26 Simple Halloween Nails Easy Designs for a Spooky Season
Halloween is the perfect time to get creative with your manicure, and you don’t need to be a professional nail artist to achieve stunning results. Whether you’re heading to a costume party, trick-or-treating with the kids, or simply want to embrace the spooky season, these 26 simple Halloween nail designs will have your fingertips looking festive without requiring hours of intricate work. From classic orange and black combinations to ghostly apparitions and creepy crawlies, there’s something here for every skill level and style preference.
Table of Contents
1. Classic Orange and Black Stripes
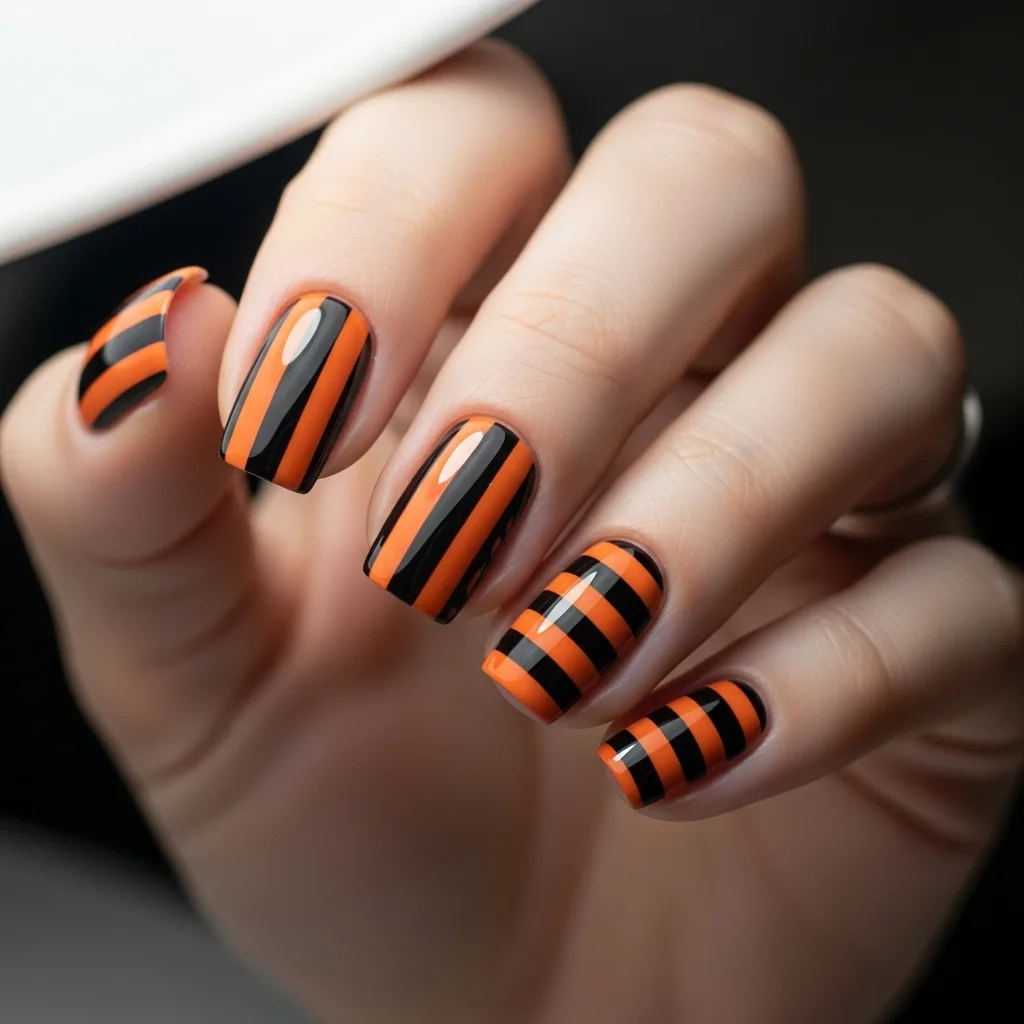
Start with a timeless Halloween combination that never goes out of style. Paint alternating nails in solid orange and black, or create thin vertical or horizontal stripes on each nail. For perfectly straight lines, use striping tape as a guide. Apply your base color, let it dry completely, place the tape where you want your line, paint over it with the contrasting color, and carefully remove the tape while the polish is still slightly wet. This technique ensures crisp, clean lines every time.
2. Matte Black with Glossy Spider Webs
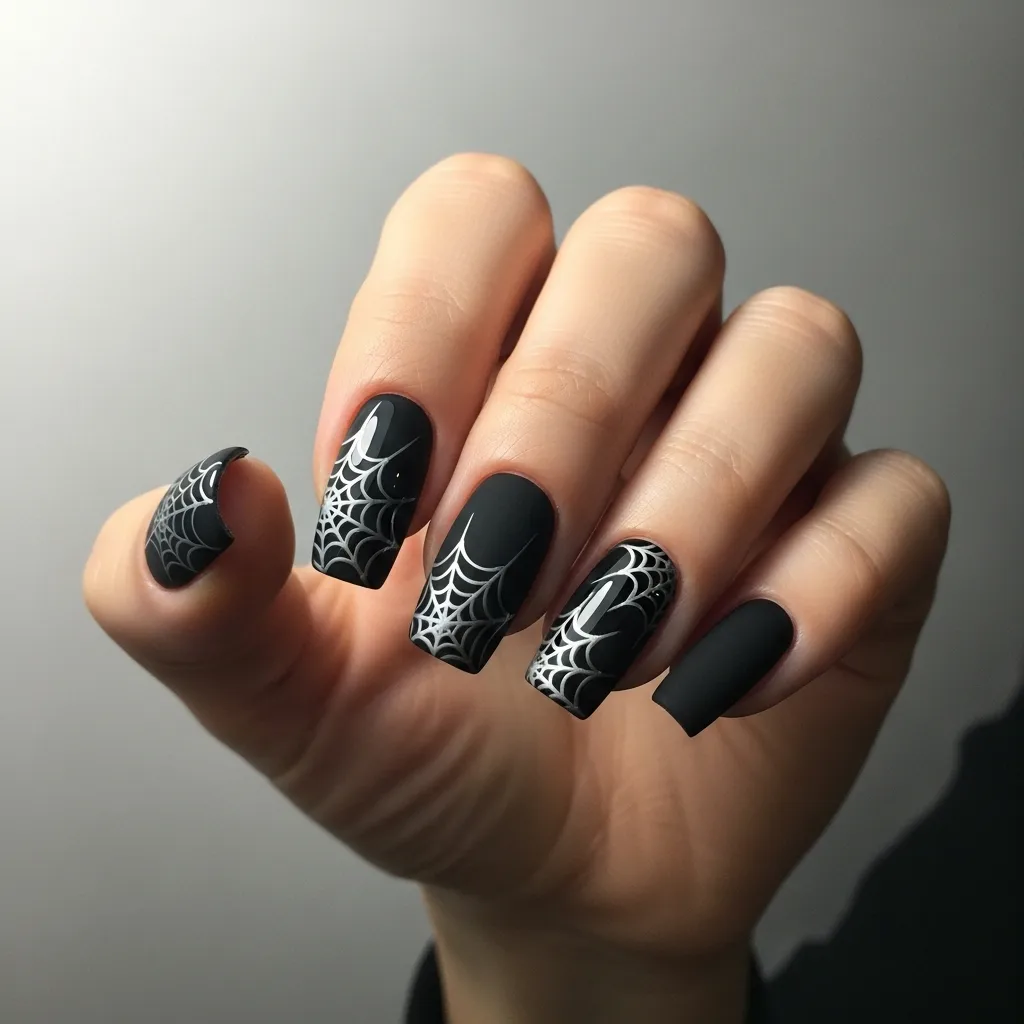
Create a sophisticated Halloween look by painting all your nails with matte black polish. Once dry, use a thin nail art brush or a toothpick dipped in glossy top coat to draw delicate spider web designs in the corners of each nail. The contrast between matte and glossy finishes adds dimension and interest without requiring multiple colors. Start from one corner and draw curved lines outward, then connect them with shorter perpendicular lines to create the web effect.
3. Candy Corn Gradient
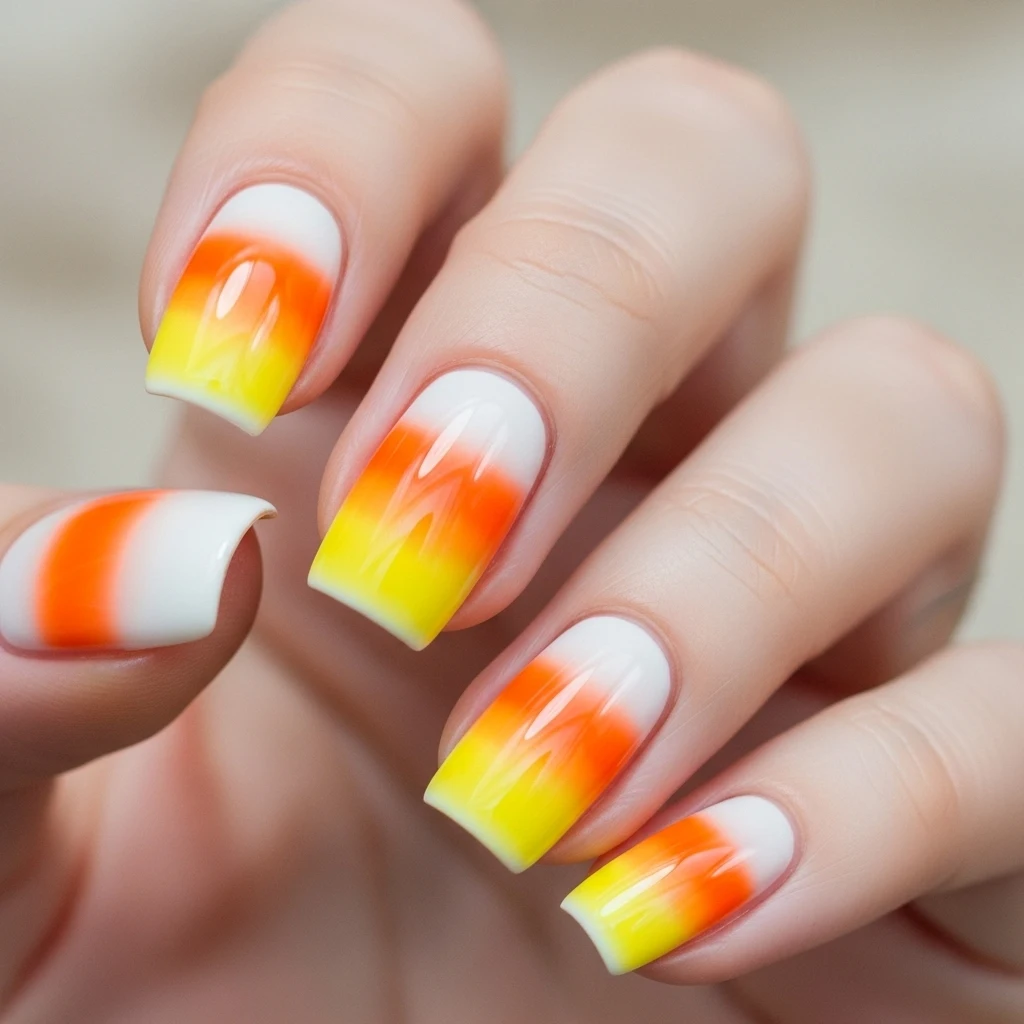
Recreate everyone’s favorite (or most debated) Halloween candy on your nails with a simple three-color gradient. Paint the tip of your nail white, the middle section orange, and the base yellow. Use a makeup sponge to blend where the colors meet for a seamless transition. Dab the sponge gently rather than swiping to avoid streaking. Finish with a glossy top coat to smooth out any texture from the sponge application.
4. Minimalist Ghost Accent Nails
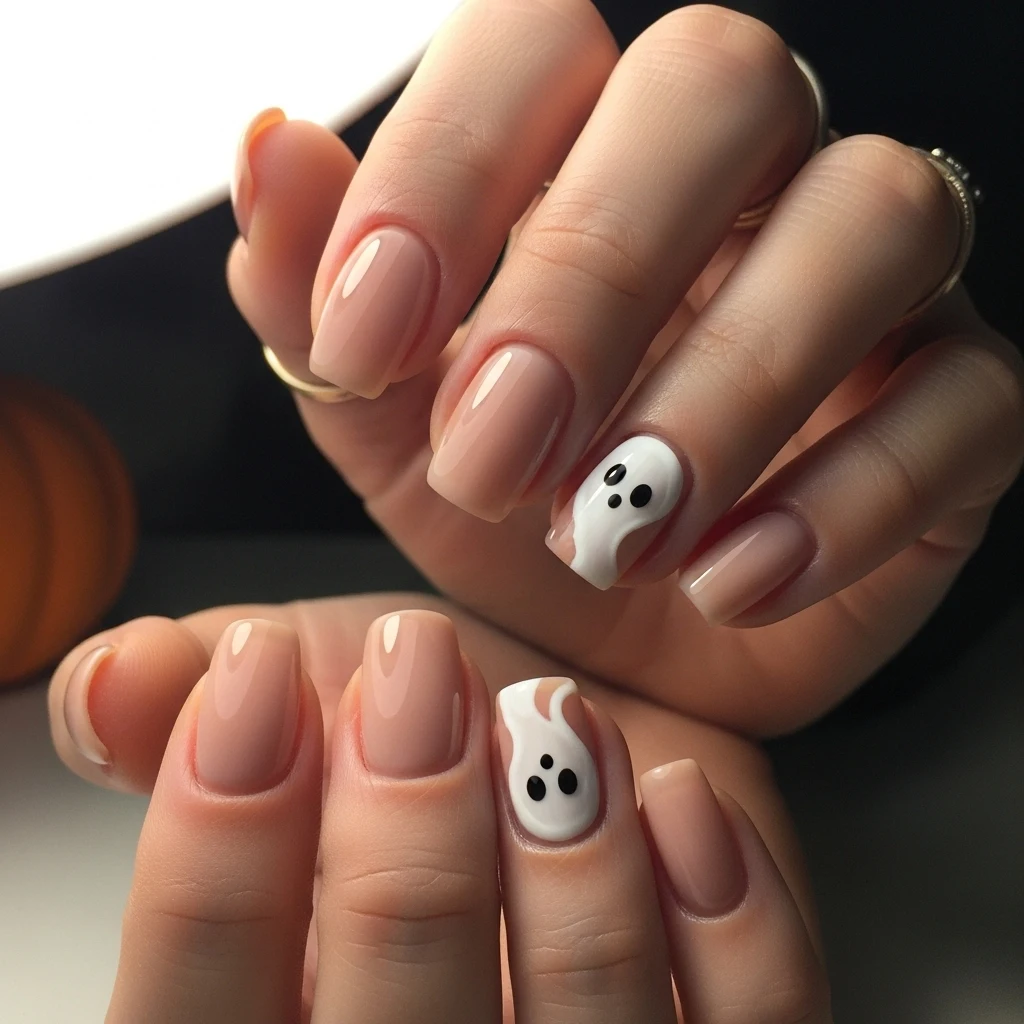
Keep most of your nails in a neutral nude or soft gray shade, then add simple ghost designs to one or two accent nails. Use white polish to create small oval shapes for ghost bodies, and once dry, add two tiny black dots for eyes using a dotting tool or the tip of a bobby pin. These adorable ghosts are quick to create and add just the right amount of Halloween spirit without being overwhelming.
5. Dripping Blood Effect
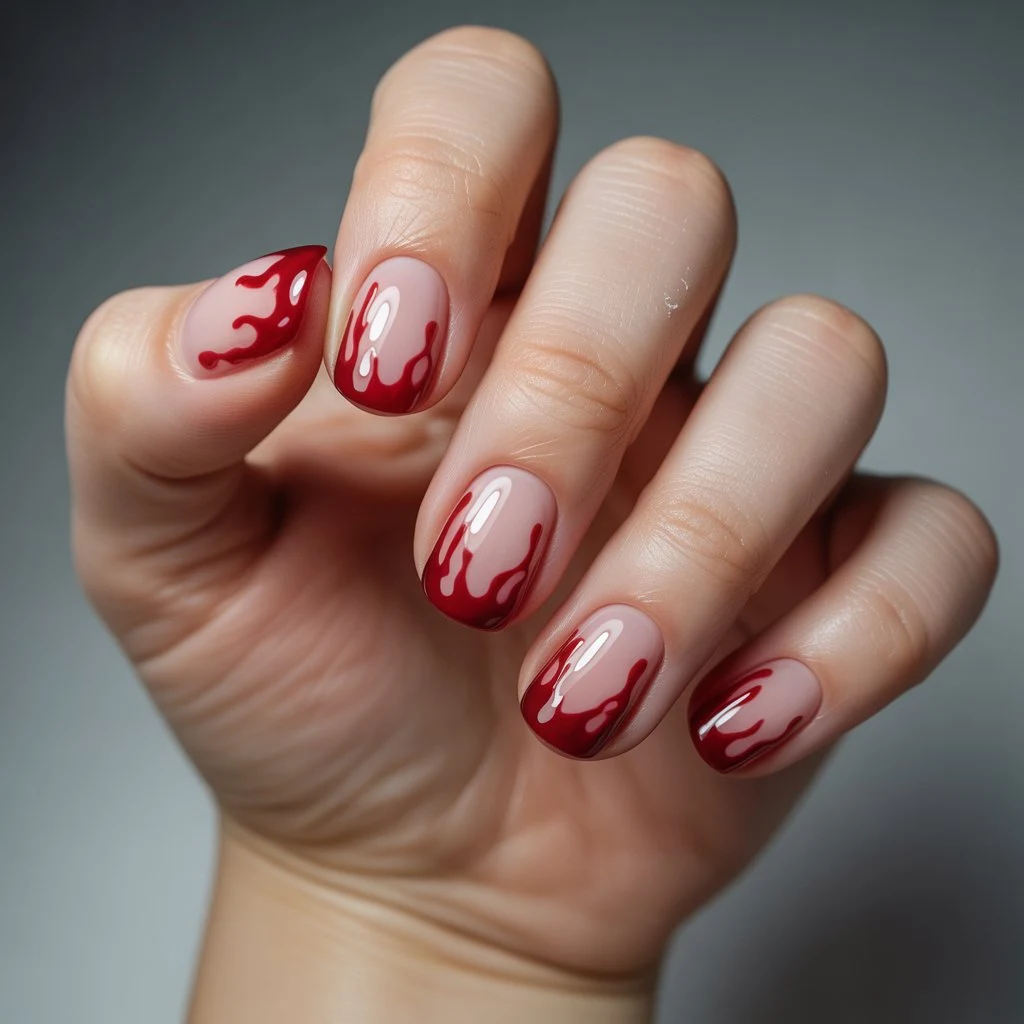
Channel your inner vampire with this dramatic yet simple design. Paint your nails with a nude or light pink base to mimic skin tone. Once completely dry, use deep red polish and a thin brush to create dripping effects from the tip of each nail, letting the “blood” drip down in uneven streams. Vary the length and thickness of each drip for a more realistic effect. This design is perfect for horror movie fans and surprisingly easy to execute.
6. Pumpkin French Tips
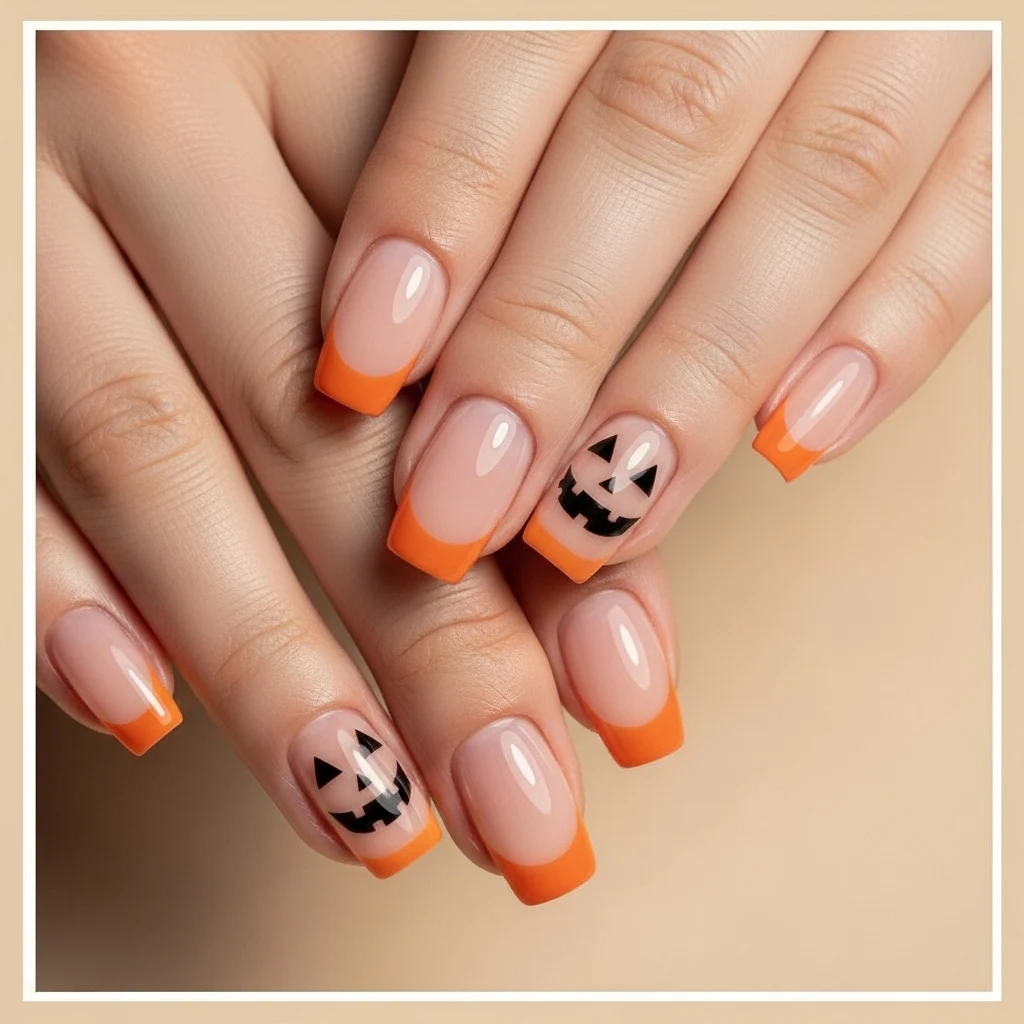
Give the classic French manicure a Halloween twist by replacing the traditional white tips with bright orange. Paint the tips of your nails in pumpkin orange, then use a thin brush to add a small green stem and a black jack-o’-lantern face on one or two accent nails. This design is festive enough for Halloween parties but subtle enough to wear to work or school.
7. Glitter Ombre in Halloween Colors
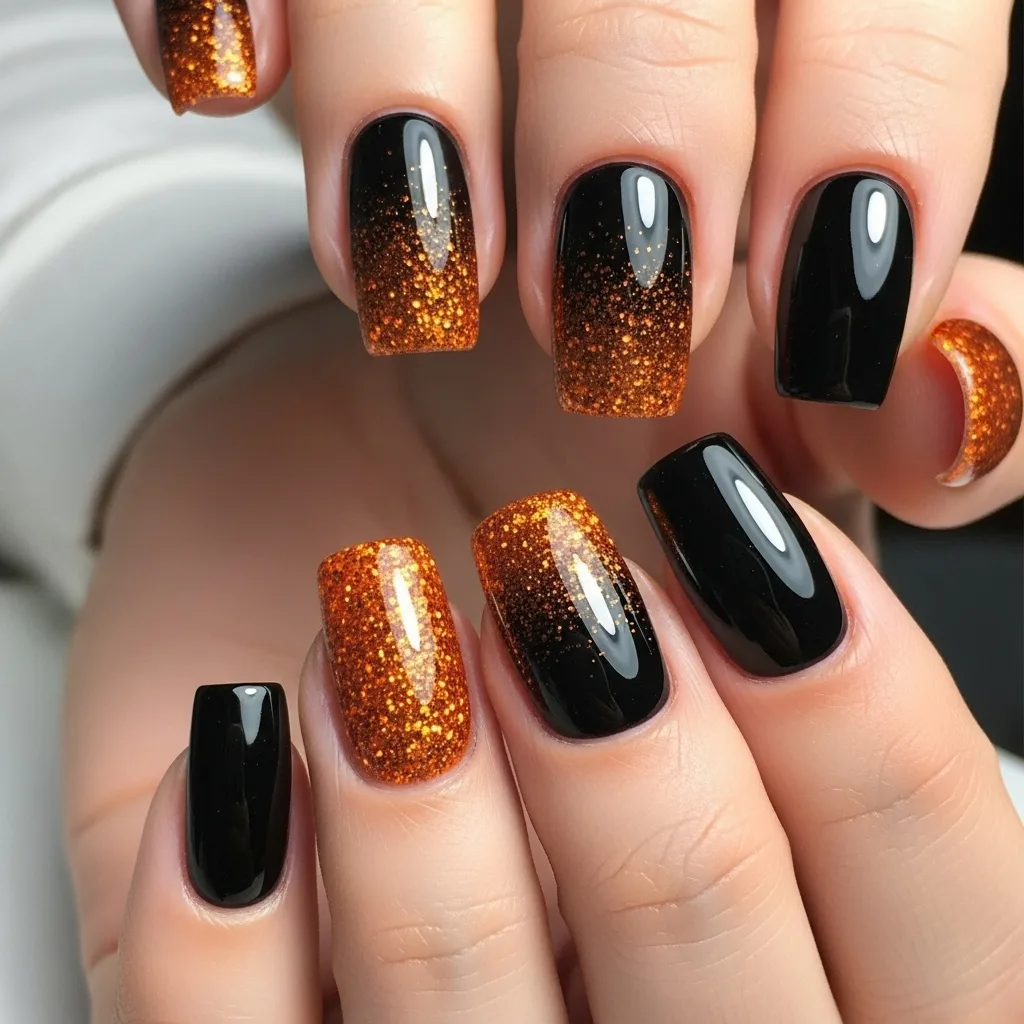
Create a sparkling gradient using Halloween-colored glitter polishes. Start with a black base coat, then use a makeup sponge to apply orange glitter polish from the tip down, concentrating the glitter more heavily at the tips and gradually fading toward the base. You can also reverse this with an orange base and black glitter. The beauty of this design is that the random nature of glitter application means perfection isn’t necessary—it looks intentionally artistic no matter what.
8. Simple Cat Silhouettes
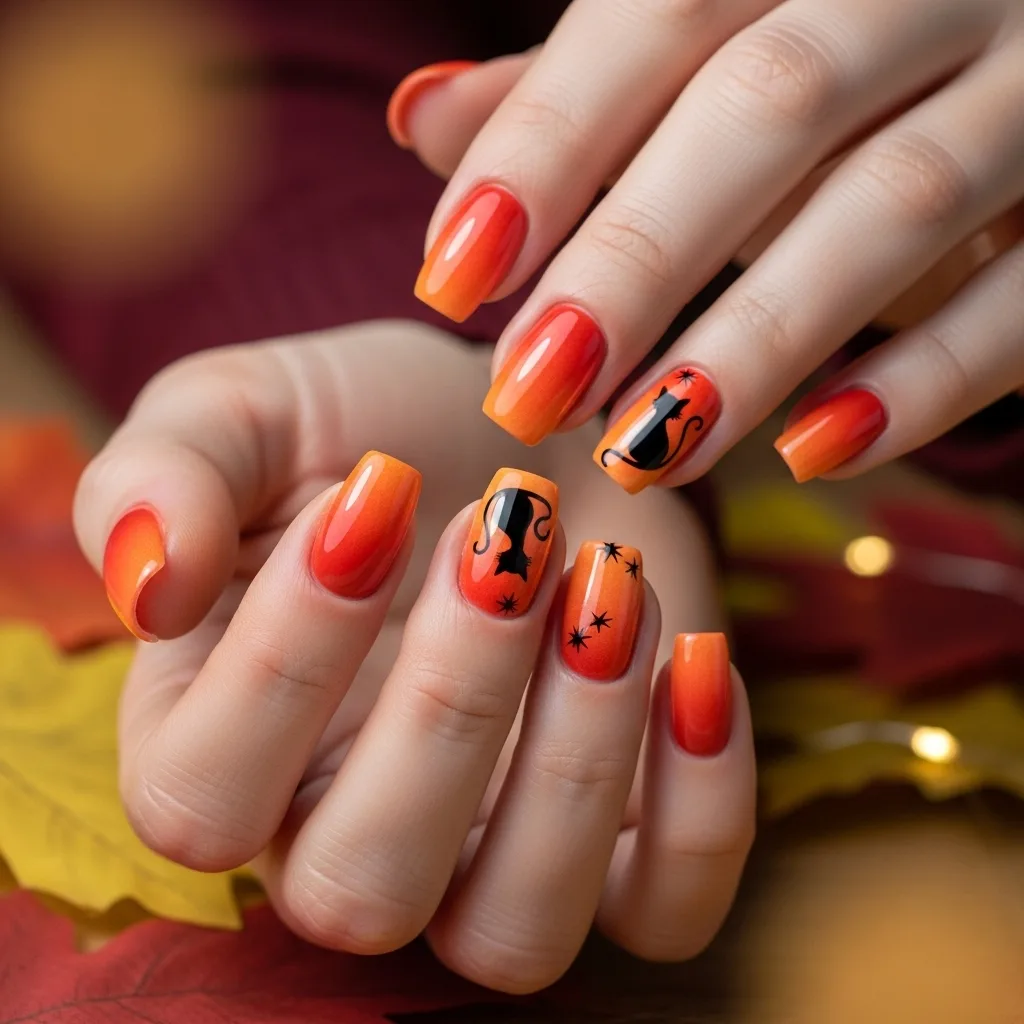
Black cat silhouettes are iconic Halloween imagery and remarkably simple to create. Paint your nails in a sunset gradient of orange, yellow, and pink, or keep it simple with a solid orange base. Once dry, use black polish and a thin brush to paint a small cat silhouette on one or two accent nails. Focus on a simple profile view—a curved back, pointed ears, and a curled tail. You don’t need to add facial features for the silhouette to be recognizable.
9. Mummy Wrap Nails

Transform your nails into adorable mummies with white polish and strategic placement. Paint all nails white, then use a thin brush to add irregular horizontal lines in a slightly darker shade of white or gray to create the bandage wrap effect. Leave a small gap in the middle where you’ll add two small black or blue dots for eyes. This design is forgiving because mummy wraps are naturally imperfect and irregular.
10. Neon Green Glow
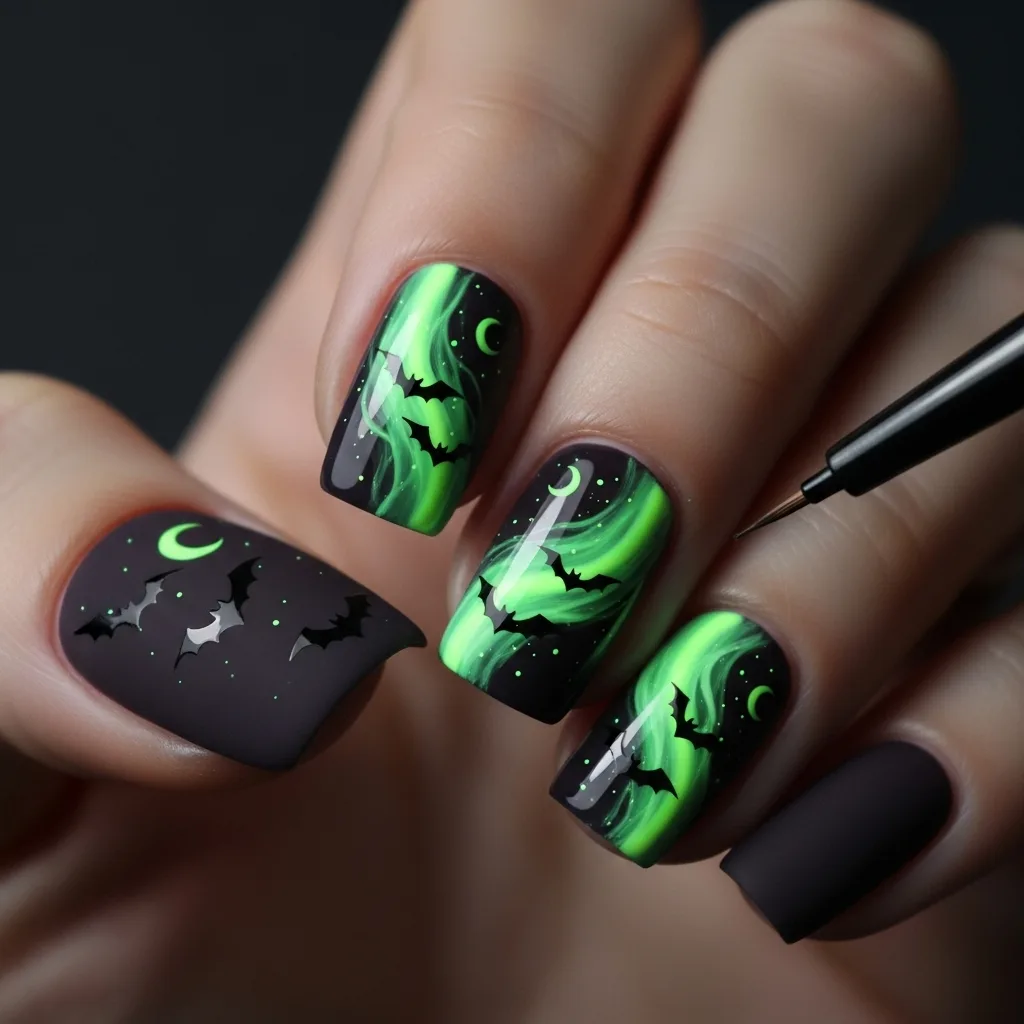
Embrace the toxic, radioactive aesthetic with vibrant neon green polish. Apply two coats for full opacity, then add black accents like tiny bats, crescent moons, or drips. The contrast between bright neon and deep black is striking and very Halloween-appropriate. For an extra glow effect, choose a neon polish that’s labeled as UV reactive—it will actually glow under black lights at Halloween parties.
11. Spider Accent Nails
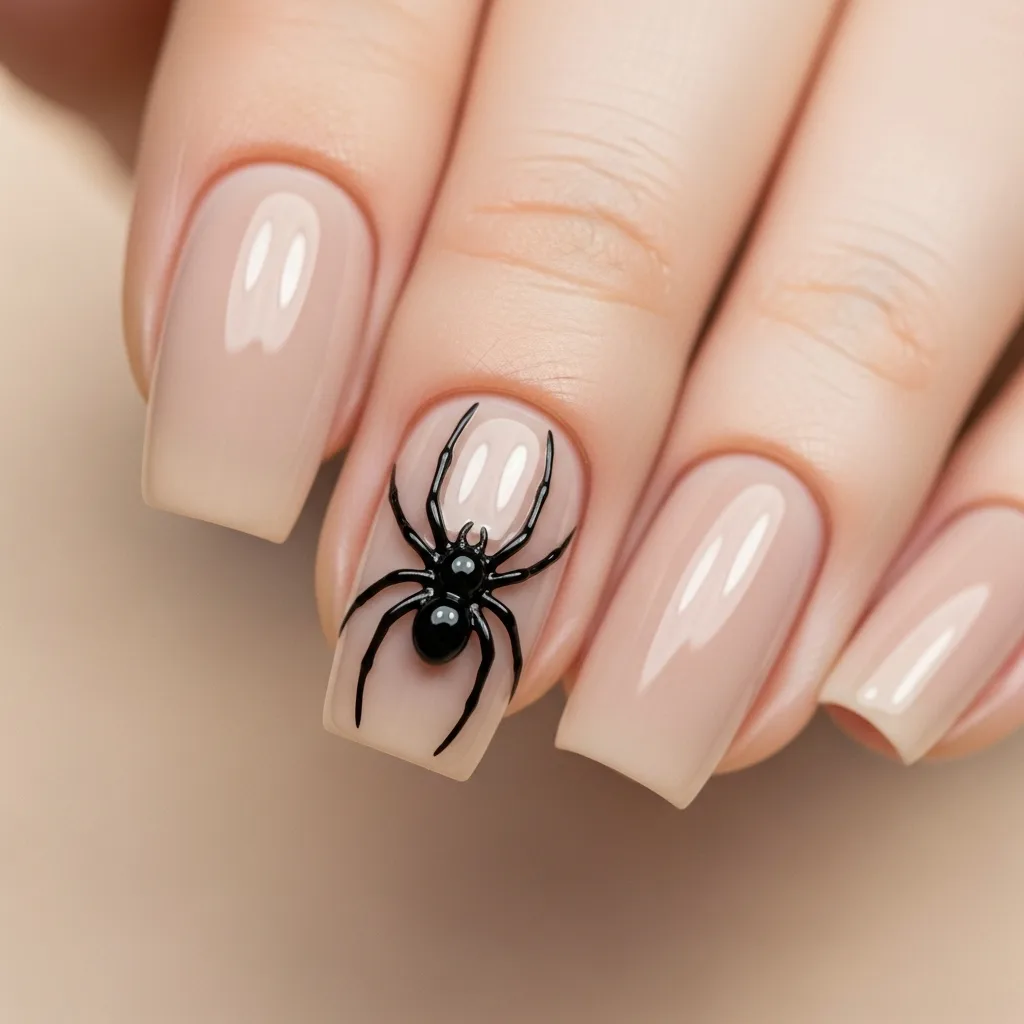
Keep your manicure simple with neutral or dark-colored nails, then add a single spider to one accent nail per hand. Use a dotting tool to create a black dot for the body, then use a thin brush or toothpick to draw eight thin legs extending outward. You can make your spiders realistic or cartoonish depending on your preference. For added dimension, apply a small rhinestone or sequin as the spider’s body.
12. Purple and Green Witch Aesthetic
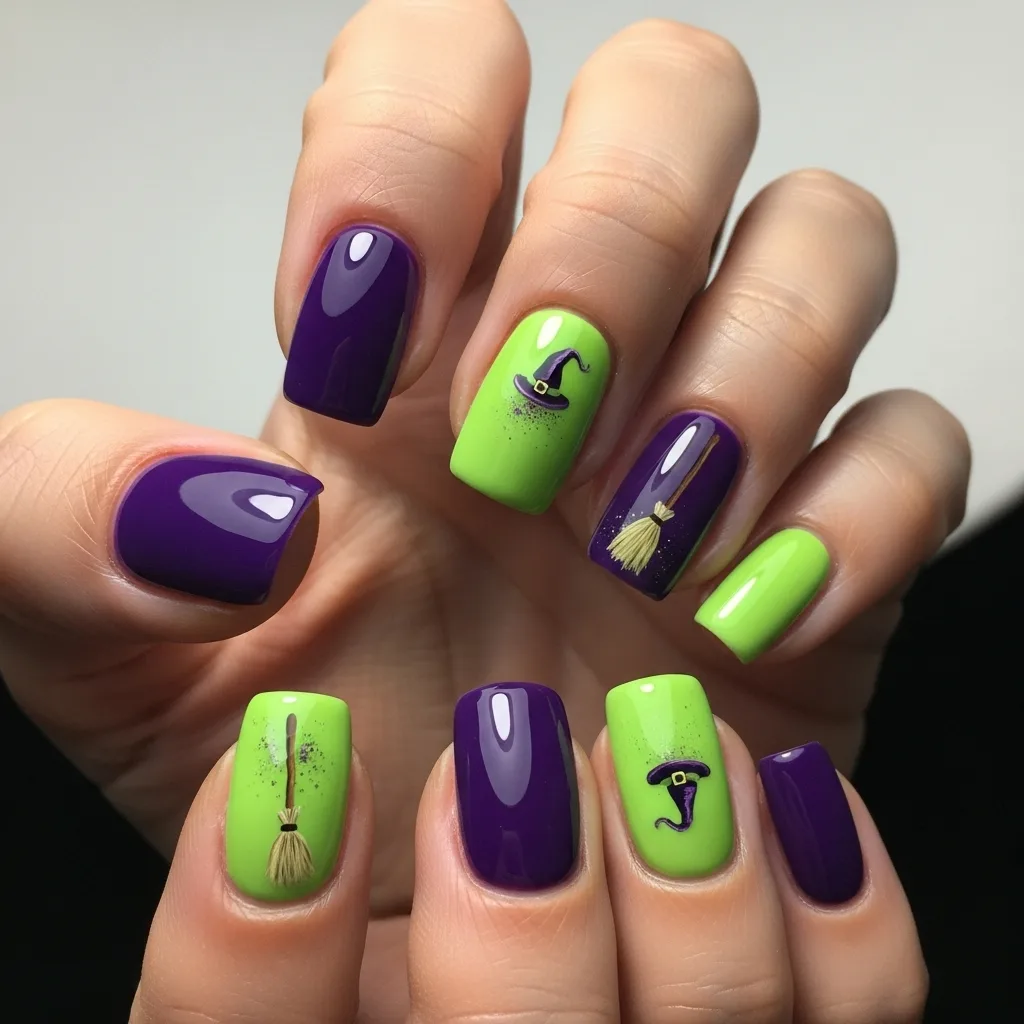
Combine deep purple and lime green for a witchy color combination. Paint alternating nails in each color, or use purple as your base with green accents. Add simple designs like black witch hats, cauldrons, or broomsticks on accent nails. These two colors complement each other beautifully and instantly evoke Halloween magic without needing complex designs.
13. Skeleton Hand Bones
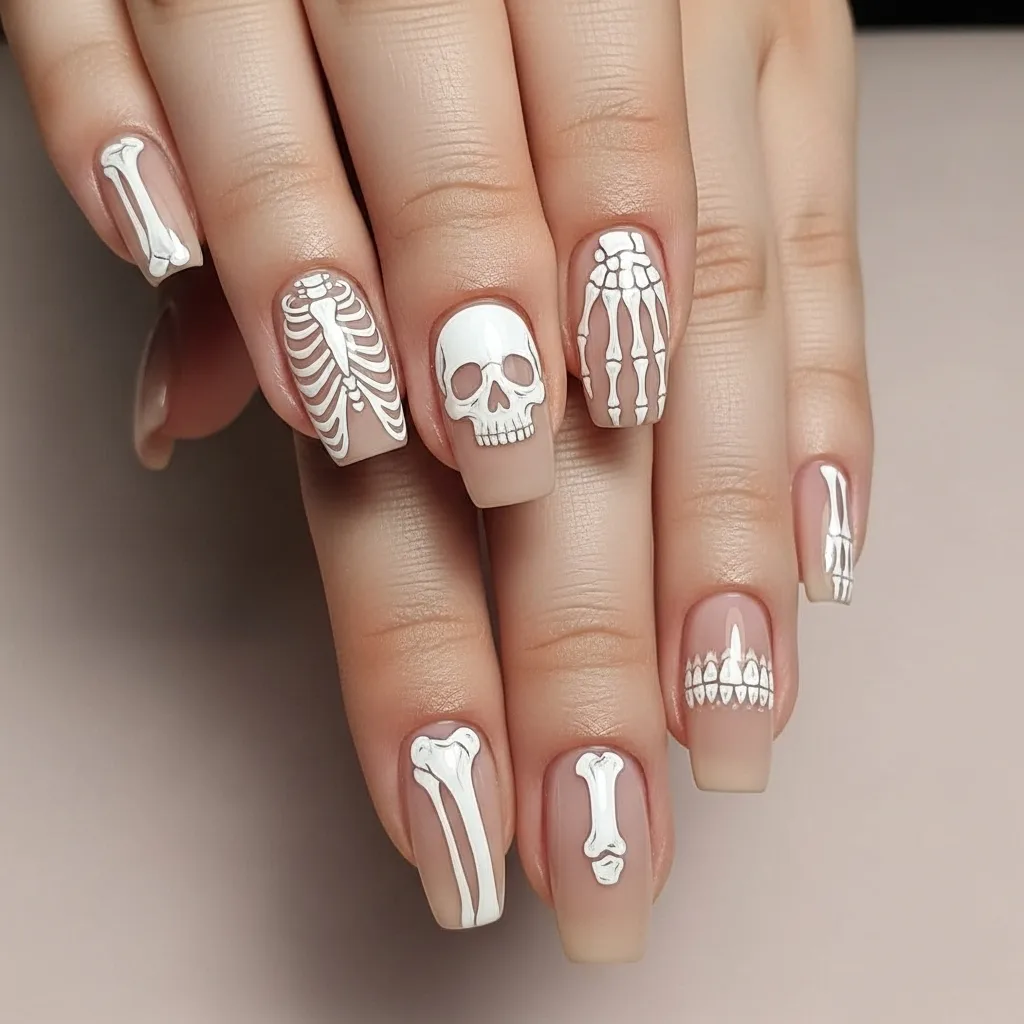
Create X-ray style skeleton nails by painting your base a nude or pale pink shade, then using white polish to draw simplified bone structures. On each nail, draw a vertical line down the center with small horizontal lines branching off to represent finger bones and joints. This design looks complex but is actually just a series of straight lines, making it perfect for beginners.
14. Polka Dot Monsters
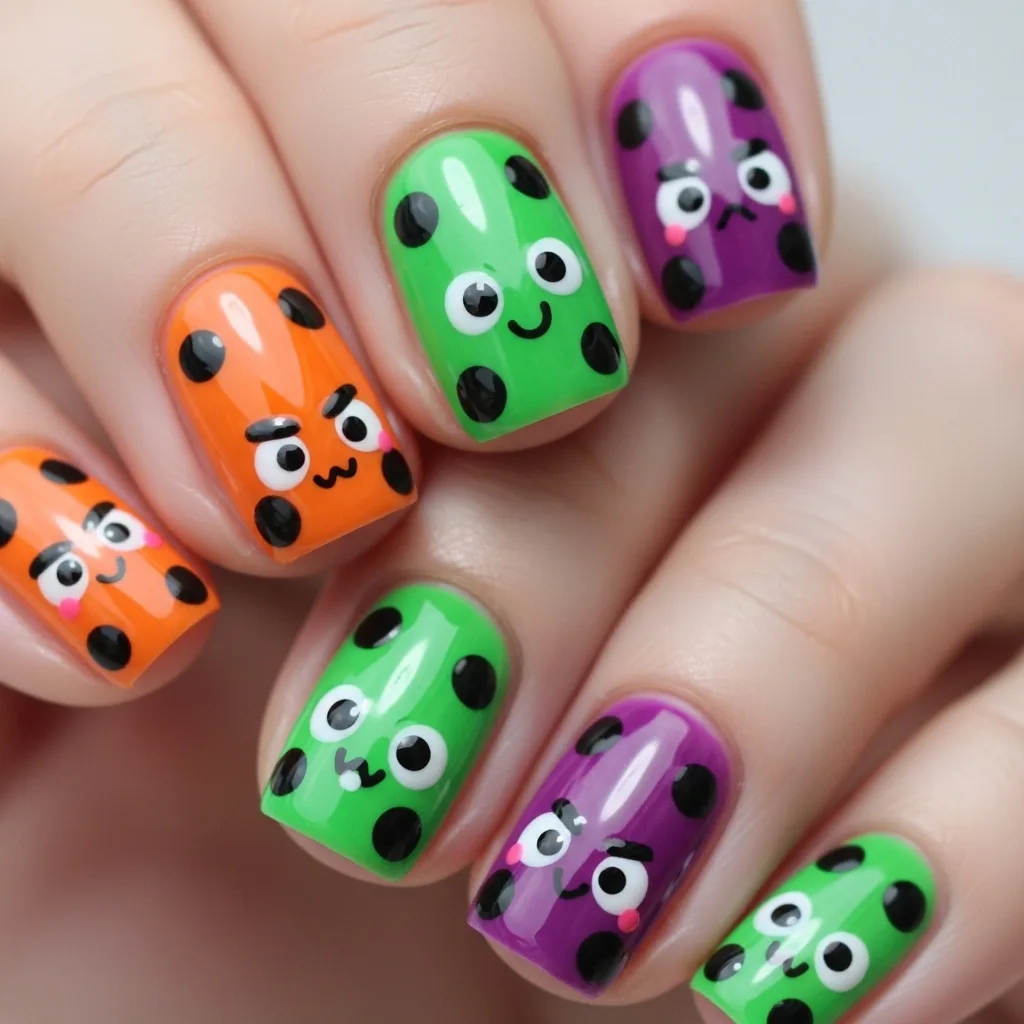
Start with a bright base color like purple, orange, or green, then use a dotting tool to add polka dots in a contrasting color. Once the dots are dry, transform some of them into tiny monster faces by adding smaller dots for eyes and small curved lines for mouths. Not every dot needs to be a monster—scatter a few throughout your nails for a playful, whimsical effect.
15. Spooky Moon Phases
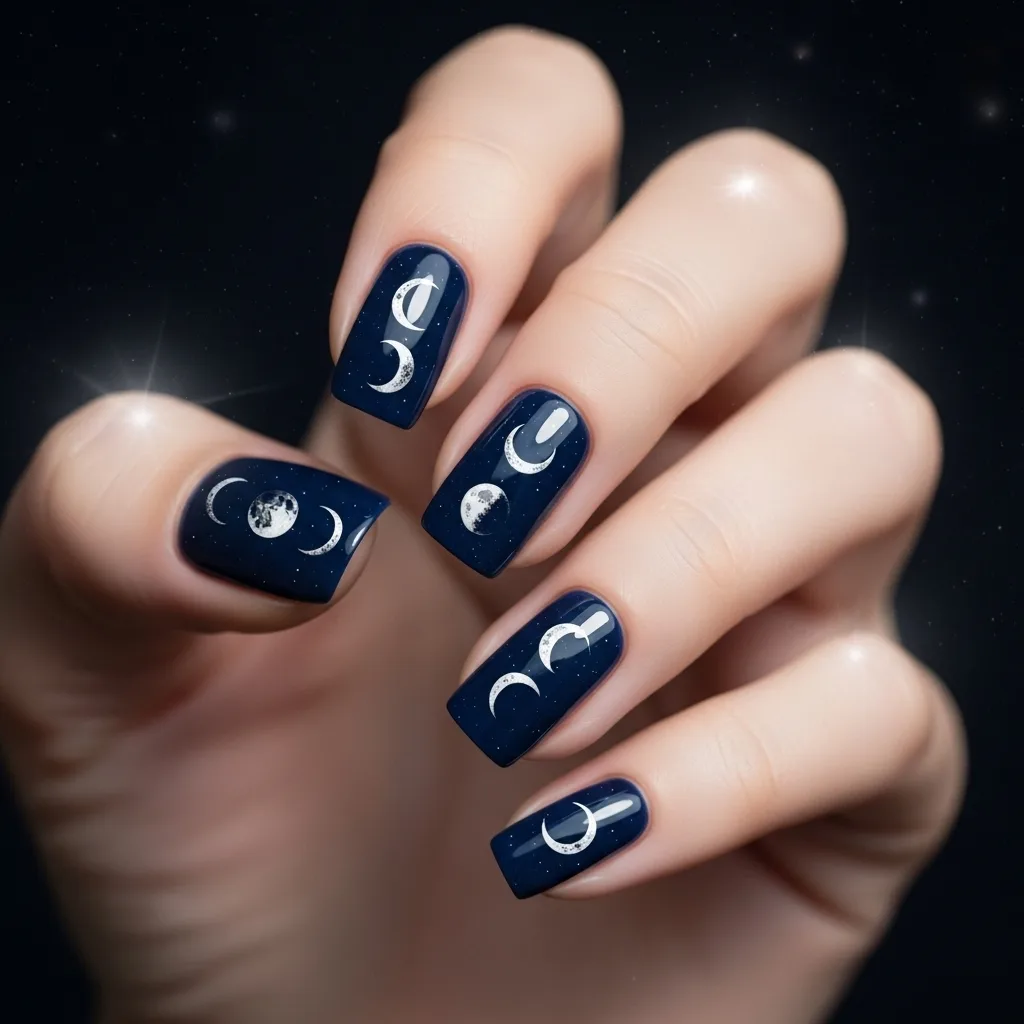
Paint your nails black or deep navy blue to represent the night sky, then use white or silver polish to create moon phases across your nails. Each nail can show a different phase, from new moon to full moon and back again. Add tiny white dots as stars for extra celestial atmosphere. This design is elegant enough to wear beyond Halloween while still capturing that mysterious, nighttime spookiness.
16. Frankenstein French Tips
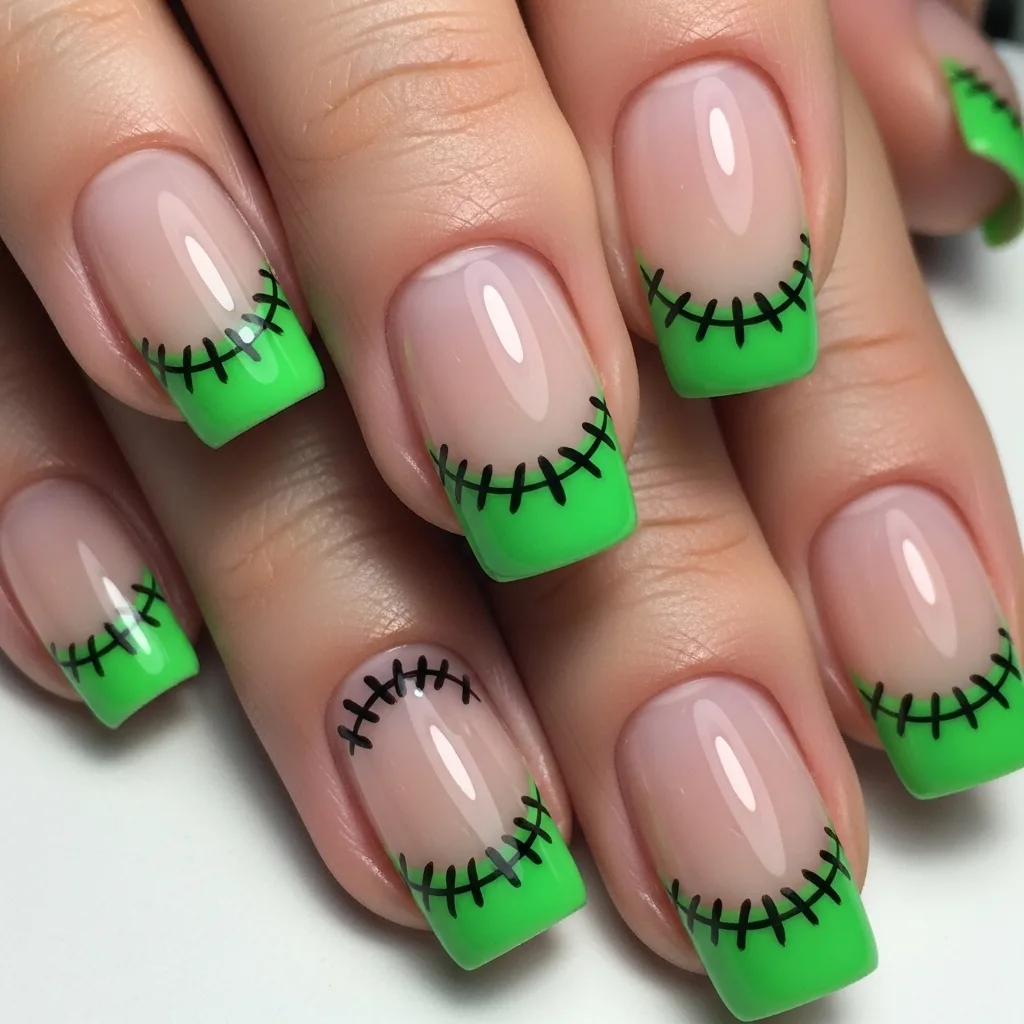
Give your French manicure a monster makeover by painting the tips in Frankenstein green. Once dry, add black stitching details along the smile line using a thin brush—just small, evenly spaced dash marks. On one or two accent nails, add simple Frankenstein faces with black squares for bolts, dots for eyes, and a line for a mouth. This design is charming, fun, and instantly recognizable.
17. Bat Wing Nails
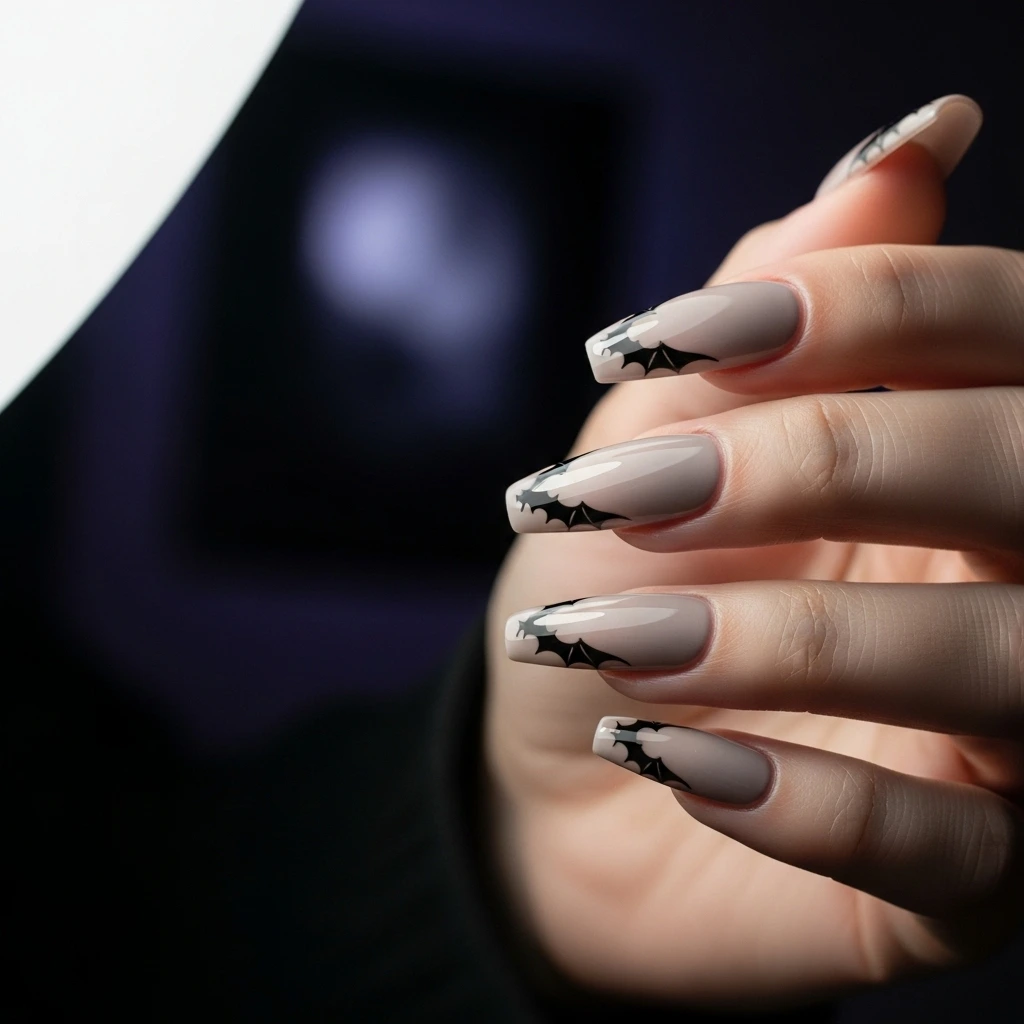
Use black polish to create simple bat wing shapes on a nude, gray, or purple base. The key is to paint triangular shapes extending from the sides of your nails inward, meeting in the middle to form a wing shape. You can paint the entire nail or create wing tips extending from the sides. Add a small dot for the bat’s body where the wings meet, and you have an elegant, gothic Halloween manicure.
18. Candy-Inspired Nails
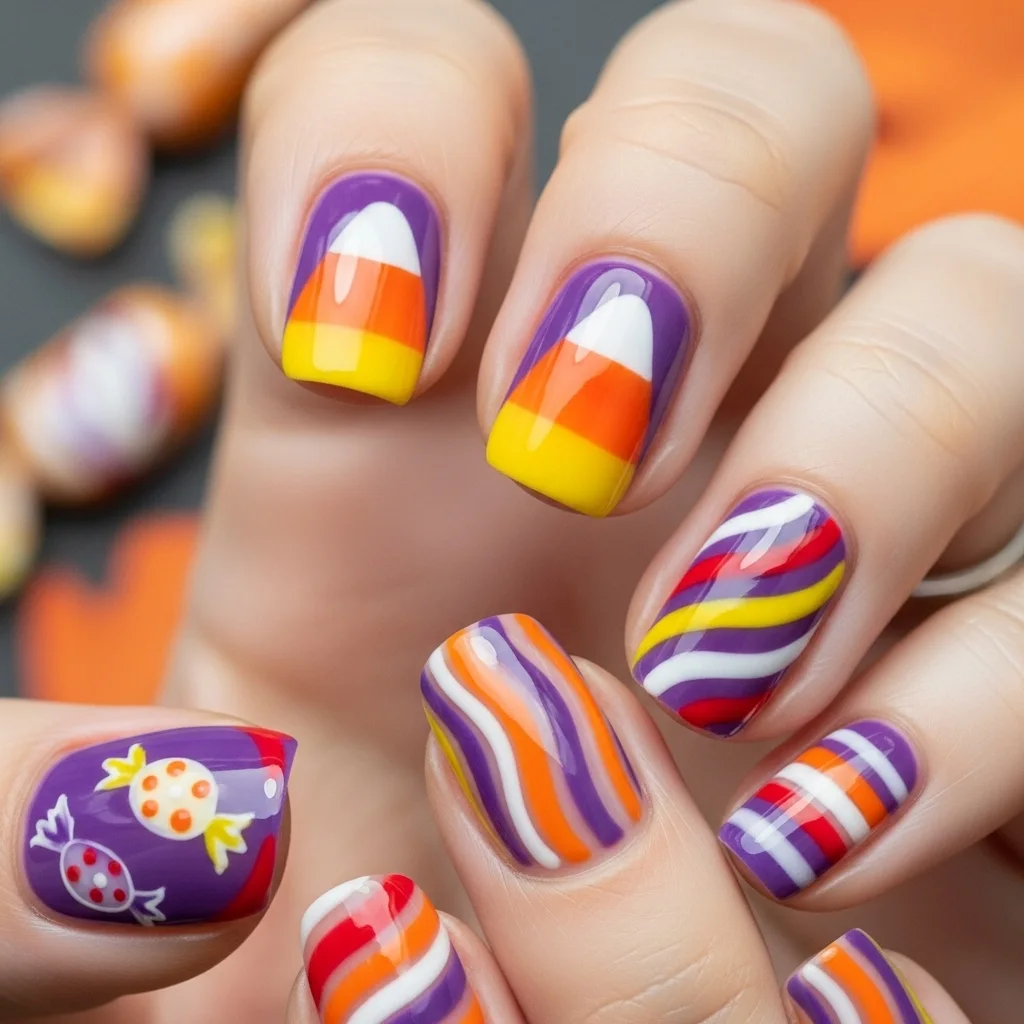
Beyond candy corn, Halloween offers plenty of sweet inspiration. Create nails inspired by different Halloween candies using their signature colors and patterns. Paint some nails in purple for chocolate bar wrappers, orange for Reese’s cups, or red and white stripes for peppermint. Add simple lettering or brand-inspired details if you’re feeling ambitious, or keep them as solid color blocks representing your favorite treats.
19. Eyeball Accent Nails
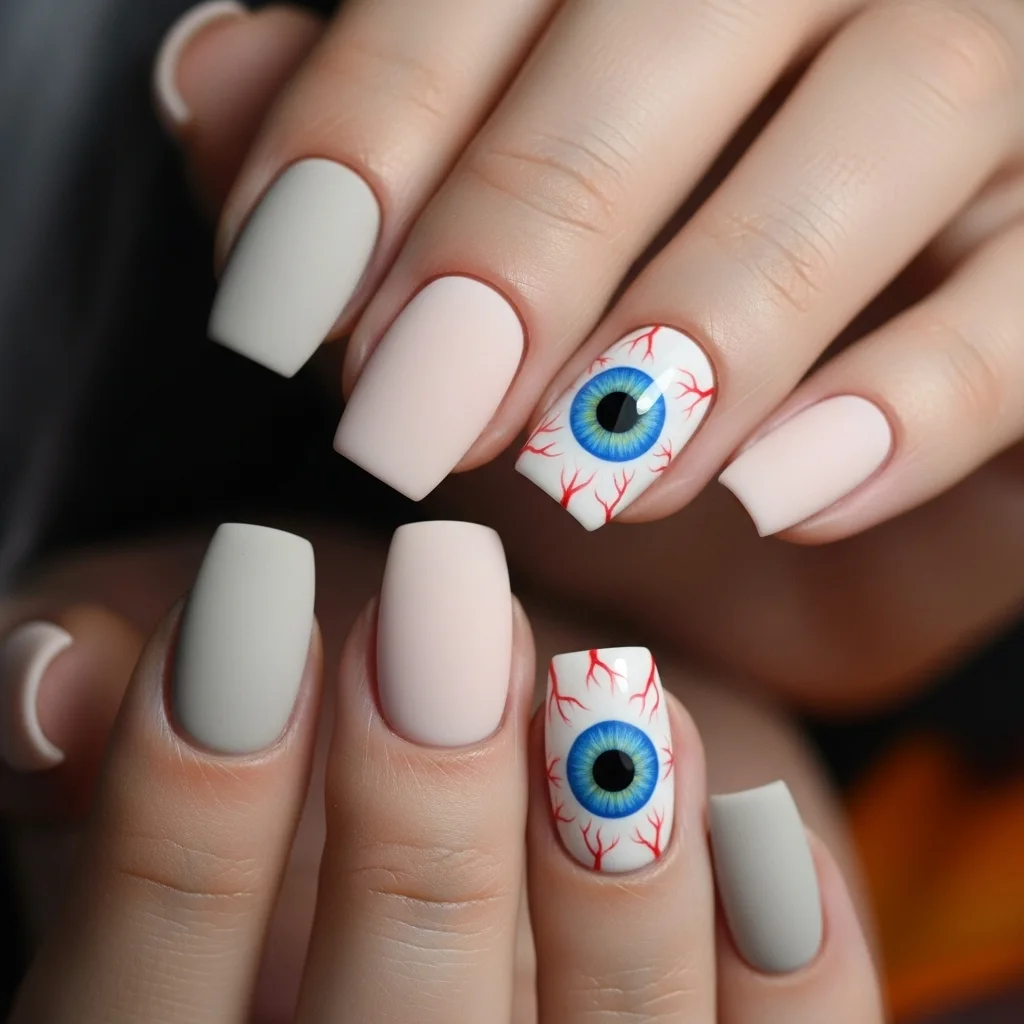
Nothing says Halloween quite like eyeballs. Paint most of your nails in a neutral or red shade, then create eyeball designs on accent nails using a white base, a colored circle for the iris (blue, green, or brown), a black dot for the pupil, and red squiggly lines for bloodshot veins. Use a thin brush or toothpick for the veins, working from the iris outward in irregular, branching patterns.
20. Stitched Together Look
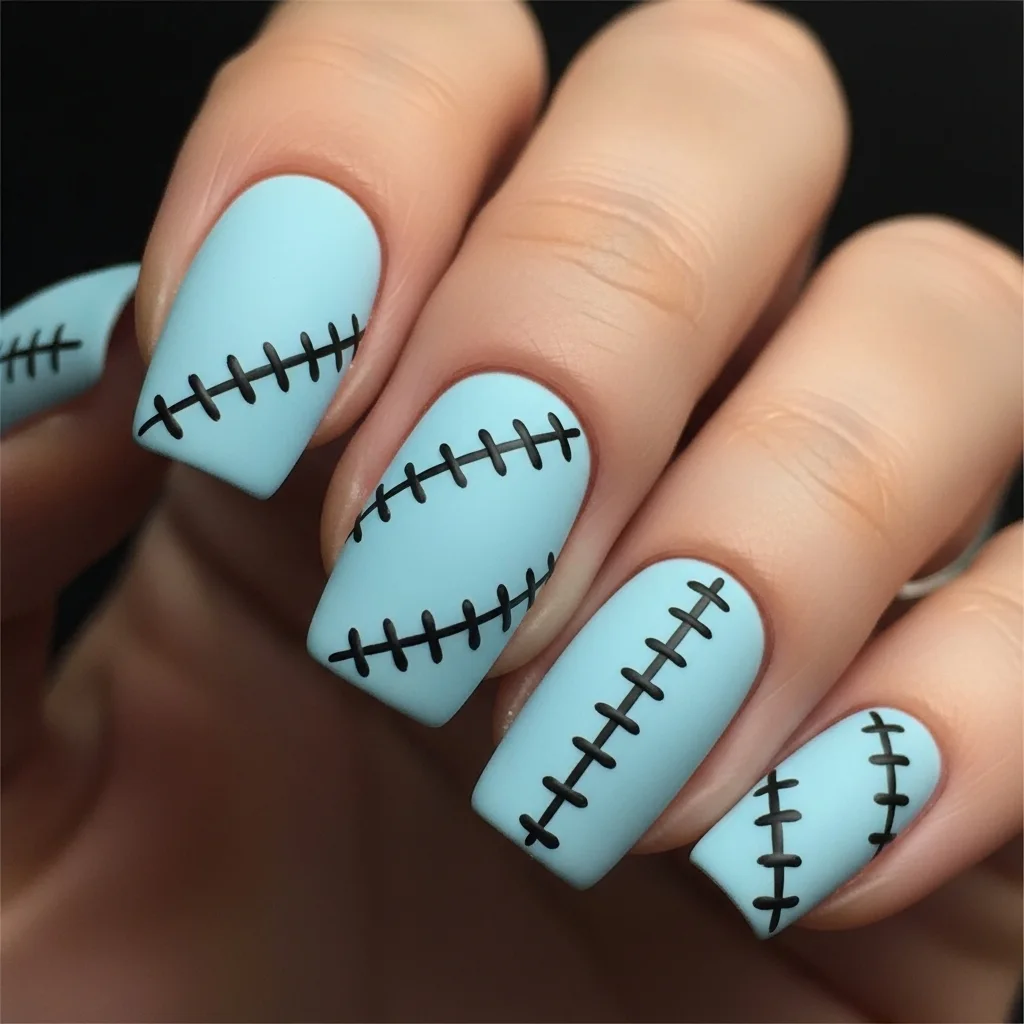
Channel Sally from “The Nightmare Before Christmas” with a stitched aesthetic. Paint your nails in pale blue, gray, or white, then use black polish and a thin brush to create cross-hatch stitching patterns. Draw a line across each nail horizontally or vertically, then add small X marks along the line to represent stitches. This design is simple, striking, and perfect for fans of stop-motion Halloween classics.
21. Poison Bottle Nails

Create tiny poison bottle designs on accent nails by painting small bottle shapes in green or purple. Add a simple skull and crossbones symbol in a contrasting color, or write “XXX” across the bottle. Keep the other nails solid in complementary colors. This design works particularly well on longer nails, where you have more space for details, but can be simplified for shorter nails by just adding the skull symbol.
22. Gradient Sunset with Black Silhouettes
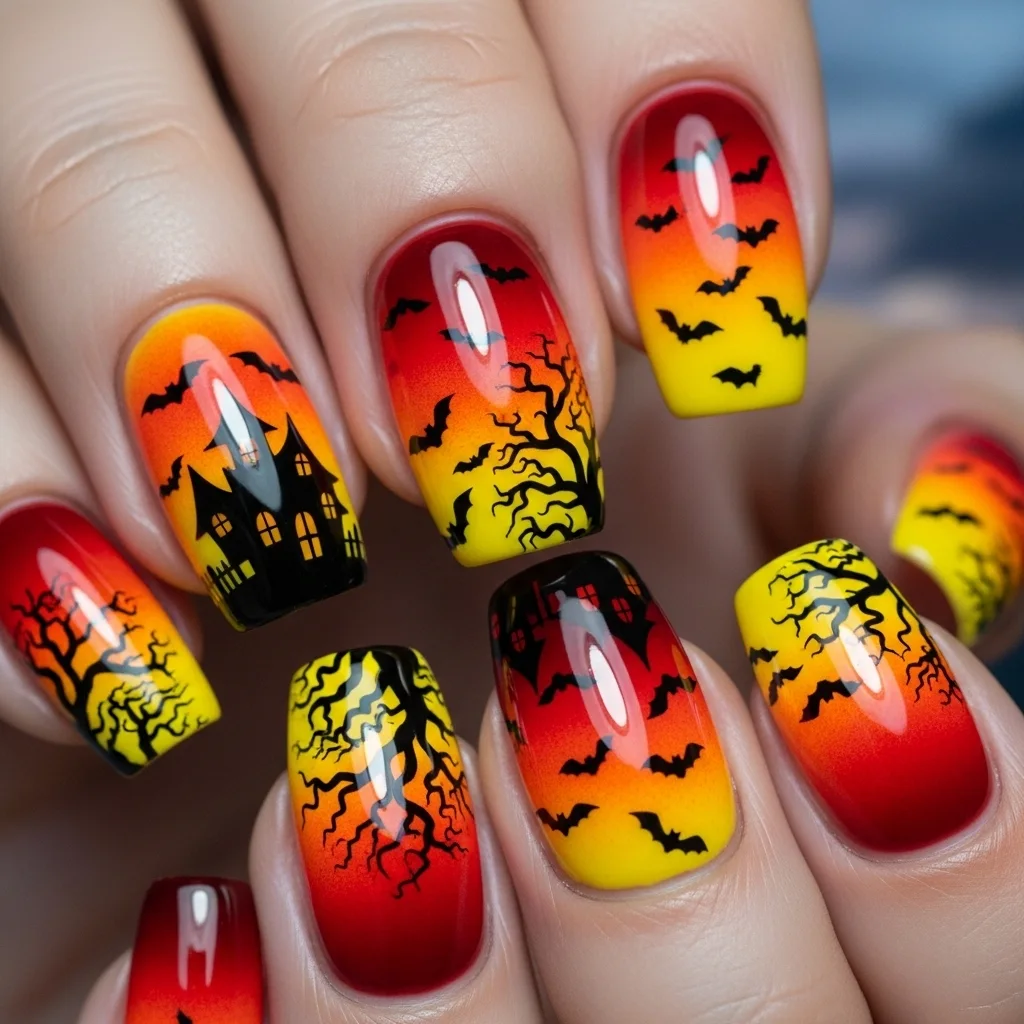
Create a warm gradient using orange, red, and yellow polishes to mimic a Halloween sunset, then add black silhouettes over the gradient once dry. These silhouettes can be anything Halloween-themed: bare tree branches, haunted house outlines, flying bats, or witch profiles. The gradient provides a beautiful backdrop that makes even simple black designs look sophisticated and artistic.
23. Glitter Pumpkin Accent

Paint most nails in a solid autumn color like burgundy, rust, or brown, then create glitter pumpkins on one or two accent nails. Use orange glitter polish to paint a rough pumpkin shape, add a small green rectangle for the stem, and use a toothpick to draw vertical lines through the glitter to create pumpkin segments. The sparkle of glitter polish is forgiving and hides any imperfections in your pumpkin shape.
24. Cobweb French Tips
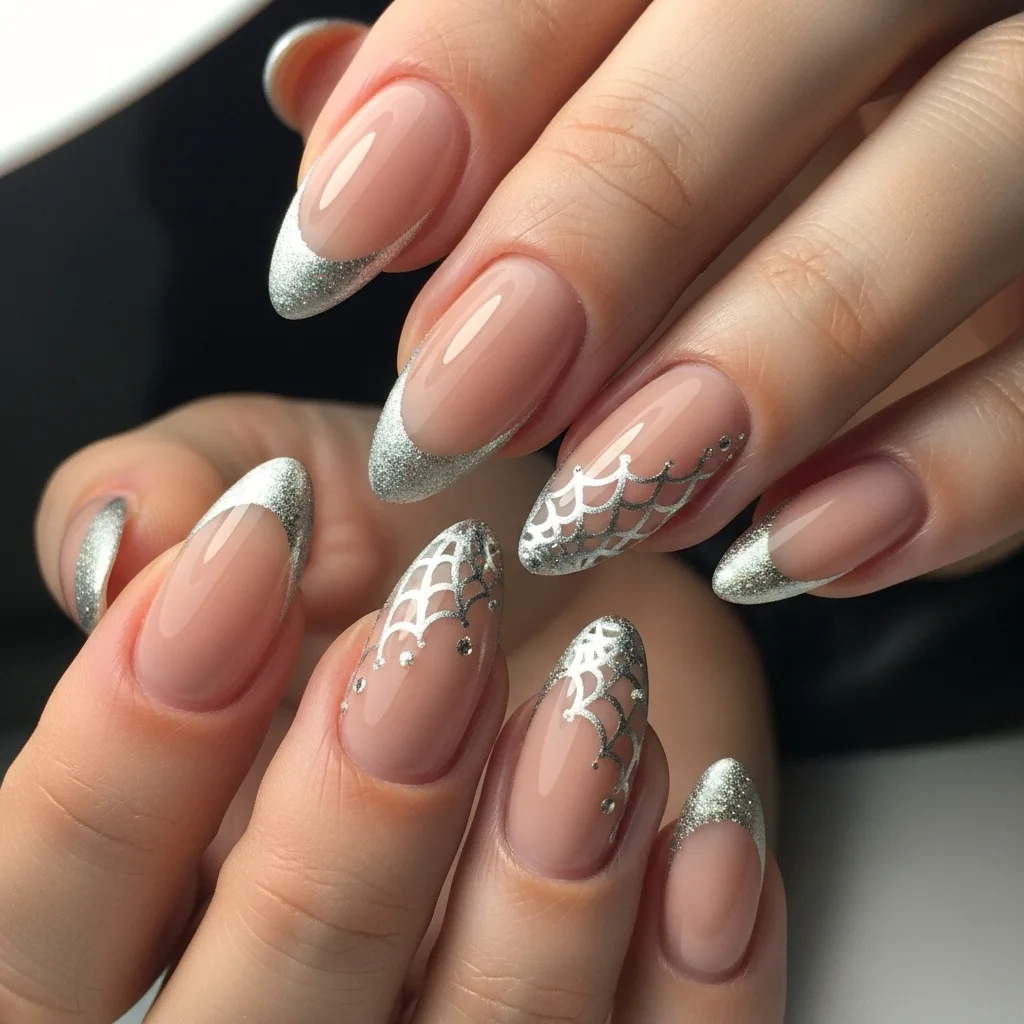
Instead of a solid color French tip, create delicate cobwebs at the tips of your nails. Start with a nude or pale pink base, then use white or silver polish with a thin brush to draw connected web patterns across the tips. Start from the corners and work inward, creating curved lines that connect in the center. This design is understated enough for professional settings while still being festive.
25. Haunted House Accent
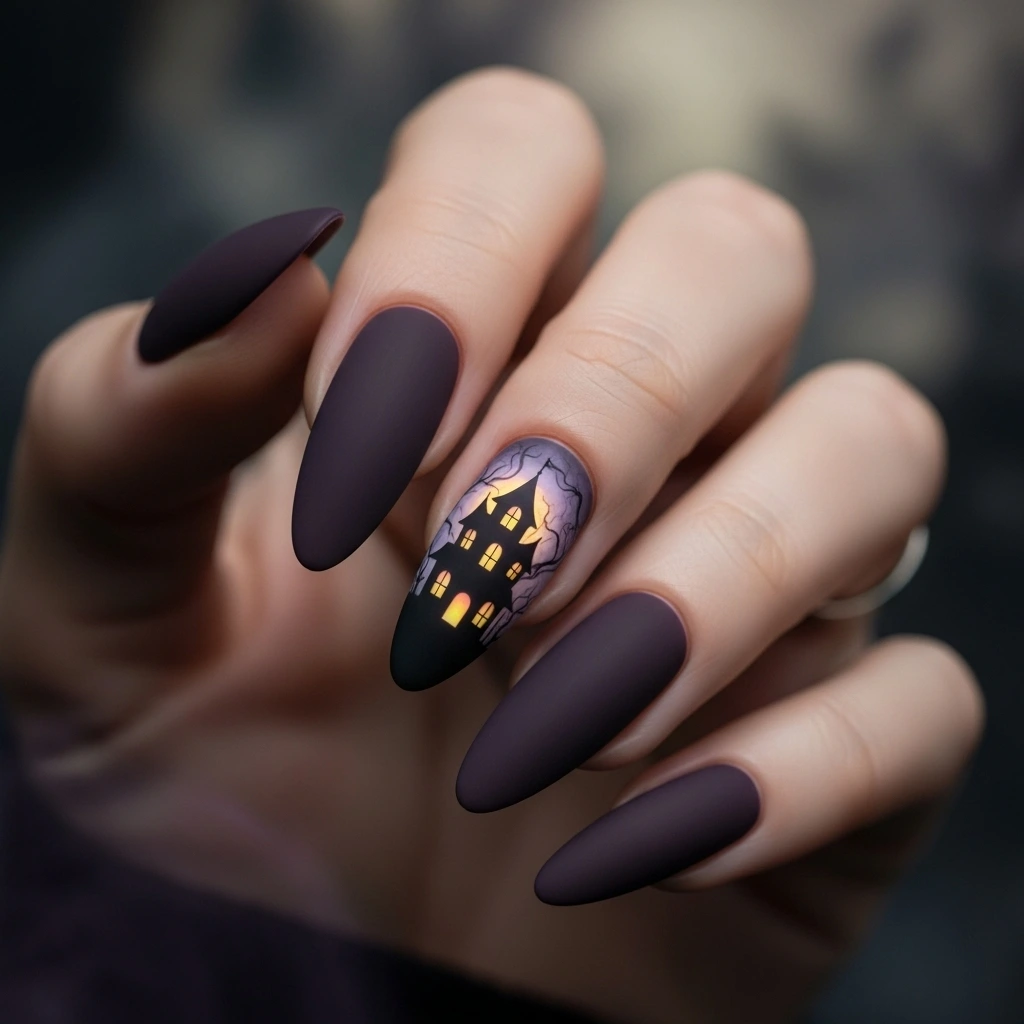
Paint your nails in a deep purple or midnight blue base, then create a simple haunted house silhouette on one accent nail. The house doesn’t need to be detailed—just a black rectangular shape with a peaked roof, a few lit windows in yellow or orange, and perhaps a crooked fence in front. This single accent nail tells a story while keeping the overall look wearable.
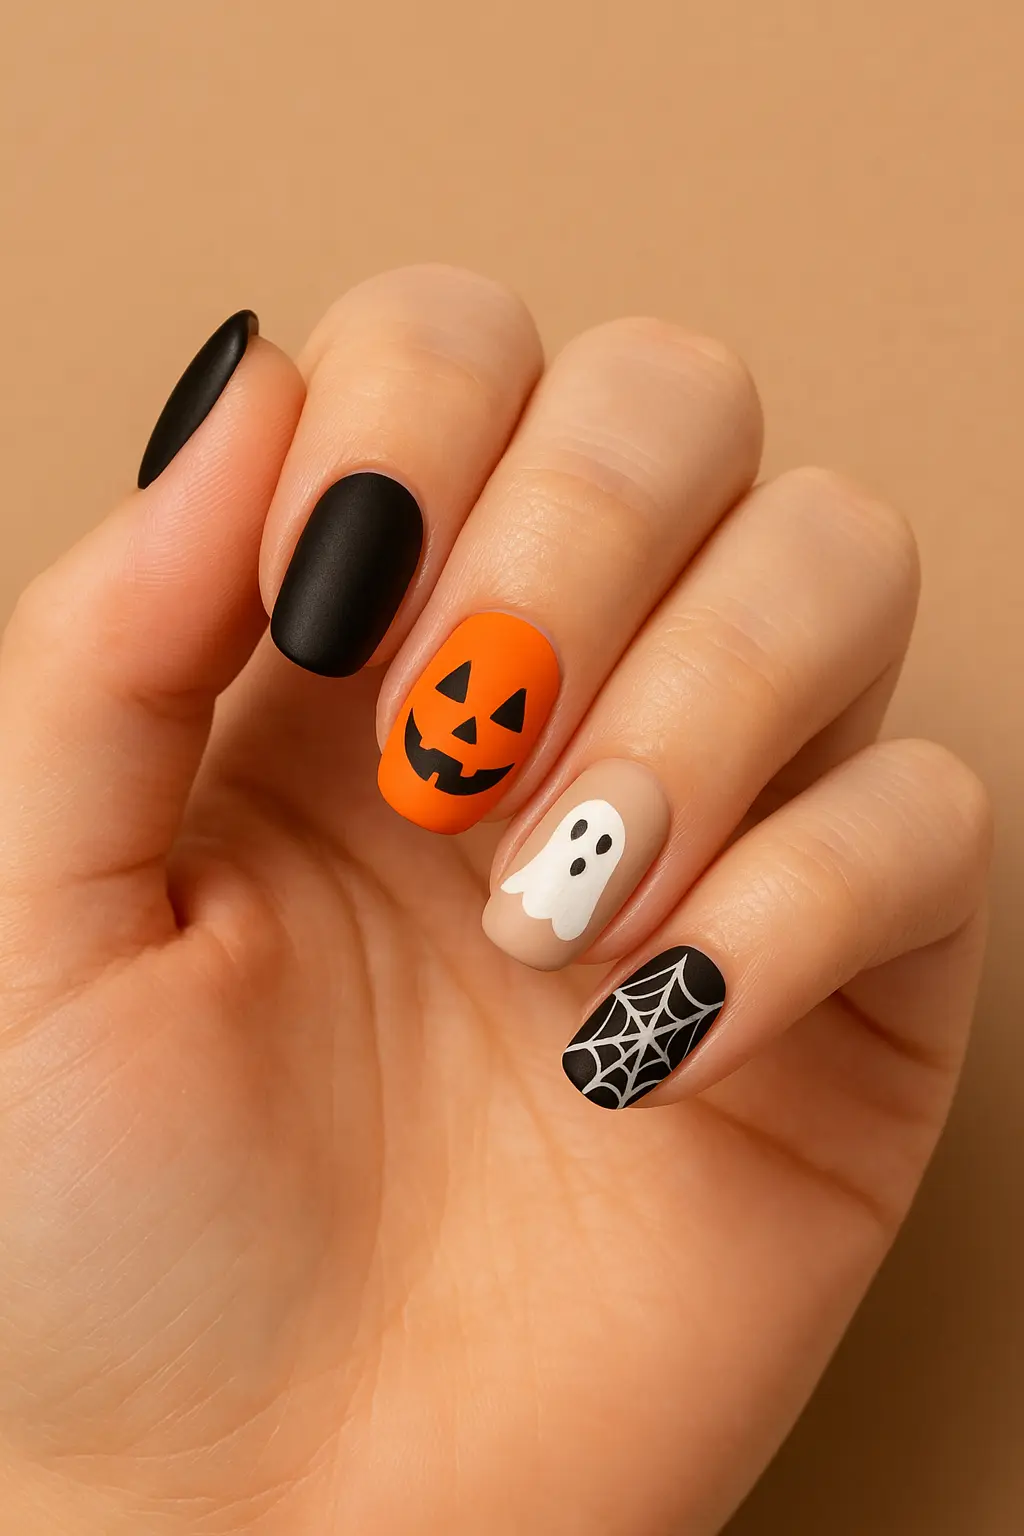
26. Mismatched Halloween Icons
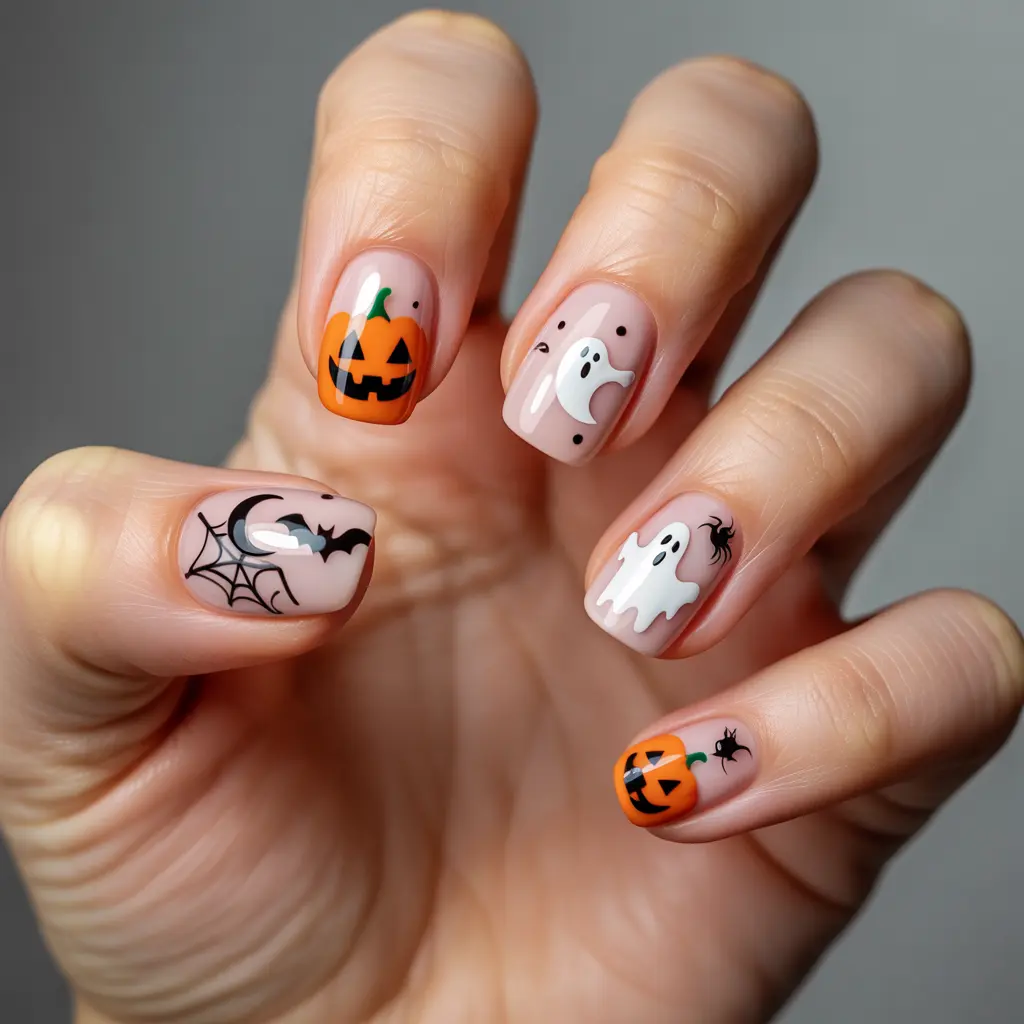
Embrace variety by painting each nail with a different simple Halloween icon. One nail gets a ghost, another a pumpkin, another a witch hat, and so on. This mismatched approach is trendy and means you don’t have to perfect the same design repeatedly. Plus, if one nail doesn’t turn out perfectly, it’s supposed to look different from the others anyway. This design celebrates creativity and individuality while covering all your favorite Halloween symbols.
Tips for Success
Achieving professional-looking Halloween nails at home requires a few key techniques. Always start with clean, shaped nails and apply a base coat to protect your natural nails and help polish adhere better. Work in thin layers rather than thick coats—two thin coats always look better than one thick, gloopy application. Allow each layer to dry completely before adding details or another coat.
Invest in a few basic tools that make nail art much easier: a thin nail art brush, a dotting tool (or use bobby pins as an alternative), striping tape for clean lines, and a cleanup brush dipped in nail polish remover for fixing mistakes around your cuticles. These inexpensive tools dramatically improve your results.
When creating designs, work from background to foreground. Apply your base color first, let it dry, add any secondary colors or gradients, let those dry, then add your finest details last. This layering approach prevents smudging and allows you to build up your design gradually.
Finally, always finish with a good top coat. This seals your design, adds shine, and significantly extends the life of your manicure. Reapply top coat every two to three days to prevent chipping and keep your Halloween nails looking fresh throughout the season.
Halloween nail art should be fun, creative, and accessible to everyone, regardless of skill level. These 26 designs prove that you don’t need steady hands or professional training to create festive, eye-catching manicures. Choose designs that match your comfort level, experiment with different techniques, and most importantly, enjoy the process of transforming your nails into miniature Halloween masterpieces.