Top 10 Crochet Baby Hat Patterns A Complete Guide for Every Skill Level
There’s something truly special about crocheting a tiny hat for a baby. Whether you’re preparing for a new arrival, creating handmade gifts, or building your craft business, baby hats offer the perfect combination of quick completion and adorable results. These small projects require minimal yarn, work up in just a few hours, and provide endless opportunities for creativity. In this comprehensive guide, I’ll walk you through ten exceptional crochet baby hat patterns that range from beginner-friendly basics to more advanced designs, complete with practical tips to ensure your success.
Table of Contents
Traditional Beanie with Ribbed Brim
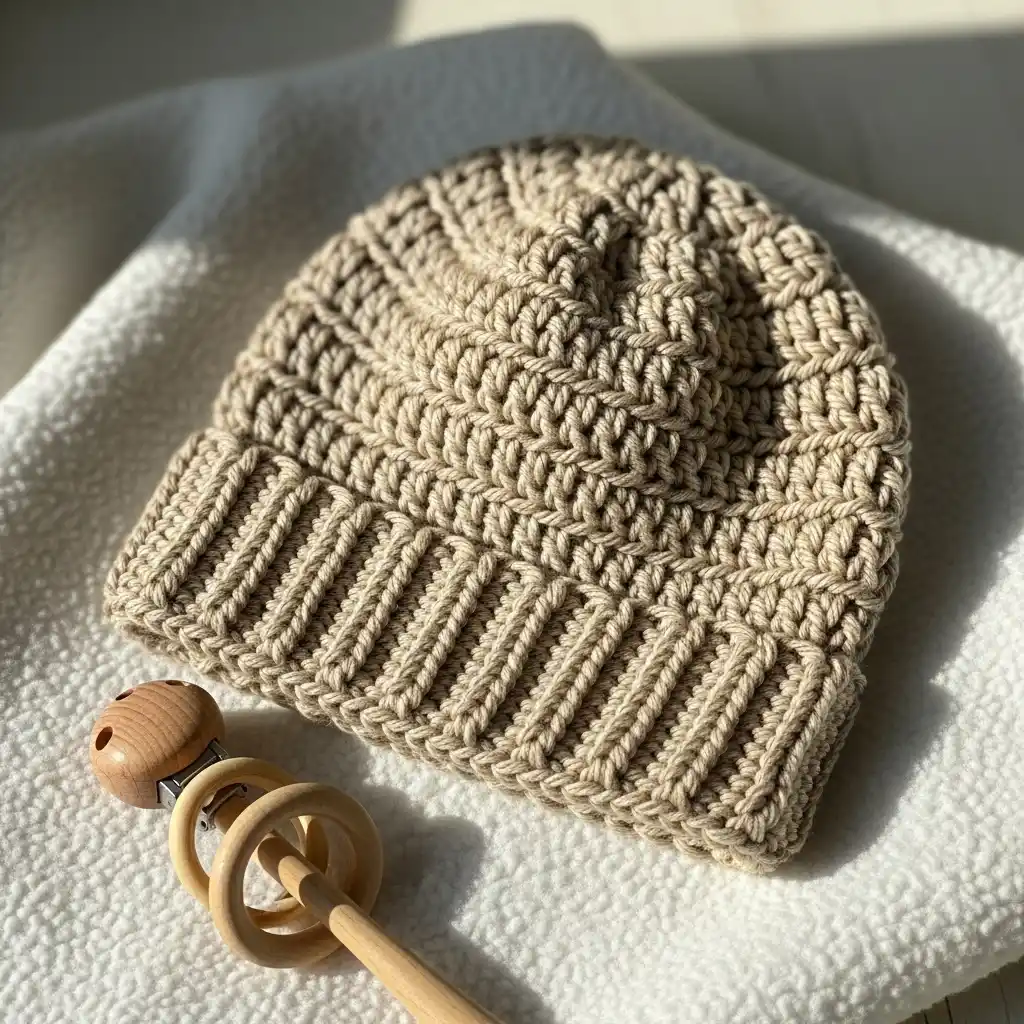
The ribbed beanie remains the most practical design in every crocheter’s arsenal. The traditional style features a stretch ribbed band to hug the baby’s head tightly, and then the simple body of half double crochet stitches. Start with creating a foundation chain of around 12-14 inches for a newborn size, and then keep working in back loop only single crochet rows to create the ribbing. Seam your ribbed band together into a circle when your ribbed band is at the desired height, and pick up around the edge to work the hat body. The secret is to be loose enough so the hat remains soft and flexible, but tight enough to retain its shape. The pattern may be made with any weight yarn, but worsted weight is the optimal compromise between warmth and ventilation. Look at this store…
Bear Ears Beanie
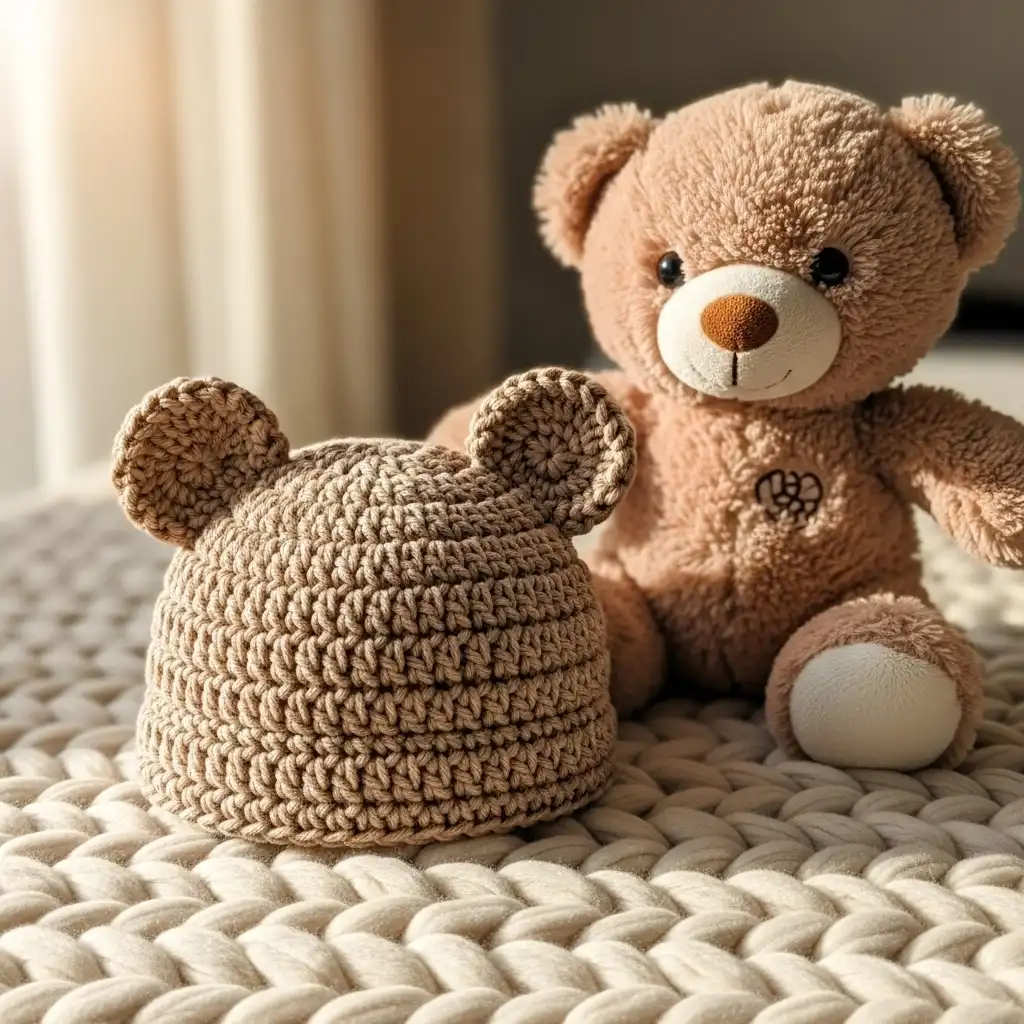
Associating animal ears with a dull and uninspiring beanie turns it into a magical accessory. Bear ears hat style is a type of easy beanie construction with two little semicircular ears constructed separately and sewn to the crown. Create each ear by crocheting in the round, working a magic ring, and increasing in a sequential manner to form a small cup shape. Position the ears a couple of inches apart on the crown of the hat, slanting them slightly outwards for a natural appearance. A trick: loosely fill ears with a pinch of fiberfill to prop them up rather than flopping over. This can be adjusted to create about any animal by playing with ear size, shape, and position.
Striped Pixie Hat
The pixie hat’s pointed crown is at once recognizable and totally cute on infants. This piling is done in rounds progressively from the brim up, tapering slowly to form the distinctive tip. Striping is fascinating without finicky stitchwork. In changing colors, carry the unworked yarn up within the hat rather than cutting and rejoining with each stripe to save extra ends to sew in. Work your decreases in the same direction around the hat, leaving them equally spaced between them so that the brim of the hat will not be crooked to one side. The pixie cut follows the ears naturally and is thus ideal for winter.
Pom-Pom Slouchy Hat
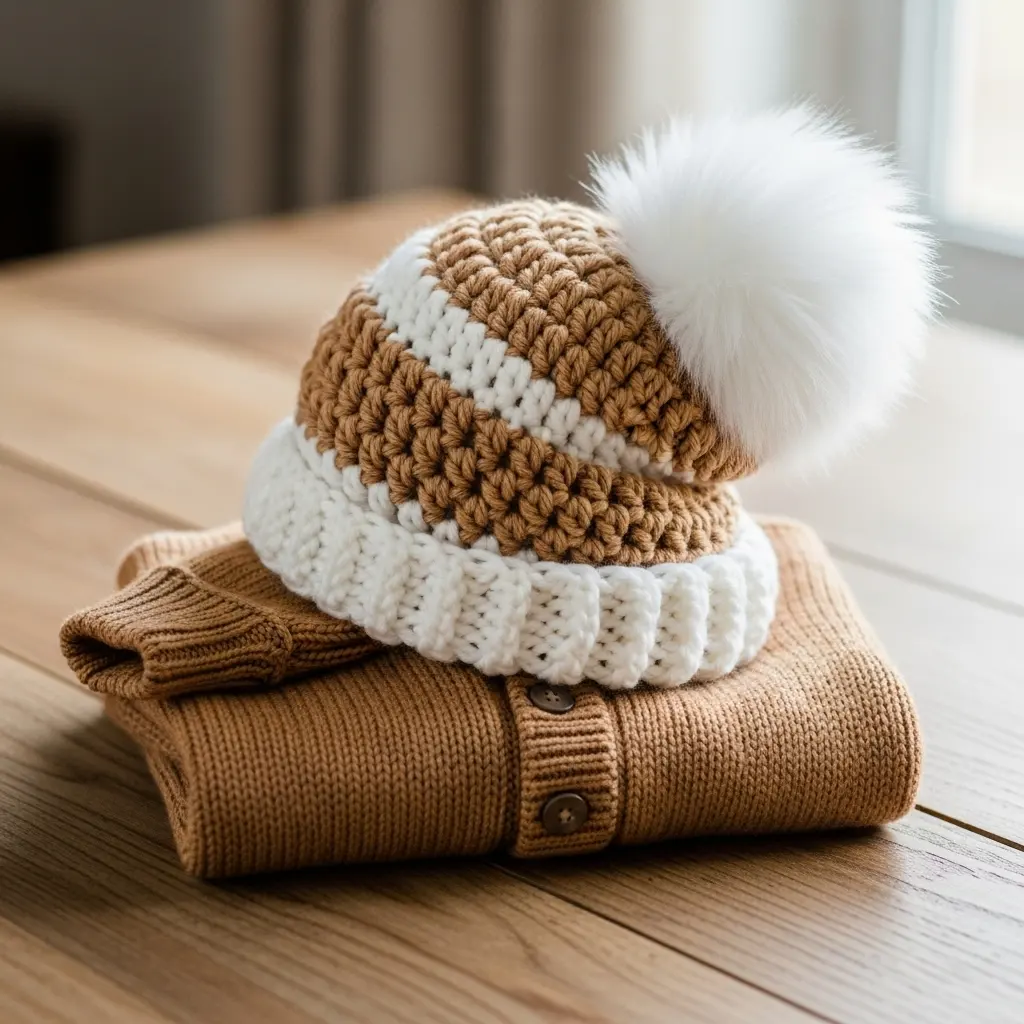
Slouchy hats offer a slouchy, trendy look while offering additional space for growth. This method requires more rounds than a fitted beanie to begin to shrink, producing fabric that creases up softly at the crown. The giant pom-pom is both a working detail and an ornament, keeping the slouchy section in form. To create a large, professional-sized pom-pom, wrap yarn around a four-inch cardboard rectangle one hundred times or more. The secret to an excellent slouch is making approximately two inches longer than when you’re making a fitted hat, then tapering over just four to six rounds rather than gradually decreasing. Let’s dive into …
Earflap Hat with Braided Ties
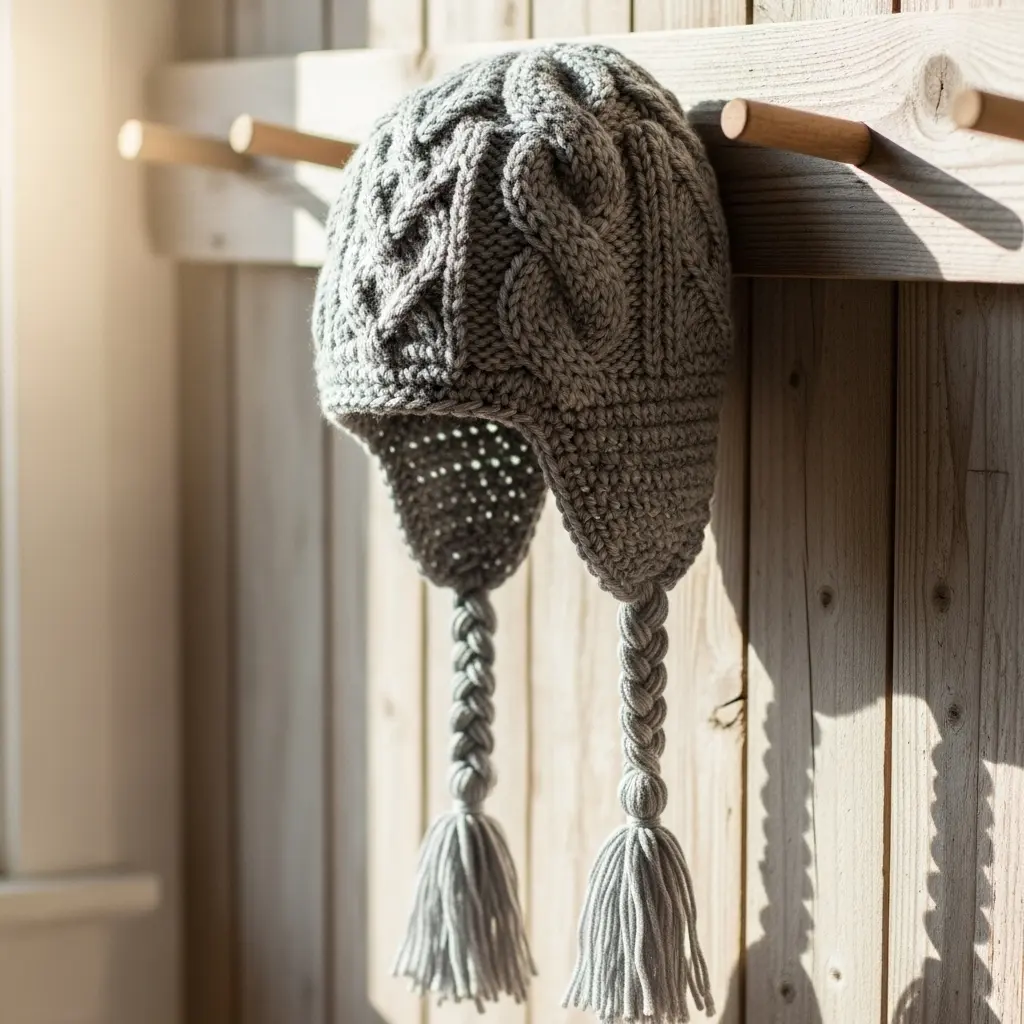
Earflaps are as comfortable as can be and remain in place without strings or elastic at the back of the neck. Begin with this motif by creating the earflaps in and of themselves as separate pieces initially, then integrating them into the hat body while finishing off the foundation round. The earflaps must be both a few inches from the brim line and hanging down slightly. Create braided ties by cutting six strands of yarn, each roughly twelve inches long, and tie them to the bottom tip of each of the earflaps. Create a simple three-strand braid and secure with a knot. A useful pro tip: have earflaps fall on or below the baby’s ears, typically starting the flaps roughly an inch behind where the hat would sit at the temple.
Bobble Stitch Textured Hat
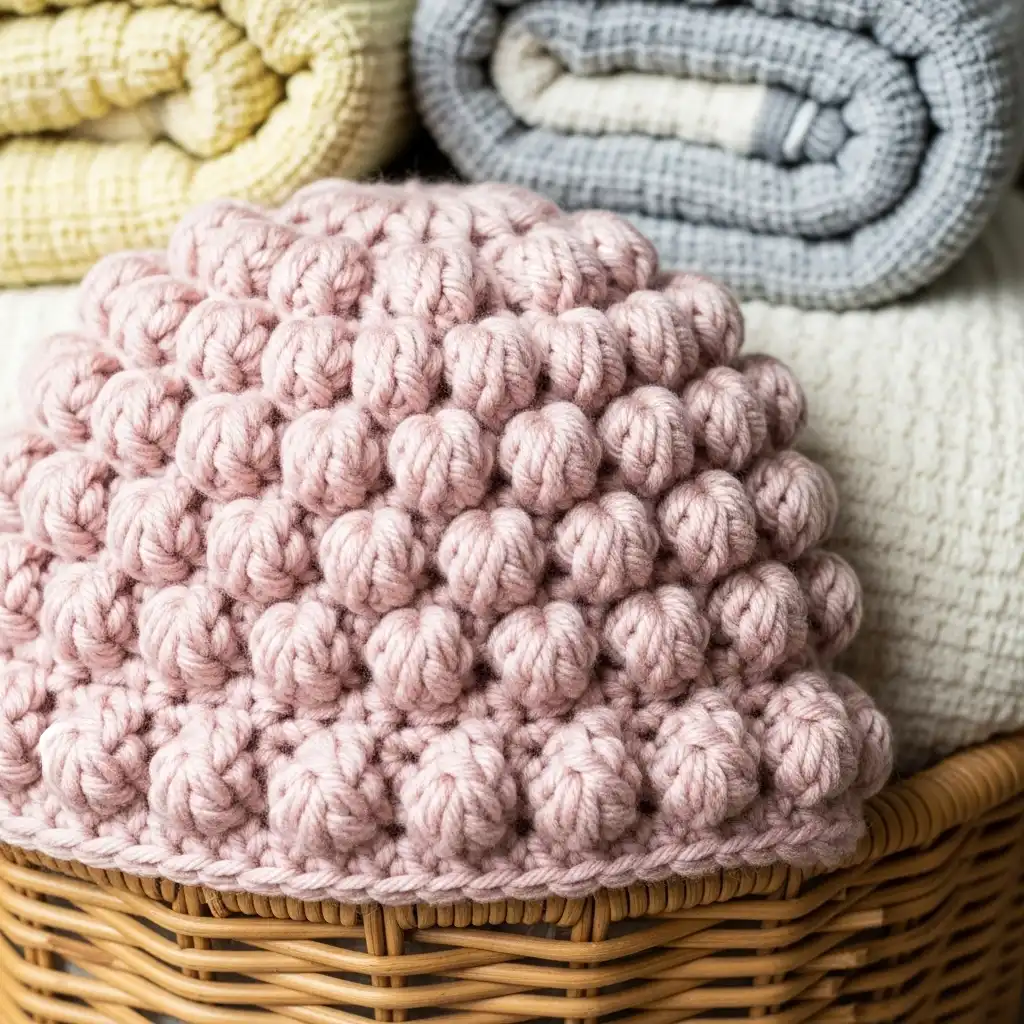
Bobble stitches add textured depth that is dramatic and delightful to the sense of touch. This mid-skill level design alternates rounds of stitch fundamentals with bobble rounds, five double crochets in one stitch, and fills them all up to the top. Even tension and finishing each bobble before moving on to the next stitch are incredibly important so that there is definite definition in the bobbles. Space out your bobbles evenly all over the hat, typically working on every third or fourth stitch so not to stiffen or weigh down the fabric. Create this pattern in soft, floppy yarn since texture contributes significantly to bulk.
Shell Stitch Sunhat
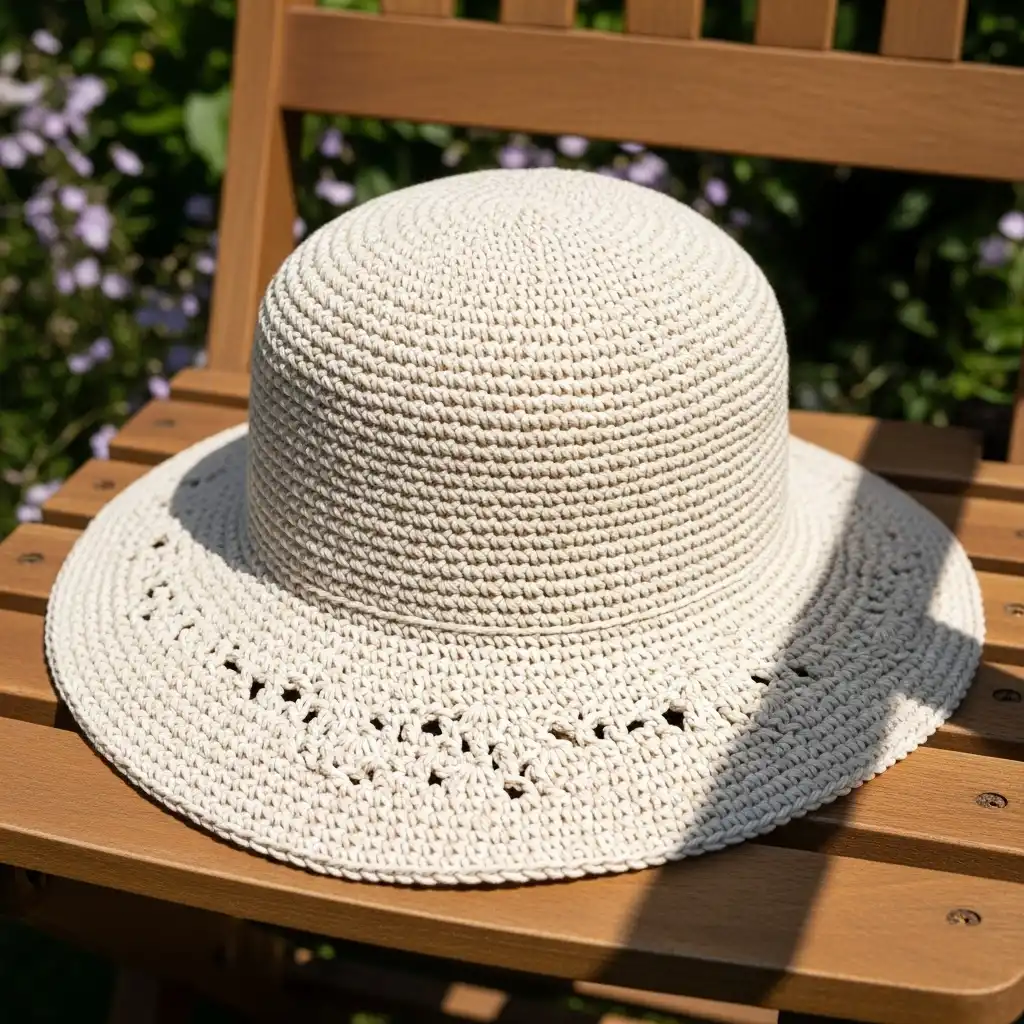
Ditching winter patterns, the shell stitch sunhat provides welcome shade from the sun while providing airy ventilation. This design has a very wide, sloppy brim constructed of shell stitches in rounds that increase more severely than for a traditional beanie. Shell is five double crochets worked into one stitch, separated by skip stitches and single crochets. Shell stitch openwork permits to allow air to pass through and also allows shade to be cast by the brim. Work the crown of the hat in close stitch fashion to fit, and change to shell stitch for the brim. To shape the brim, try working a final round in a reduced stitch or string in a wire of fine gauge along the edge.
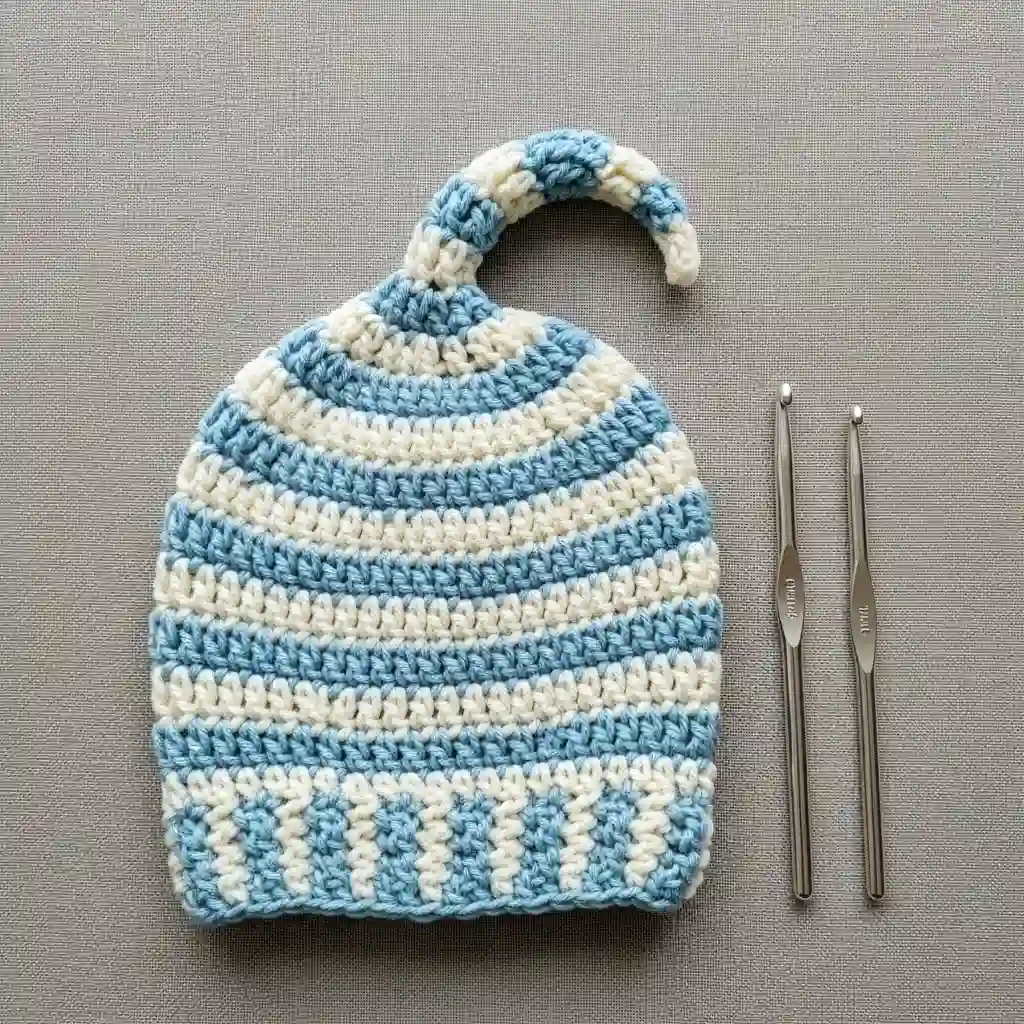
Top Knot Hat
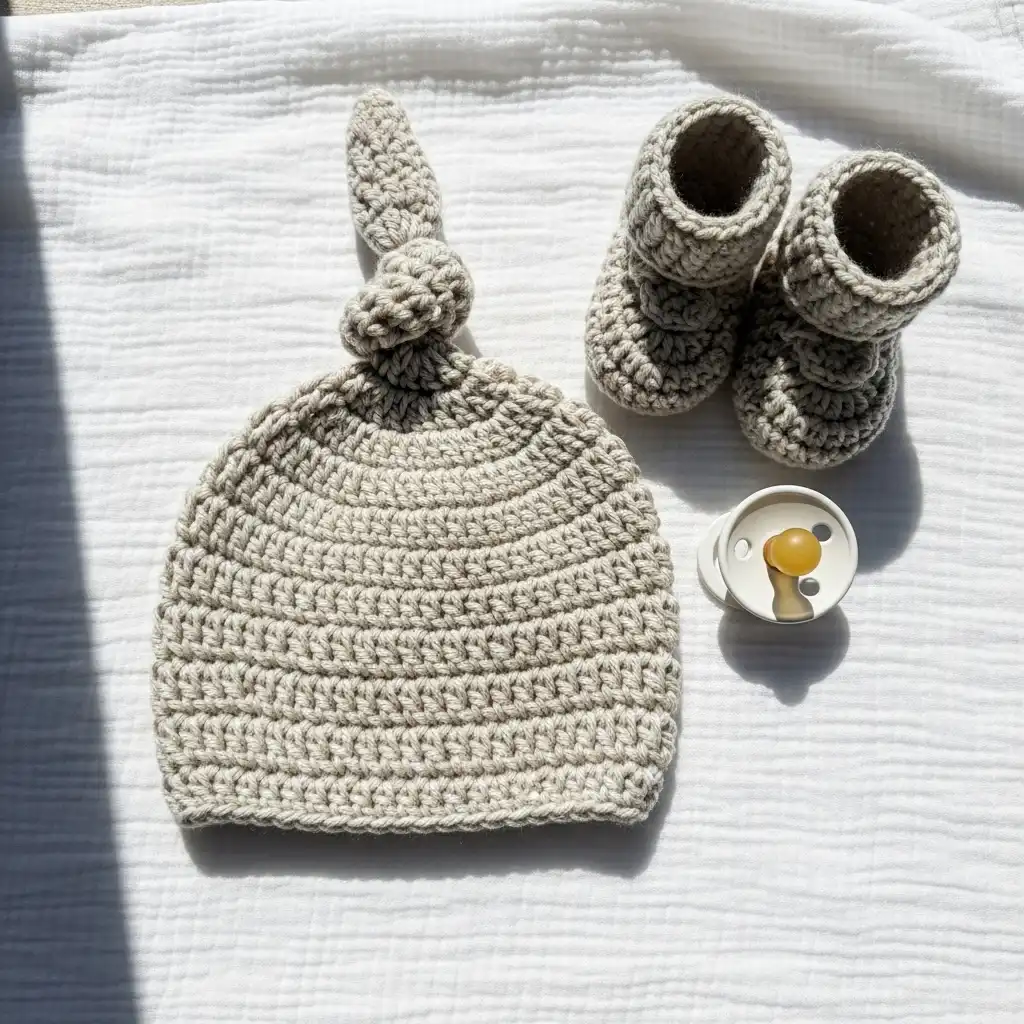
The top knot hat is dominating the fashion skyline with its cute shape and gender-neutral appeal. This creative design starts from a regular beanie, and the top half is then folded over and secured with a small band for the purpose of forming a mound-like knot. Having finished the hat body, rather than tapering off to complete the finishing of the top, you will continue working some rounds directly, then slowly close the hole. Form the signature knot by passing a long yarn tail through stitches two inches from the crown and pulling it tight firmly. The secret to successful cabby-ing is to stuff the gathered fabric fairly evenly so that it lies flat in an even, symmetrically above the gathering point, producing an even, flower-like effect.
Cabled Hat Pattern
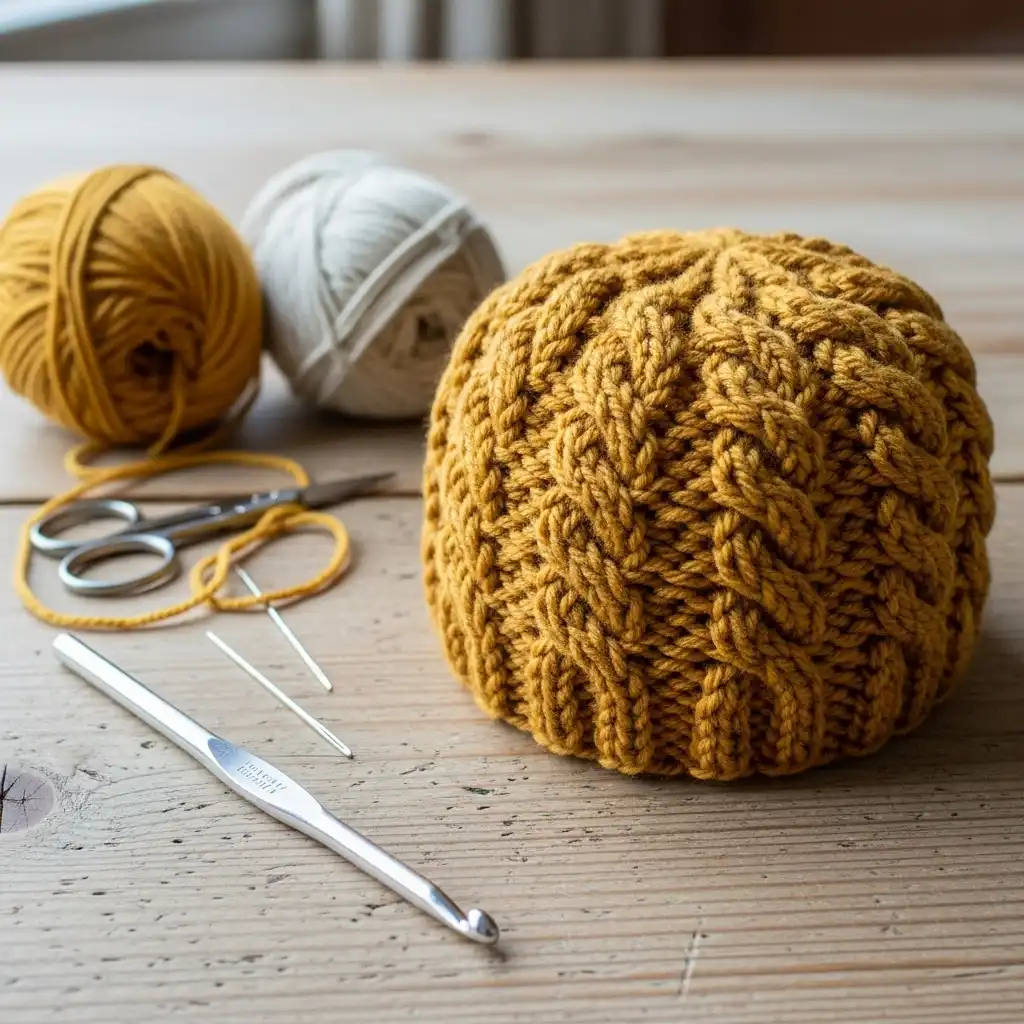
Cable stitches bring sophisticated texture normally set aside for knitting into the realm of crochet. Front post and back post stitches create bumpy lines that intersect each other, mimicking classic knit cables. This is a mature pattern and requires attention to your pattern repeat and even tension. Mark the beginning of each round clearly, as cables tend to confuse where rounds start and end. Work your post stitches loose so they project outward from the background but tightly enough to create good definition. Practice the cable technique on a sample swatch first before using it to form your hat.
Granny Square Hat
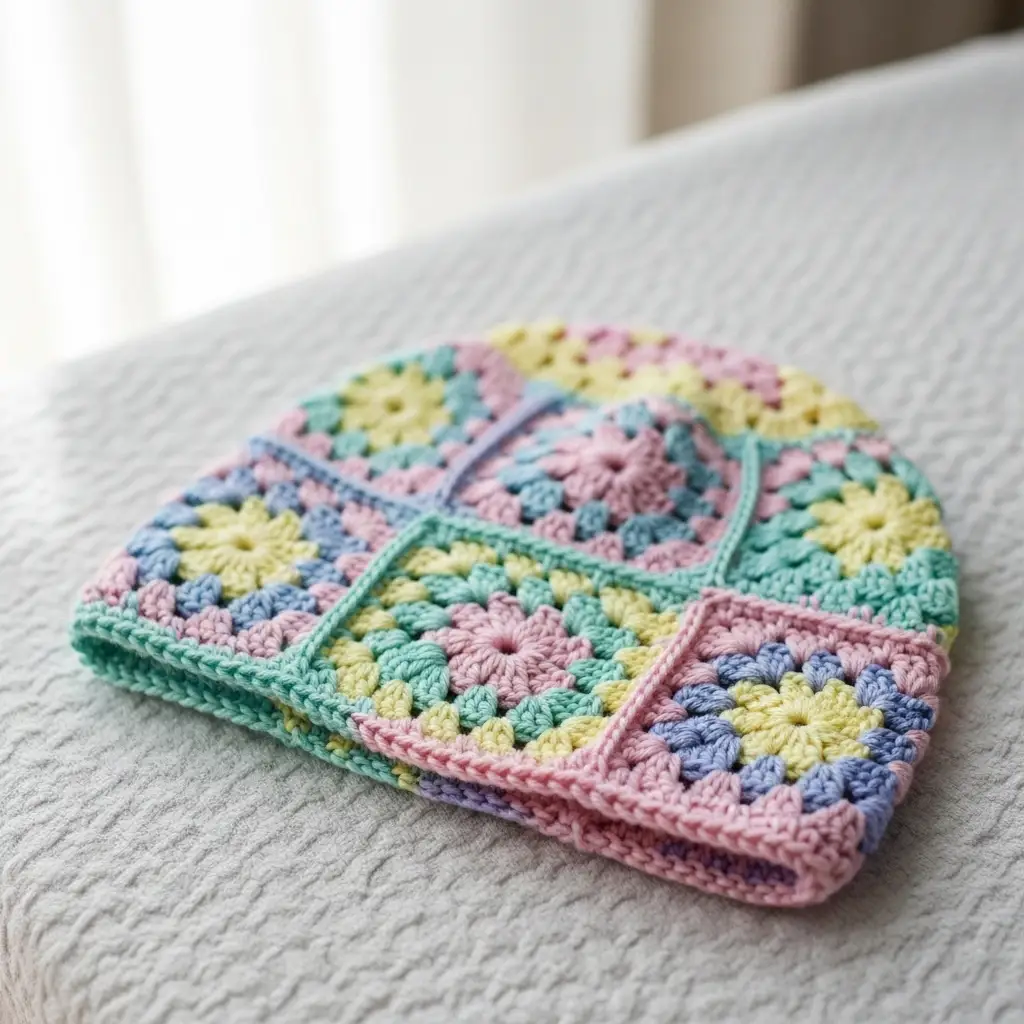
This nifty trick transforms the ubiquitous granny square design into headwear. Create eight identical granny squares using any traditional pattern, and then join them in a specific sequence that organically creates a hat form. The squares converge at the crown, an eight-pointed star at the top. Whipstitch or join-as-you-go to join squares when completed. Then, crochet a few rounds of single crochet around the bottom edge to create a brim and achieve a smooth fit. Trend allows unlimited personalization with color schemes and square sizes so that each hat is unique.
Tips for Success
No design you select should be attempted without creating a gauge swatch, so you will know it will be the right size. Babies’ hats should be snug but not tightly fitted enough to be uncomfortable. Employ soft, washable “baby-friendly” yarn, and omit anything that can be irritating to sensitive skin. Trims and other adornments should be kept to a minimum to prevent choking. Lastly, think about making a few different sizes of hats – babies develop rapidly, and if you make multiple sizes, your product will last for a few months.
With these ten patterns and their associated techniques, you’ll have the basics down to make gorgeous, functional baby hats that mothers will love and eagerly wear.