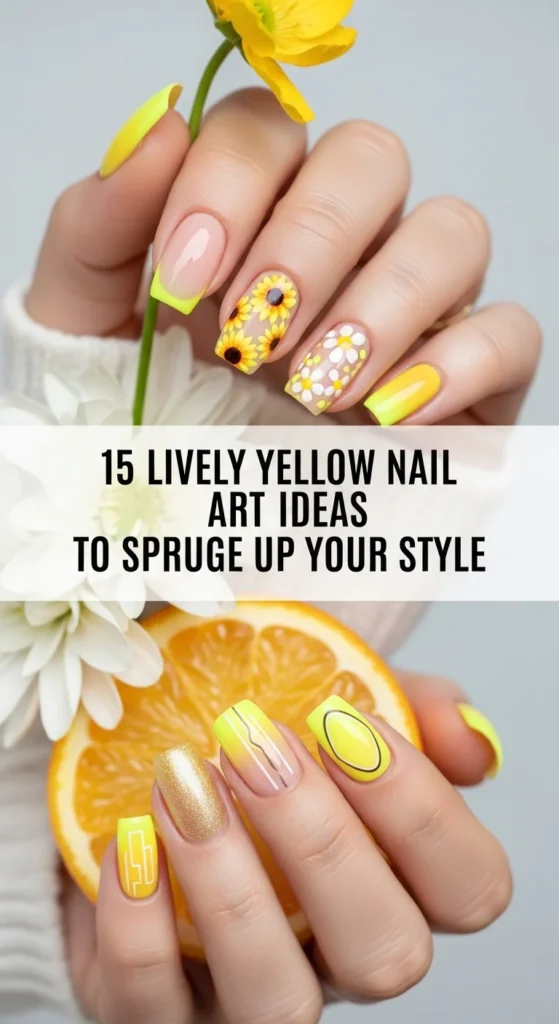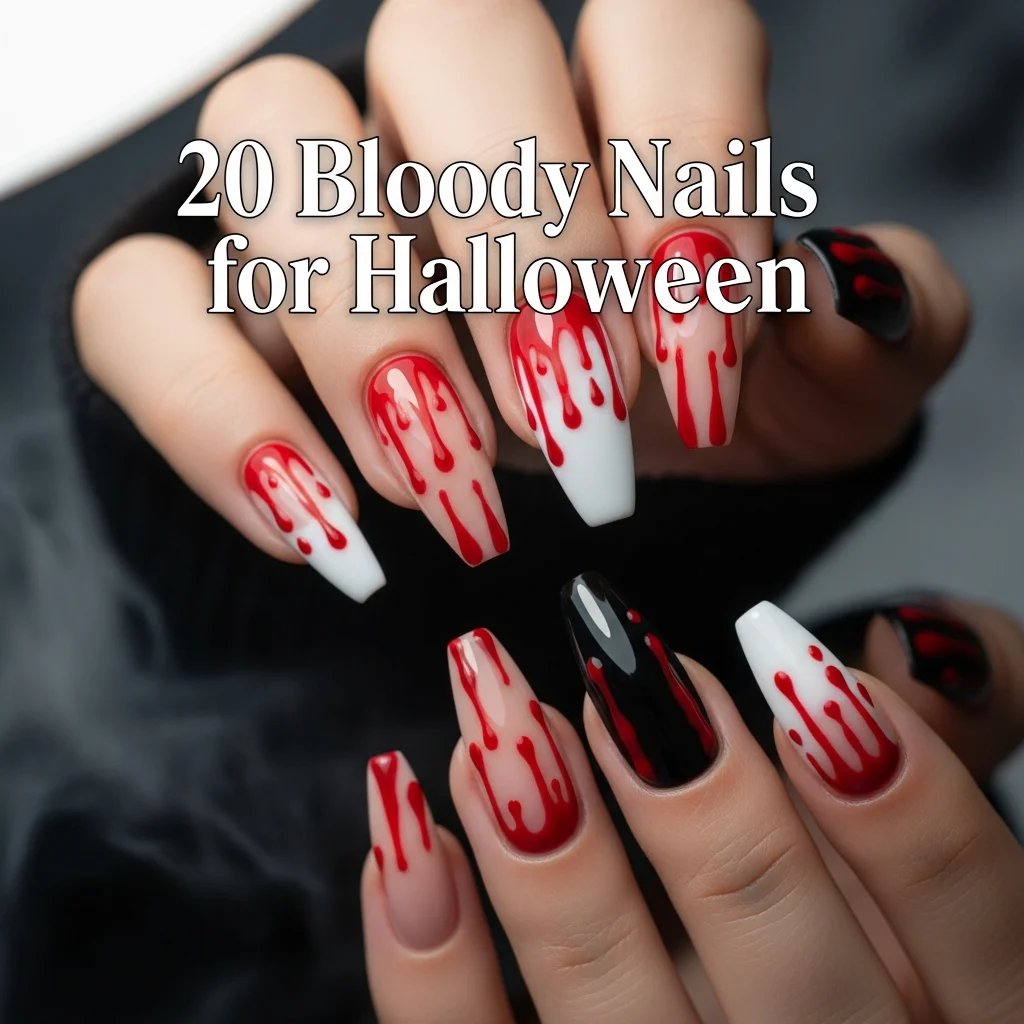
20 Bloody Nails for Halloween
Unleash your dark side with some creative nail art this Halloween, and nothing says ‘spooky’ like bloody nail designs. Be it costume parties, trick-or-treating with family, or that spur-of-the-moment urge to look seasonal, bloody nails can make the perfect finishing touch to your Halloween get-up. The following is a detailed tutorial containing twenty different stunning, bloody nail designs-from subtle sophistication to full-on horror. Complete with step-by-step instructions and expert tips on how to achieve salon-quality results in the comfort of your own home, you’re sure to find something that tickles your fancy.
Table of Contents
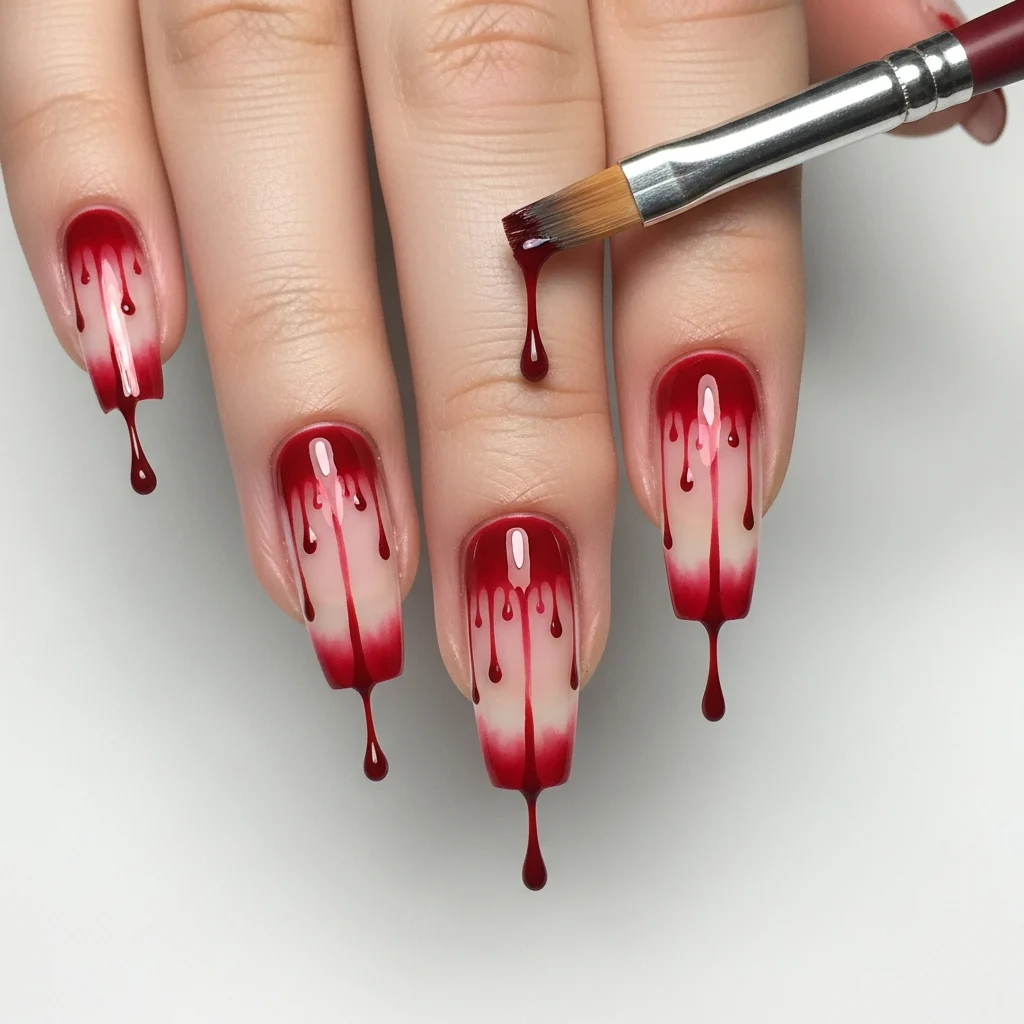
Classic Blood Drip French Tips

Transform the classic French manicure into a haunting masterpiece by trading in white tips for crimson drips. Start off with a nude or pale pink base and let it dry. Using a thin nail art brush dipped in deep red polish, create an irregular drip pattern running down from your tips. For more realism, go ahead and vary the length and thickness of the drips on each nail. The secret to perfecting the design is all in the layering. Apply your red polish in translucent layers, letting each partially dry before adding the next-really adds dimension by emulating the viscosity of blood. For extra, wet-look sheen, seal it all off with a super-shiny top coat. This design will look fabulous no matter how short your nails are and perfectly complements vampire and zombie costumes.
Blood Splatter Nail by COMPLETE
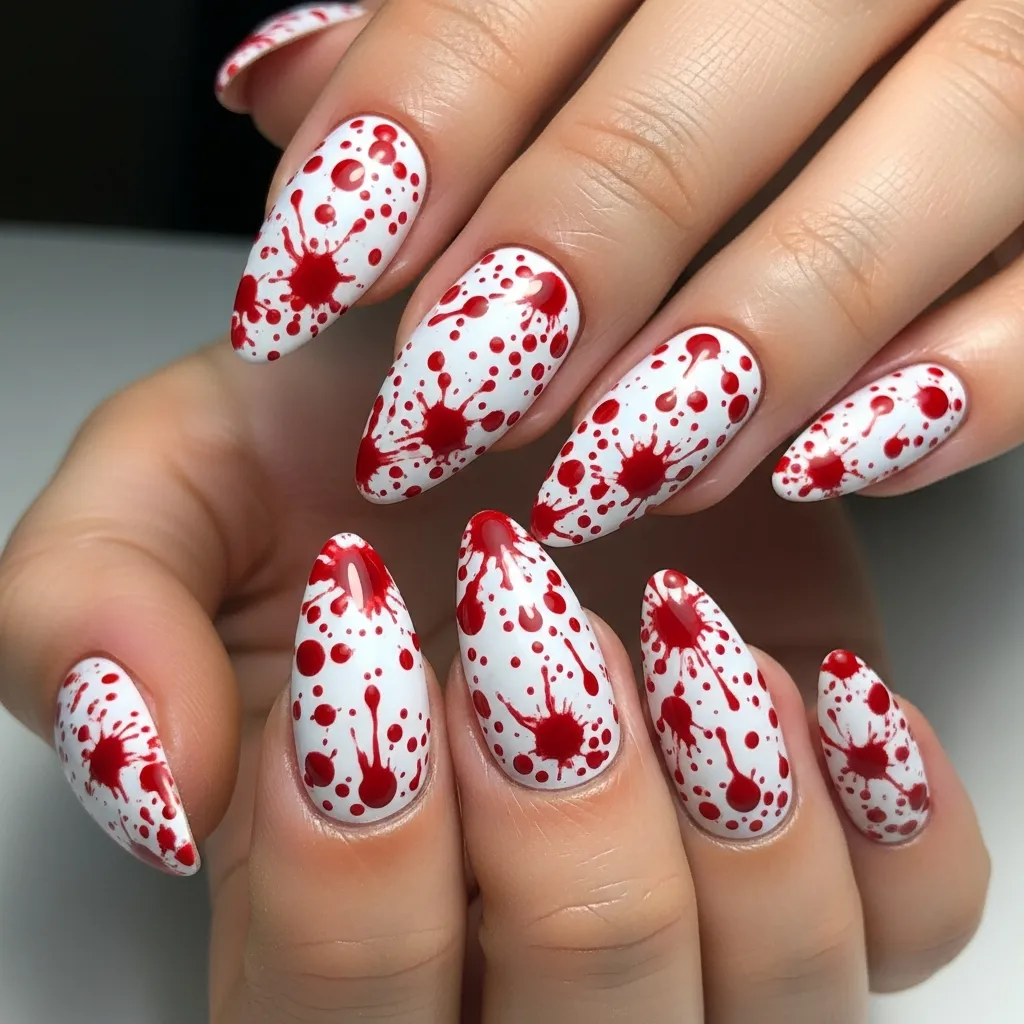
Channel your inner CSI with some seriously dramatic blood-splatter effects that will look freakishly real. To start, paint a white, cream, or pale gray base to provide maximum contrast. Once that’s totally dry, protect your cuticles with liquid latex or petroleum jelly. Dip a stiff-bristled brush or an old toothbrush into thinned red polish and flick the bristles toward your nails from about six inches away. The distance and amount of polish on your brush will determine how large the splatters are. Combining various red shades-from fire engine crimson to deep burgundy-will add depth and realism to your splatters. For added contrast, you can do heavier splatters on accent nails and keep the others more subtle. Because this design is edgy, it requires practice to test out your skill on some paper first. The intentionally messy nature of the style ensures that no two manicures will be exactly alike, making this a unique Halloween statement.
Vampire Bite Nails
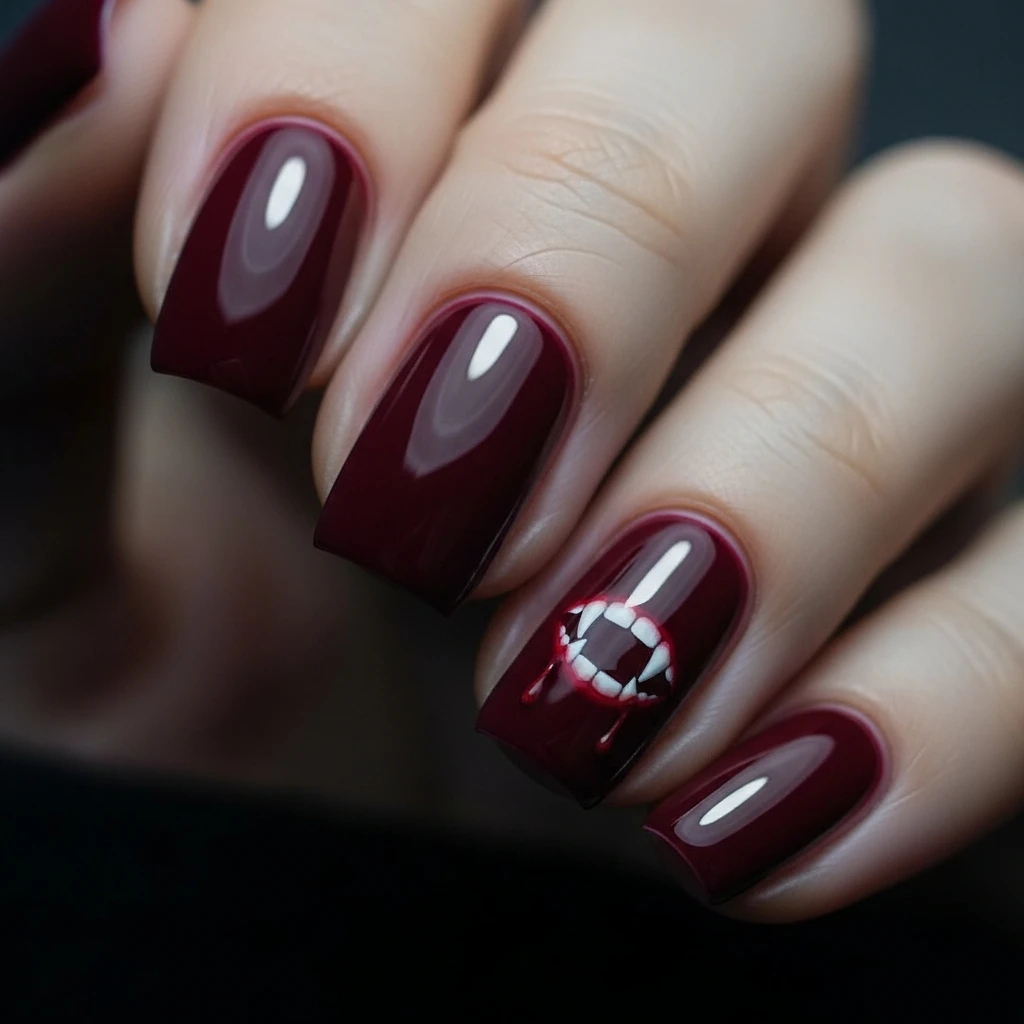
Embrace all things vampiric with elegant, blood-red nails that subtly display fang mark details. Paint all nails in rich, deep red polish-think wine or blood red rather than bright cherry. Using a white nail pen or thin brush, place two little dots side by side to form the vampire puncture wounds on one or two accent nails per hand. Using a slightly darker red or burgundy polish around the dots, create some bruising effects. For a bit of extra drama, draw in a few tiny drips coming out of the bite mark. This sophisticated design strikes the balance between spooky and wearable just right, making it perfect for a professional environment in which you still want to highlight the time of year. The design goes perfectly with vampire costumes, but works as a standalone Halloween nail art that you can wear throughout October and into November.
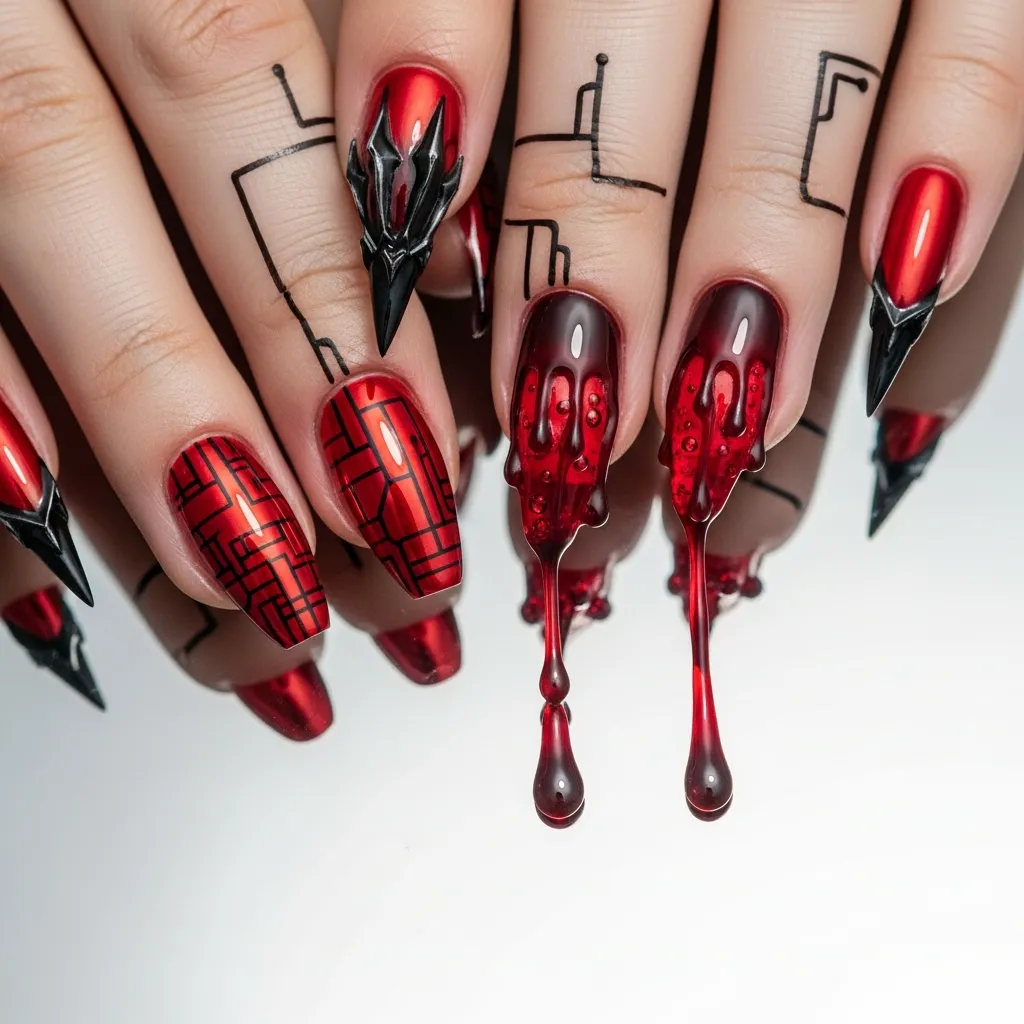
Glossy Blood Red w/ Matte Black Accent
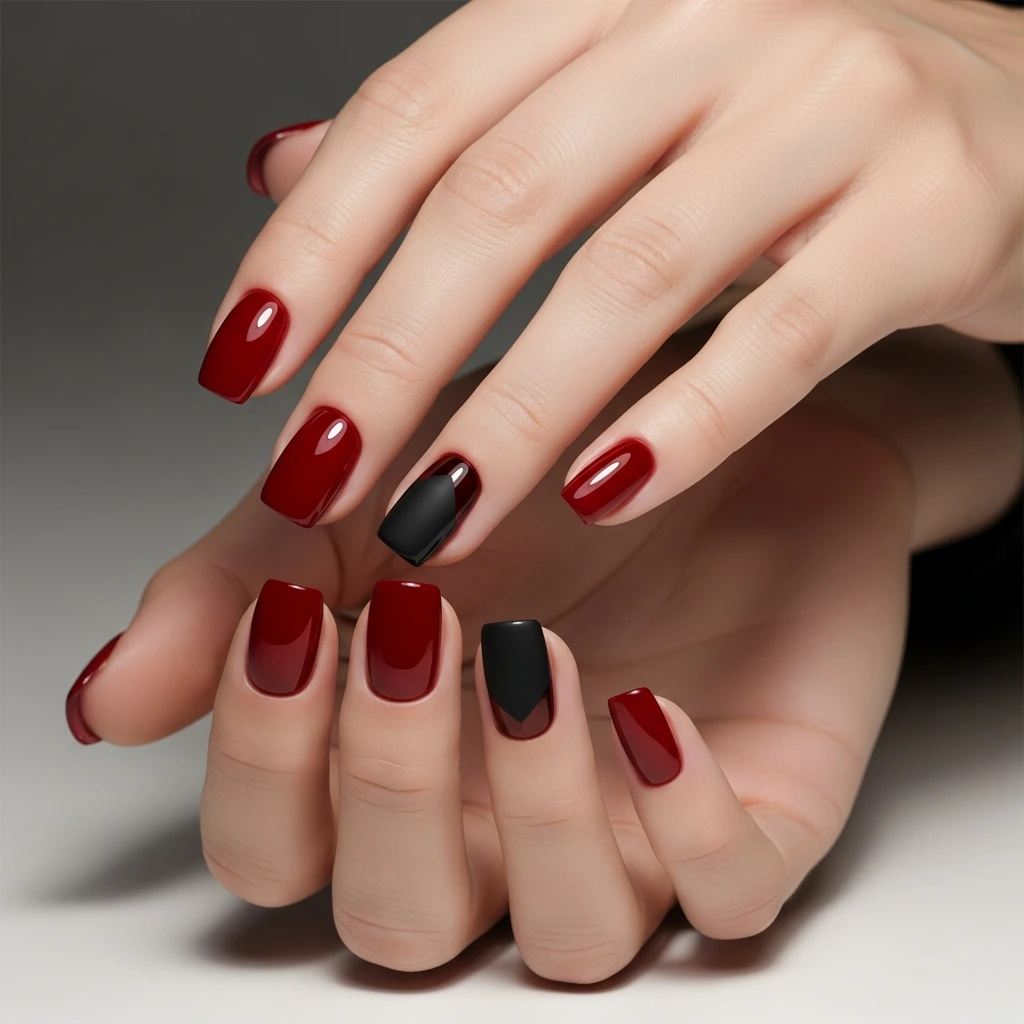
Striking contrast gives this modern design an edgy feel. This is an abstract Halloween nail art design done in a glossy blood-red polish; coverage is fully saturated over two coats. Pick one or two accent nails on each hand and paint in with matte black – either using matte polish or a matte top coat over regular black polish. The contrast of gloss against matte keeps things interesting, but the nail art skills are at a minimum. To take it up a notch, sprinkle tiny silver or gold studs along the cuticle line in the black nails, or add thin metallic striping tape between colors on a single nail. Bloody Halloween nails don’t need to be outright literal – the deep red will make anyone think of blood without showing explicit imagery. Perfect for those who want to wear their nails in an office-friendly but still sophisticated manner that isn’t limited to October.
Dripping Blood Accent Wall
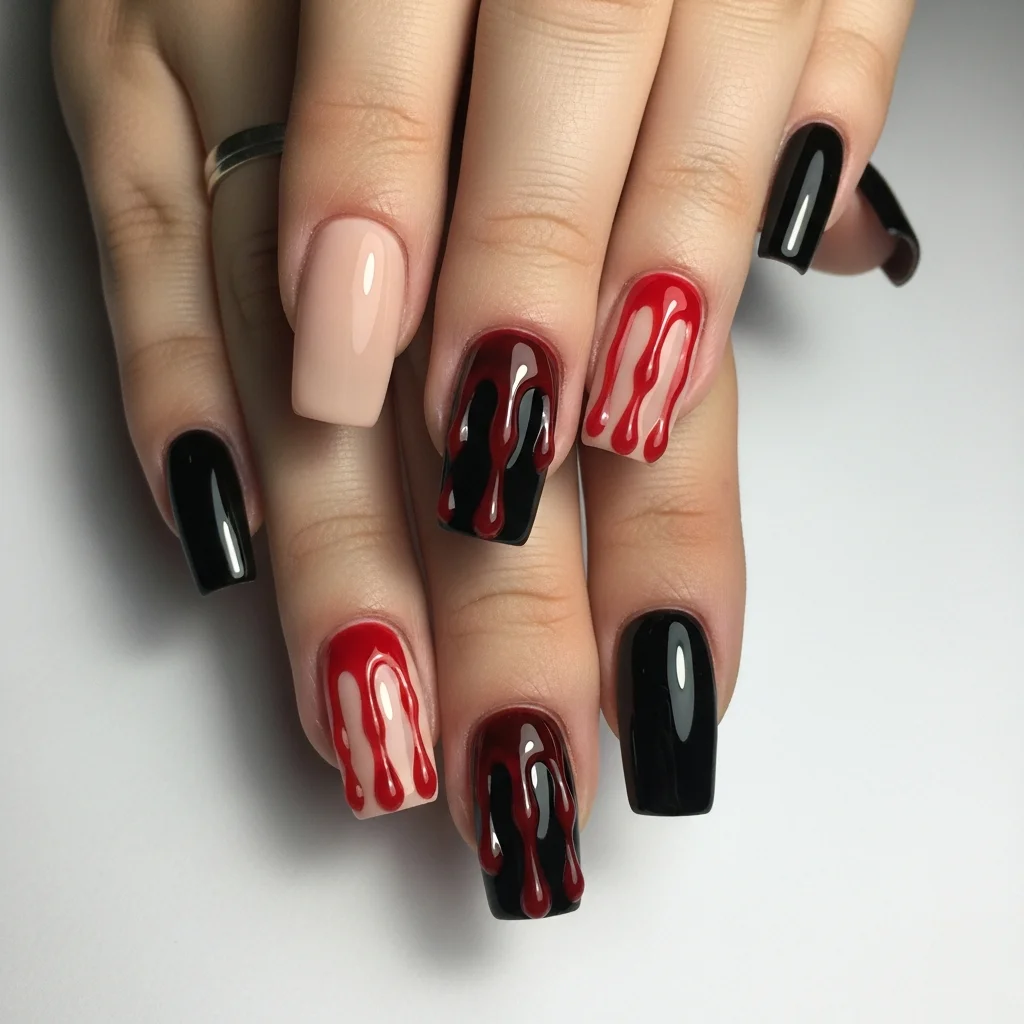
Nail the art of the blood drip with this focused design that makes accent nails the star. Paint most nails in a neutral nude or light pink shade, then select one or two nails per hand as your “canvas.” On these accent nails, paint the entire nail black or deep purple to create contrast. Using a fine detail brush and bright red polish, paint thick drips starting from the cuticle area and flowing down in irregular patterns. The key is varying the width of the drips and stopping them at different heights for natural randomness. Place smaller satellite drips next to larger ones for authenticity. Some of the drips should just about reach the middle of the nail, while others reach the tip. To give the drips some dimensions, outline each with a slightly darker red shade to create the shadows. This design takes some patience, but it’s perfect for nail art beginners wanting to try something quite dramatic because it provides maximum impact with minimal coverage. look at this…
Bloody Handprint Nails
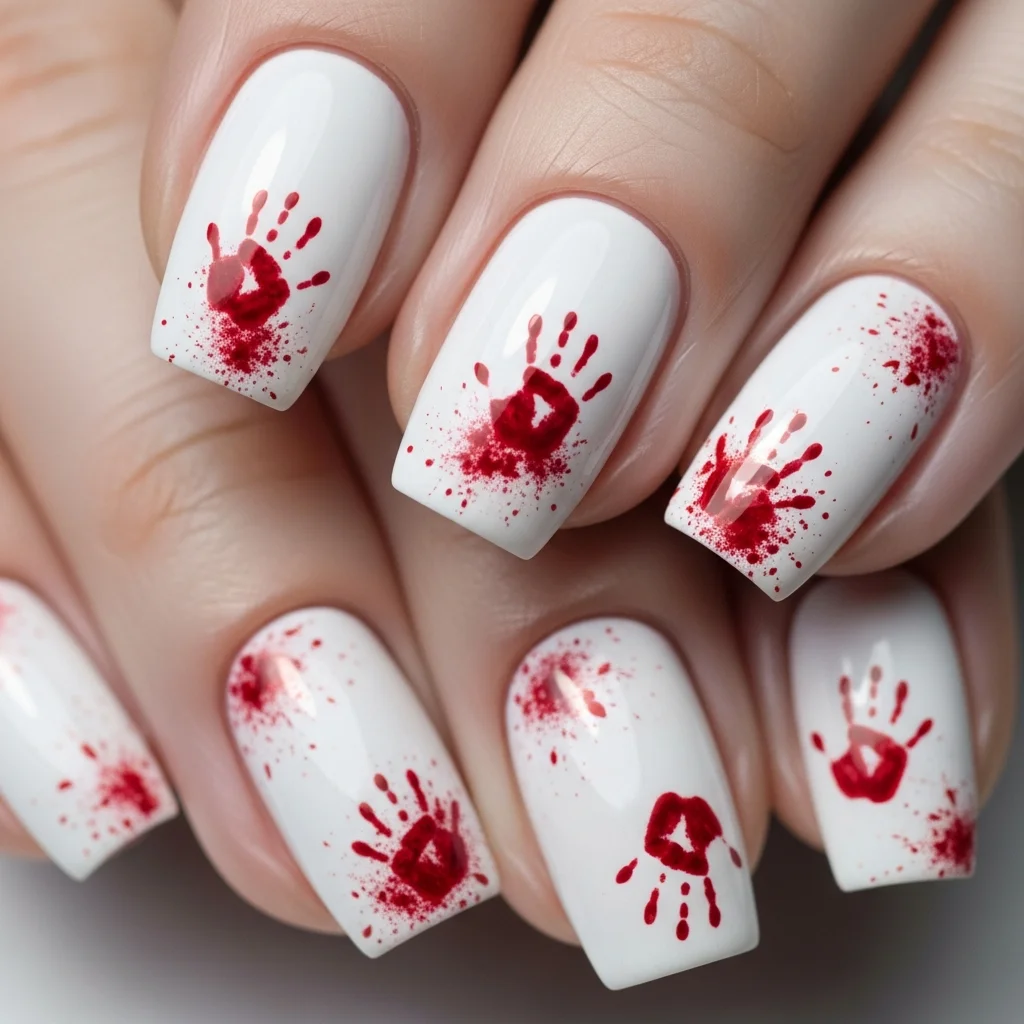
Nothing says horror movie like bloody handprints. This design works best on longer nails, where details remain visible. Start with a white or cream base coat to maximize the blood color contrast. Using a fine detail brush and red polish, paint tiny handprint silhouettes on one or two accent nails. For realism, study actual handprints to capture proper finger proportions and palm shape. The prints should look smudged and imperfect, as if someone grabbed your nails in panic. Add fingerprint texture by gently dabbing a makeup sponge loaded with slightly darker red polish over the prints. Around the handprints, create small splatter marks using the toothbrush flicking technique. On remaining nails, keep the design to a minimum with just light splatters or leave them solid in your base color. The design tells a story and is an instant conversation starter at any Halloween gathering.
Ombré Blood Gradient
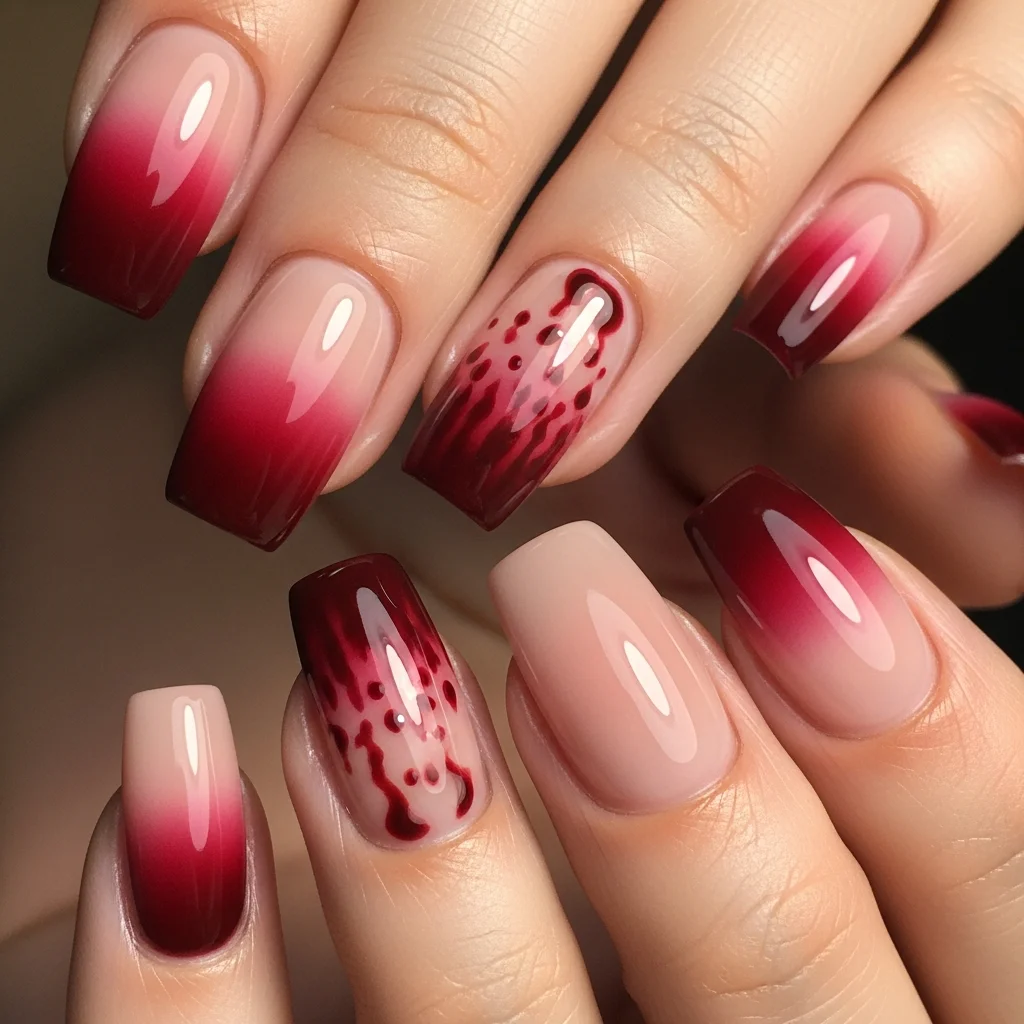
This gradient technique creates an unsettling fade from healthy pink to deep crimson. It takes makeup sponges and patience, but it’s worth it. Paint all the nails in a light pink or nude base coat. On a makeup sponge, paint horizontal stripes of light pink, medium red, and deep burgundy polish, slightly overlapping each color. Gently dab the sponge onto your nail, rolling slightly to blend the colors together. The trick is working fast before the polish on the sponge dries. You’ll want to repeat the dabbing process several times, adding more polish to the sponge between applications, until you achieve a smooth gradient. The darkest red should concentrate at the tip of your nail, fading to pink near the cuticles. After this, gently touch up the edges with a small brush dipped in acetone. Go over with a glossy top coat to smooth out the texture created by the sponging. This design achieves that ombre effect, suggesting blood pooling at the fingertips.
3D Blood Droplet Nails
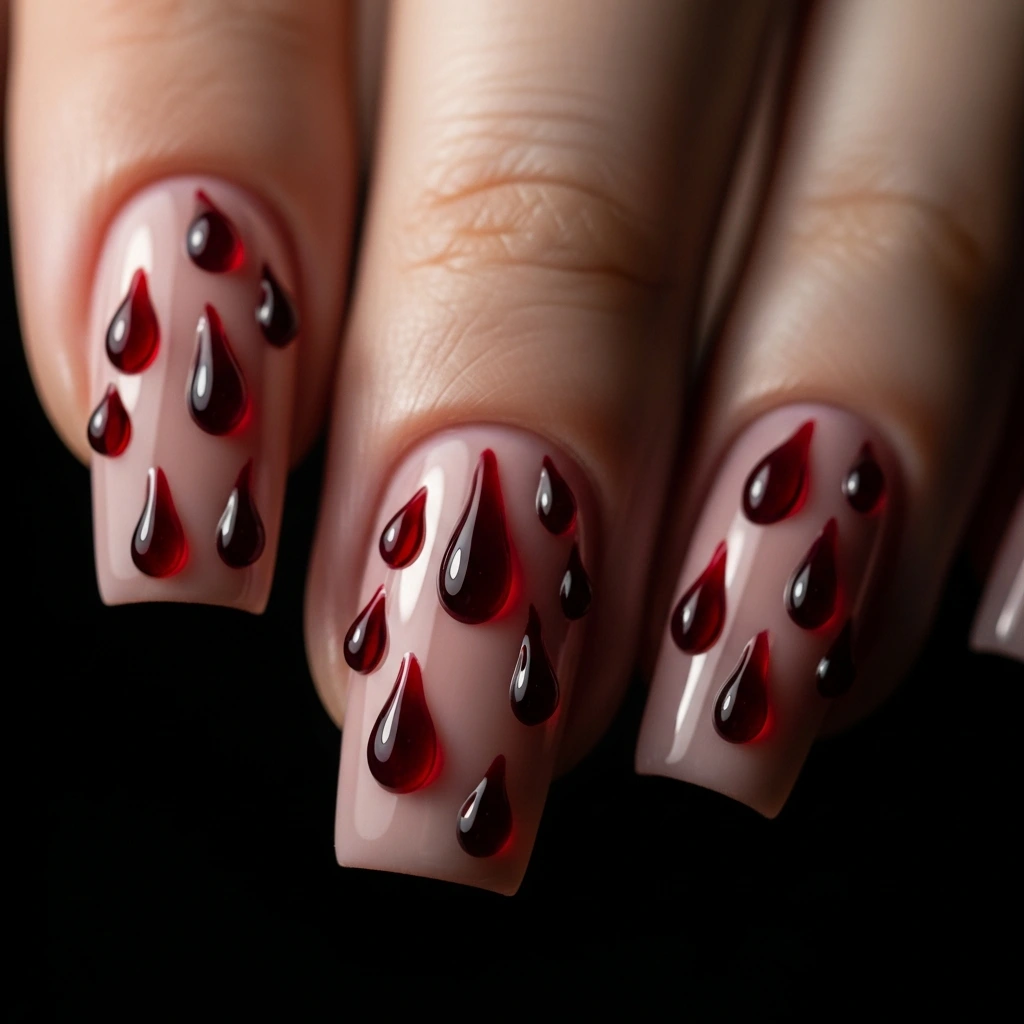
Add dimensional drama with raised blood droplets that look quite real. Paint the nails in your base color of choice-black provides maximum contrast, while nude offers subtle sophistication. Using thick red gel polish or 3D nail art gel, dot onto your nails in dome-shaped droplets. The trick is applying enough product to achieve height without it slipping off before curing. If you’re using gel polish, cure it under a UV or LED lamp until dry, following the manufacturer’s instructions. For regular polish, you’ll want several thick layers of glossy red, allowing each layer to partially dry before adding more. Place droplets in a strategic manner-one large drop near the cuticle with smaller ones trailing toward the tip creates the effect of active dripping. Use a variety of sizes on different nails for natural variation. For ultimate realism, mix translucent red with opaque red polish to create depth within each droplet. This advanced technique calls for a little practice, but trust us, the results are show-stopping and photograph beautifully.
Bloody Skeleton Hand Nails
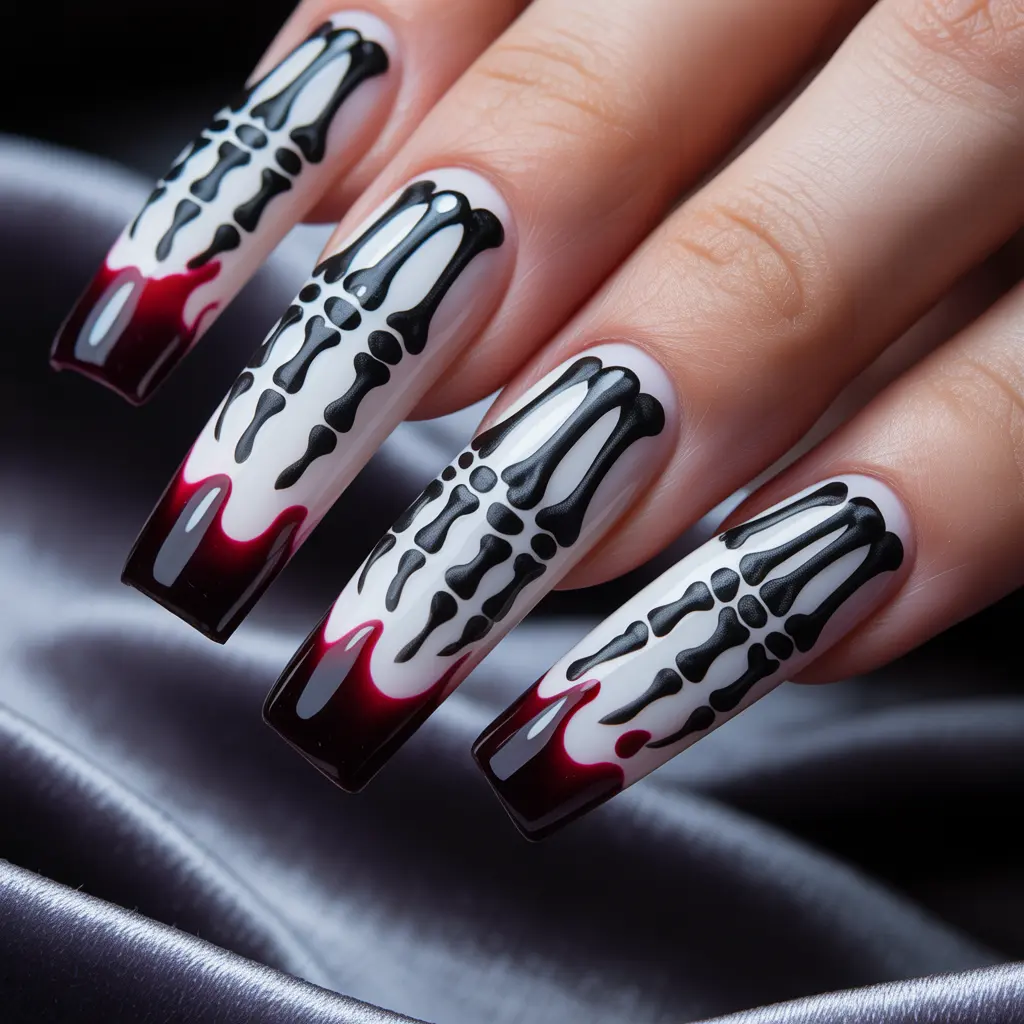
Combine anatomical artistry with gore in this complex but rewarding design. Paint nails white or cream to start, then use a thin black brush to draw simplified skeleton hands across your nails. Focus on key elements like finger bones and knuckles rather than perfect anatomical accuracy. Once the skeleton design is dry, go back and strategically add bright red polish to create the appearance of blood dripping over the bones. The contrast between the clinical white skeleton and vivid blood creates a disturbing visual impact. To make things easier, use skeleton hand nail decals as your base, then add blood effects on top. This design works particularly well on longer nails, where the details can remain visible; if you have shorter nails, you could simplify this by focusing on individual fingers rather than complete hands. This pairs perfectly with skeleton or grim reaper costumes and shows off impressive artistic skill.
Blood Moon Nails

Get ready to capture the eerie beauty of a blood moon with this celestial-meets-spooky design. Paint the nails with a deep midnight blue or black base. On the accent nails, you will create circular moon shapes with white or pale yellow polish using a makeup sponge. When it is dry, go over the moon with translucent red polish in layers, building the color up until you reach that signature blood moon color. The red should be thick at the bottom and fade as it gets to the top to emulate the atmospheric effects. Dot small white stars around the moon, using either a dotting tool or a toothpick. Paint the rest of the nails out with only the dark base and scattered stars. This nail design is an elegant, not-so-literal translation of “bloody” nails, but still very appropriate for Halloween. The theme of astronomy adds a certain sophisticated feel to it, perfect even after the Halloween parties through to October’s everyday wear.
Nails of Wounded Flesh

Push the limits with this special effects-inspired nail art that looks disturbingly real. It is an advanced technique that requires patience and layering skills. Base your nails with a color as close to your skin tone as possible. Using red, pink, and burgundy polish, make “wounds” of irregular shapes on accent nails. Give dimension by layering darker tones toward the center of the wounds and lighter ones around the edges. For more realism, take a small brush and stripe on thin white lines, indicating exposed tissue or bone. Put on glossy topcoat only over the wounds, while leaving the surrounding “skin” matte, creating textural contrast that enhances the illusion. Some nail artists add tiny morsels of tissue paper or special effects material before sealing, but this takes experience. This design is not for the faint of heart; best leave it for costume parties or Halloween events rather than everyday wear. The shocking realism guarantees you’ll be the talk of whatever you attend.
Dripping Chandelier Blood Nails
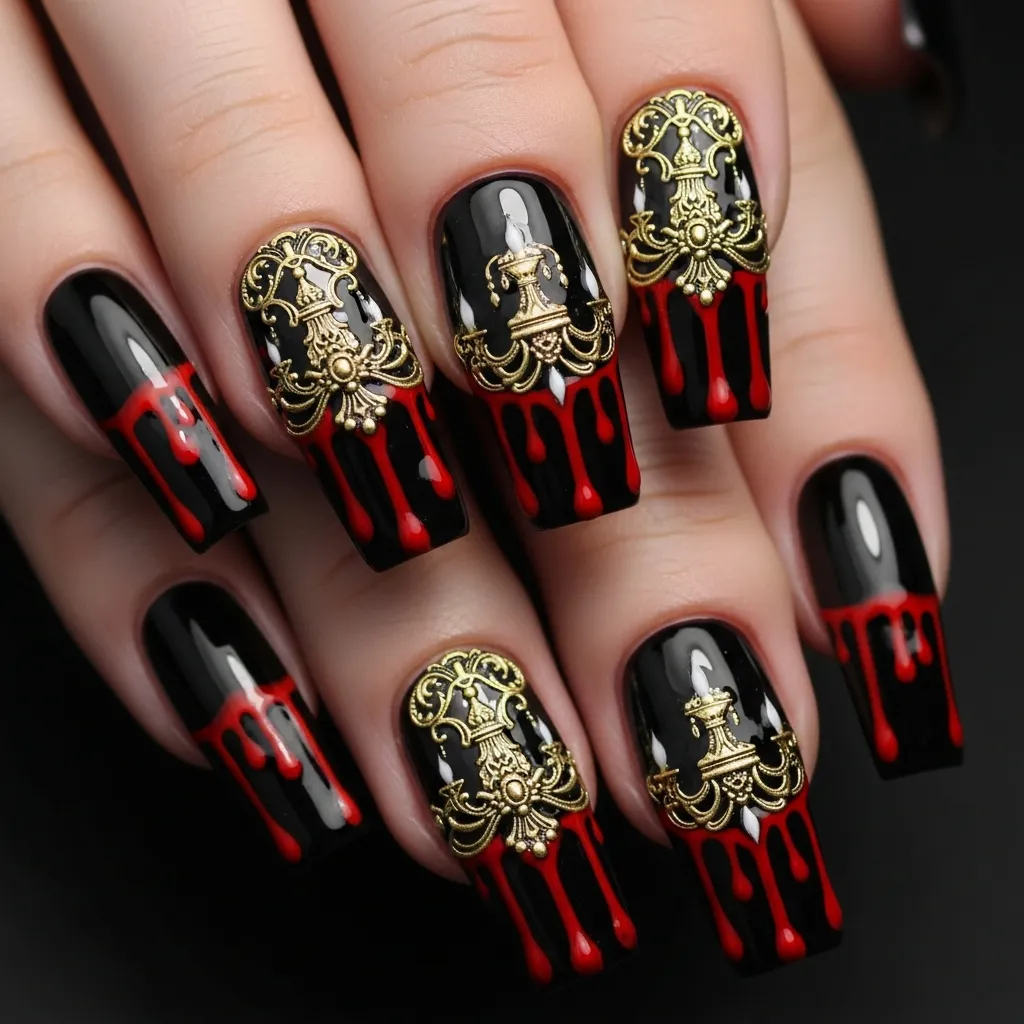
Combine elegance and horror in this Gothic-inspired design. Paint nails black or deep purple, then use metallic gold or silver polish to create chandelier or hanging jewelry designs near the cuticle area. From these ornate elements, paint bold red drips flowing downward, as if blood is dripping from elegant fixtures. The juxtaposition of luxurious metallic details with gruesome blood creates fascinating visual tension. Add small rhinestones or metallic studs to the chandelier area for dimensional elegance. Steady hands are needed, but it’s well worth a unique aesthetic that stands apart from typical Halloween nail art. The Gothic romantic vibe pairs beautifully with vampire, Victorian ghost, or dark angel costumes. Varying the length and thickness of the blood drips will allow you to maintain natural randomness. This sophisticated design proves that Halloween nails can be simultaneously elegant and eerie.
Bloody Lace Overlay
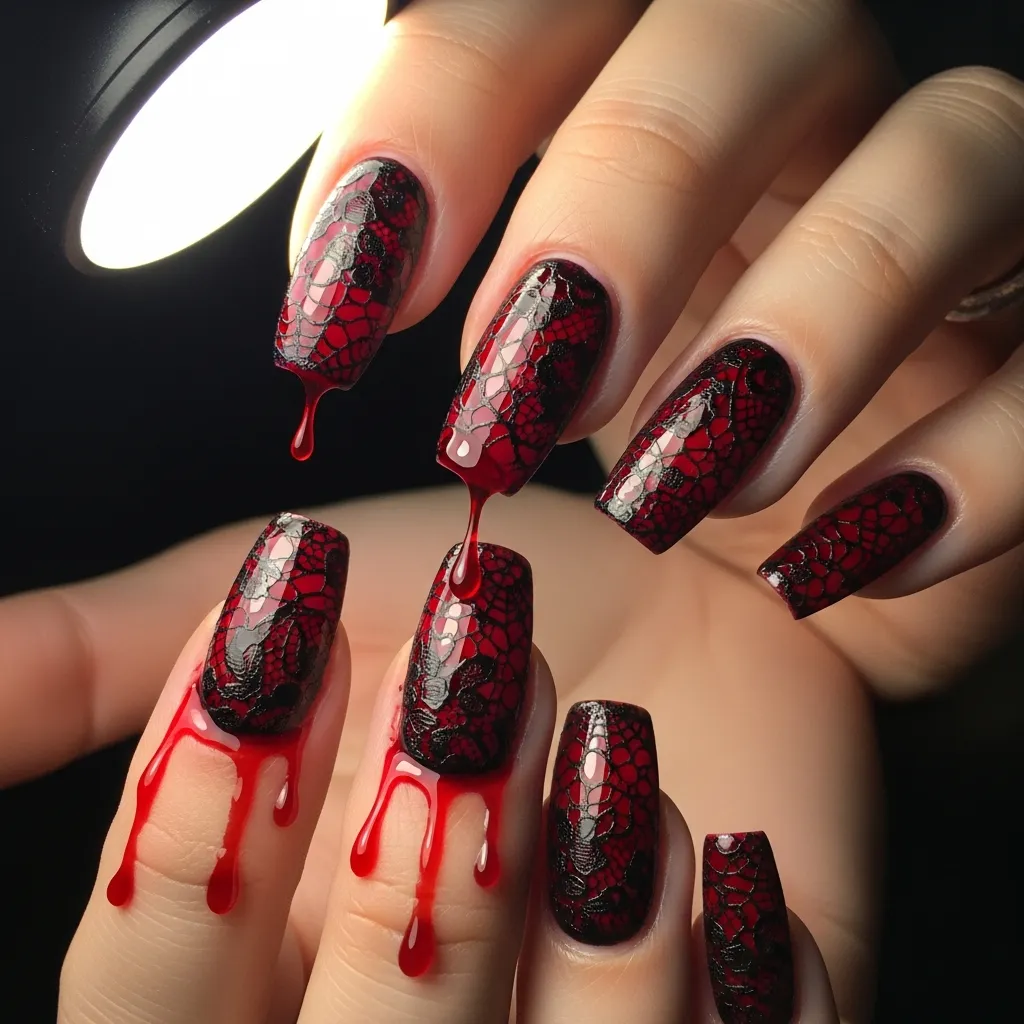
Go for Victorian horror elegance: Delicate lace patterns disrupted with blood. Paint nails with a deep red or burgundy base. Once dry, stamp black lace patterns across your nails with stamping plates or paint with a fine brush. Lace should be intricate-think spider web patterns, floral motifs, or geometric designs. Then, on accent nails, disrupt that perfect lace pattern with bright red “blood” that seems to seep through or drip over the black lace. The tension between delicate patterns and visceral blood is really compelling. To make things easy on yourself, use lace-patterned nail decals or stampers rather than hand-painting. This works for those who want Gothic elegance sans gore. The sophisticated black lace is still totally wearable after the Halloween season; the blood just adds some seasonal appropriateness. Pair this with a period costume, vampire look, or Gothic-inspired Halloween ensemble for cohesive styling.
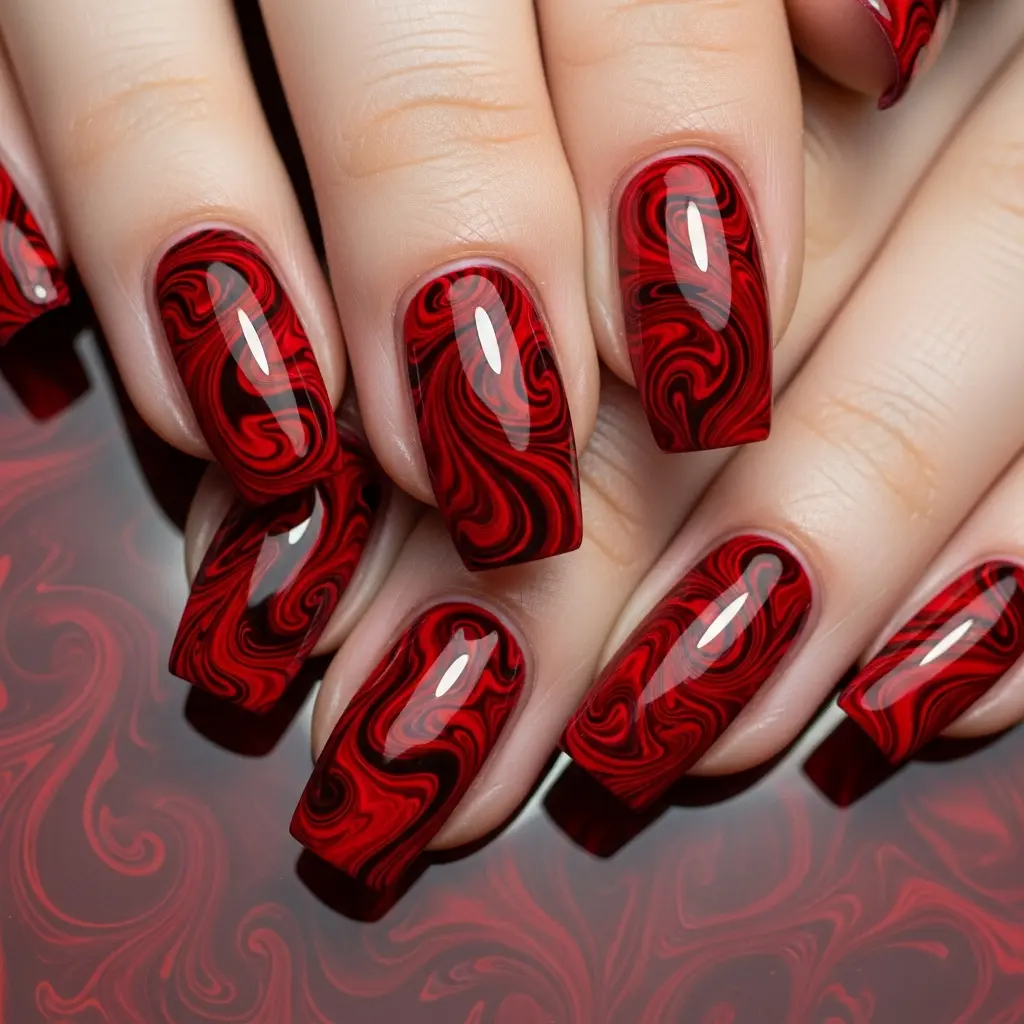
Abstract Blood Swirl Nails
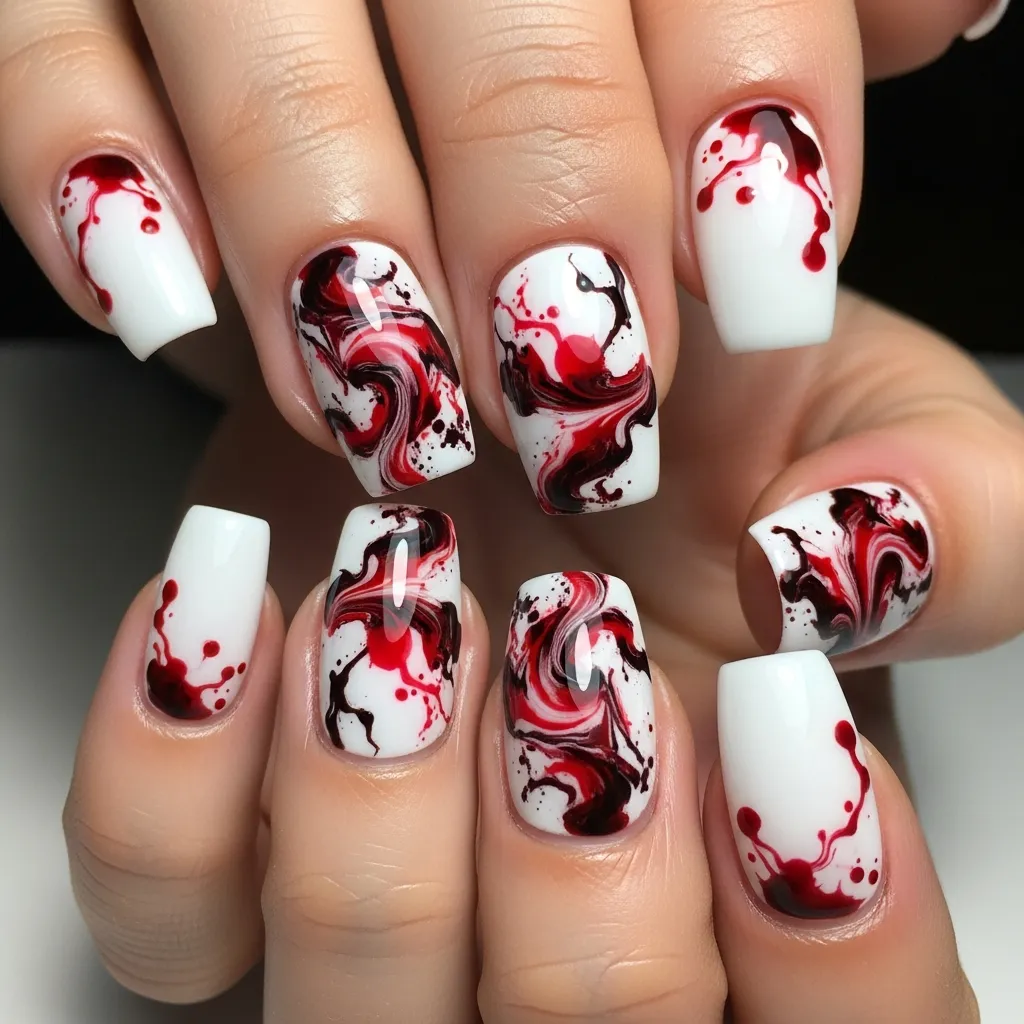
Create an artistic interpretation of blood with modern, abstract designs. The free-flowing nature invites creativity and allows personal expression. White, cream, or black paint grounds the nails. With different tints of red, from bright scarlet to deep wine, swirl and make marbled patterns across the nail. Unlike in traditional marble methods, allow colors to remain somewhat distinct instead of fully blended to get this drastic movement. Cover the swirls with thin lines all over in dark red or black to give an impression of depth and shades. Some can have heavy red coloration, while some can remain more base color with only accent swirls. This design does not take the literal meaning of blood but makes it into an abstract art form; as such, it will be wearable in conservative environments. Since it’s abstract in nature, imperfections enhance the design rather than detract from it. This very forgiving approach works great for nail art beginners who would want to try out something creative without needing precision.
Bloody Chrome Nails
Mix chrome finishes with Halloween horror to create a really out-of-this-world style. Apply the red chrome powder over a black or deep red gel base, using the instructions provided for chrome powder application. The metallic sheen creates this otherworldly blood effect that changes and shifts in different lighting. Accent nails in regular glossy blood-red polish will create a vivid contrast with the chrome finish. Add small drips of blood, beginning at the cuticle in glossy red, to give the impression that liquid blood is running over metallic surfaces. Thus, high-tech chrome mixes with organic blood imagery to create visual interest in a singular way. This is perfect for those who want a modern take on Halloween nail art rather than typical versions. Chrome powders call for gel polish and proper curing equipment; this technique will be a bit more involved. However, the gorgeous, mirror-like finish and color-shifting properties make the extra effort well worth it for special Halloween events.
Speckled Nails
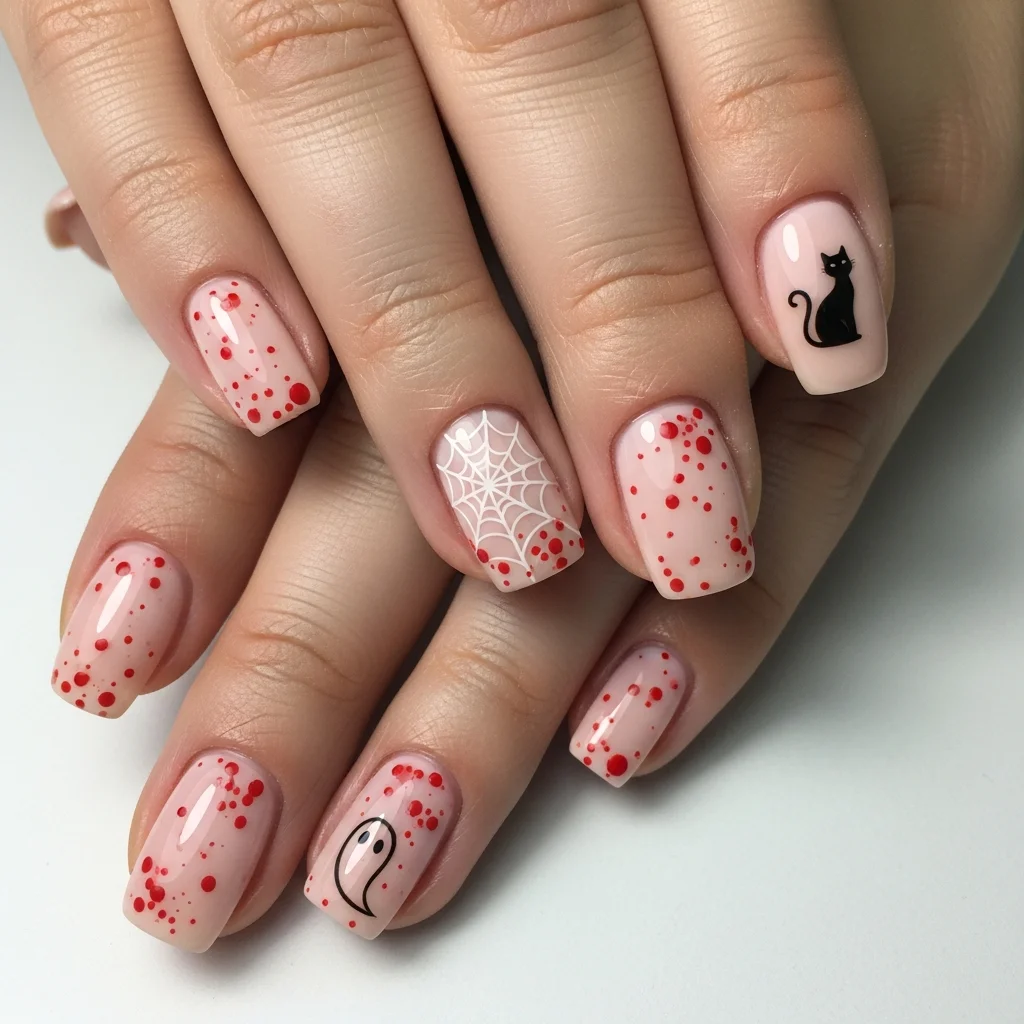
In Blood, get subtle, spooky sophistication with delicate blood speckling: paint the nails a neutral nude, soft gray, or pale pink base coat. Using a very fine detail brush, paint small red dots over your nails in random patterns. The speckles should be irregular in size and spacing; they should be more akin to fine blood spray than ordered polka dots. Place more speckles on accent nails and fewer on others. The subtlety of this design makes it workplace-appropriate while still conveying Halloween cheer. For added flair, add in a few larger droplets among those tiny speckles on accent nails. It’s proof that bloody Halloween nails don’t have to be all about bold drama-sometimes the whispered suggestions are far more potent than the screamed statements. The minimalist approach will work for professional environments and look good with any Halloween costume or any everyday outfit throughout October. For such a simple design, though, it does take patience to get that random distribution looking authentic.
Bloody Water Marble Nails
Take your water marbling to the next level with a blood-soaked twist. Fill a small cup full of room-temperature filtered water. Drop alternate colors of red polish-but bright red, burgundy, and dark red-only onto the surface of the water in concentric circles. Grab a toothpick and drag through the colors, creating marble patterns. Carefully dip your prepared nail (protecting the surrounding skin with tape or liquid latex) into the pattern, collecting the design on your nail surface. Remove excess polish from the surface of the water before removing your finger. This creates organic, flowing blood-like designs, different on each of your nails. Because the actual technique requires patience and practice, some failed attempts will be involved in getting it perfect. But it’s worth the learning curve, and the result is stunningly one-of-a-kind. It does look like blood mixing into water or other fluids, making it distractively beautiful for Halloween. No two nails are the same, making your manicure truly unique.
Reverse Bloody French
Flip classic French manicure logic with this inverted design. Instead, you will be painting dramatic color around the cuticle. First, paint the entire nail in nude or pale pink polish. With bright red polish and a thin brush, paint thick, irregular curves starting at the cuticle line and fade towards the middle of your nails. It should look like blood has pooled at the bottom of the nail and is beginning to drip down. The depth of the red section on each nail should be different to keep the nail’s natural randomness. For added realism, go back with slightly darker red or burgundy to outline the bottom edge of the red section, adding shadow effects for more dimension. This is an unexpectedly creative take on a very classic nail art piece that creates maximum impact through its subverted expectations. The reverse nature of the concept guarantees creativity with sophistication that is still wearable.
Bloody Glitter Gradient
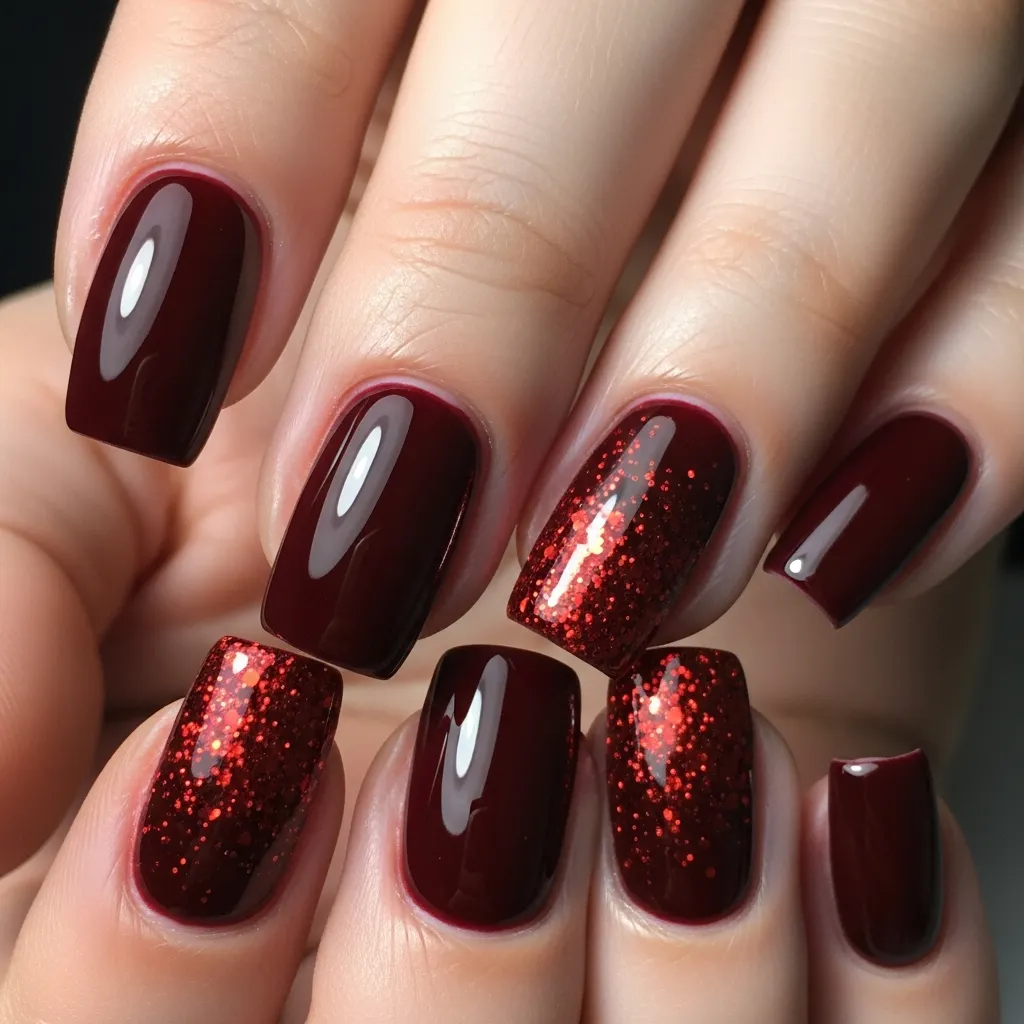
This is one of the more dramatic designs, as it incorporates both glamorous sparkle and spooky themes. Paint the nails deep burgundy or blood-red until the color is fully opaque. While it is still a bit tacky but not completely dry, apply the red glitter polish heavily at the nail tip, allowing most of the sparkle to be there. Take a makeup sponge to feather the glitter back toward the cuticle for super-smooth gradation from pure base color to a heavily glittered tip. That catches the light dramatically and will give you a real vampire-worthy glamour. You can vary this by layering black glitter over a red base or by mixing together red and black glitters. Add a few small rhinestones near the cuticles for extra elegance. This proves bloody Halloween nails can be feminine and glamorous yet seasonal and spooky. The sparkle makes this design particularly suited to evening Halloween parties, costume balls, and other events where dramatic lighting enhances the glitter. Even though this design seems super dramatic, the technique behind it is pretty beginner-friendly.
Story-Telling Bloody Scene Nails

Narrative nail art refers to designing one continuous picture across all ten nails. As this is a very advanced method, it calls for planning and an artistic touch, but the impact will be unparalleled. First, draw your idea onto paper, noting which parts go on which nail. Haunted houses with blood running from the windows, crime scene tape with splatters of blood, or scenes from classic horror movies are all popular. In most instances, the background color for all of your nails is best when black, deep purple, or gray for added drama. Then paint your detailed elements with a small brush, layering up the complexity. Save blood elements for last, strategically dotting with bright red for optimum contrast against your detailed backgrounds. When you put your hands together, the full scene becomes visible across your fingers. It is perfect for someone who really loves nail art and wants something cool to do for special events around Halloween. Though time-consuming, this will give you really unique nail art that works as wearable art and a conversation piece.
Essential Tips for Perfect Bloody Nails
For all of these designs to be successfully executed, technique and quality materials are paramount. Start with clean, filed nails, topping them off with a base coat to prevent staining-red polish notoriously stains natural nails. Invest in quality nail art brushes in various sizes, particularly extra-thin detail brushes that will work well for detailed work. Practice designs on paper or fake nails before trying them out on your actual nails. For realistic blood, remember that real blood is not one solid color-mix bright reds with darker burgundies and browns for authenticity. Give ample drying time in between layers so as not to smudge. When you create splatter effects, do so by using liquid latex or tape around your nails to make cleanup easier. Seal with a quality top coat to protect your work and add professional shine.
These twenty bloody nail designs run the gamut from subtle sophistication to full horror effects, with options for every skill level and aesthetic preference. Halloween is the perfect time to do something different for those who do not wear dramatic nail art on a daily basis. Whether you’re a total beginner or advanced in doing nail art, these designs will help you celebrate in style. The best art comes from playing around and not being too hard on your mistakes-perfect blood is not real blood, so your perfect blood-inspired designs shouldn’t be either. Gather your supplies, unleash your creativity, and let your fingertips tell frightening stories this Halloween season.