Christmas Nails That Santa Will Give a Second Glance
The holiday season is the best time to usher in bright nail art that spreads joy wherever you are. Whether you’re heading to Christmas parties, gift wrapping, or simply enjoying the winter wonderland, your nails can be small masterpieces that commemorate the most magical time of the year. This tutorial will guide you through ten stunning Christmas nail art designs that range from understated elegance to over-the-top festive, complete with tips and tricks to help you achieve salon-quality at home.
Table of Contents
1. Classic Candy Cane Stripes
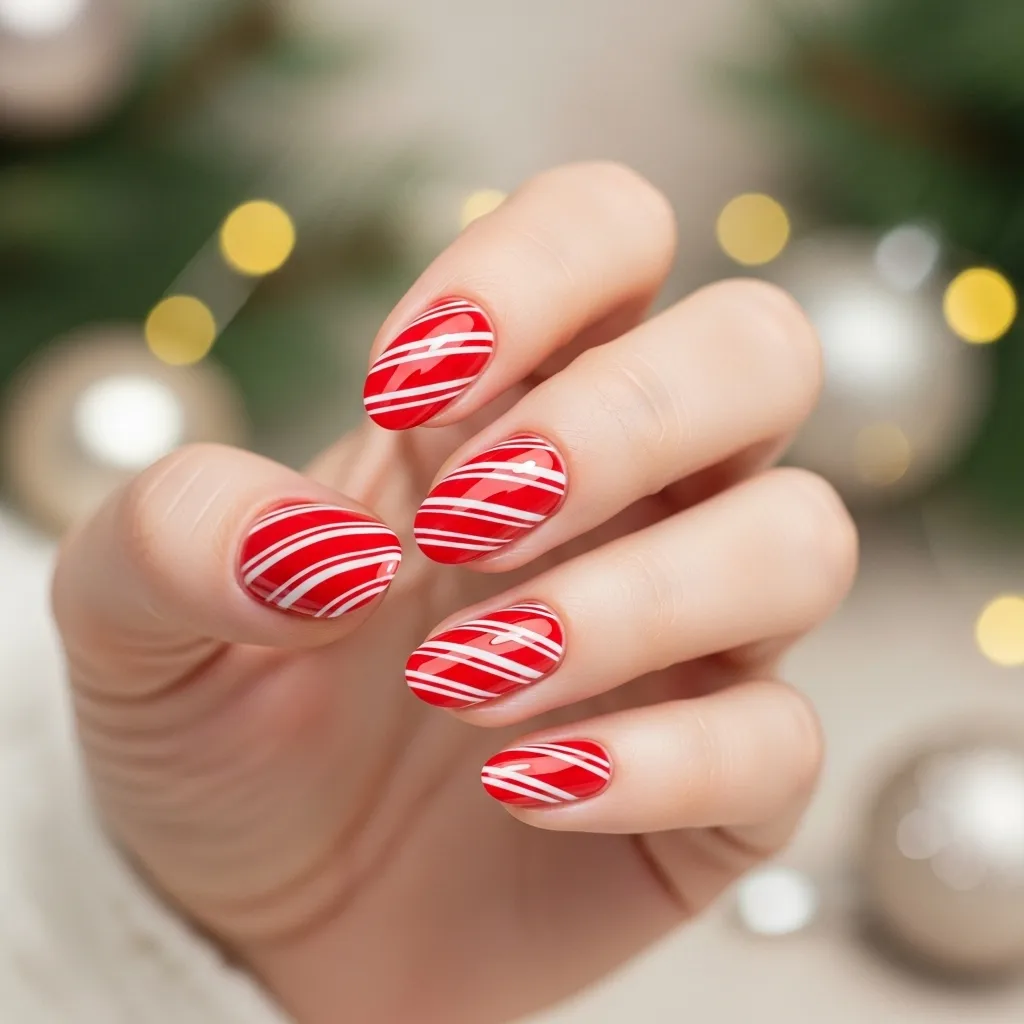
There is no Christmas quite as classic as the red and white candy cane appearance. This timeless look works well on nails of any length and is surprisingly easy to achieve. Start with a white base coat and allow it to dry completely. Place diagonal red stripes on each nail by using striping tape or a small nail art brush. To get even straight lines, place thin strips of tape at an angle on every nail, paint red polish over them, and gradually remove the tape when the polish is still moist. The key to crisp lines is going slow—rushing this process will result in smudged edges. This is such a classy look when paired with a glossy top coat that makes your nails look like peppermint treats.
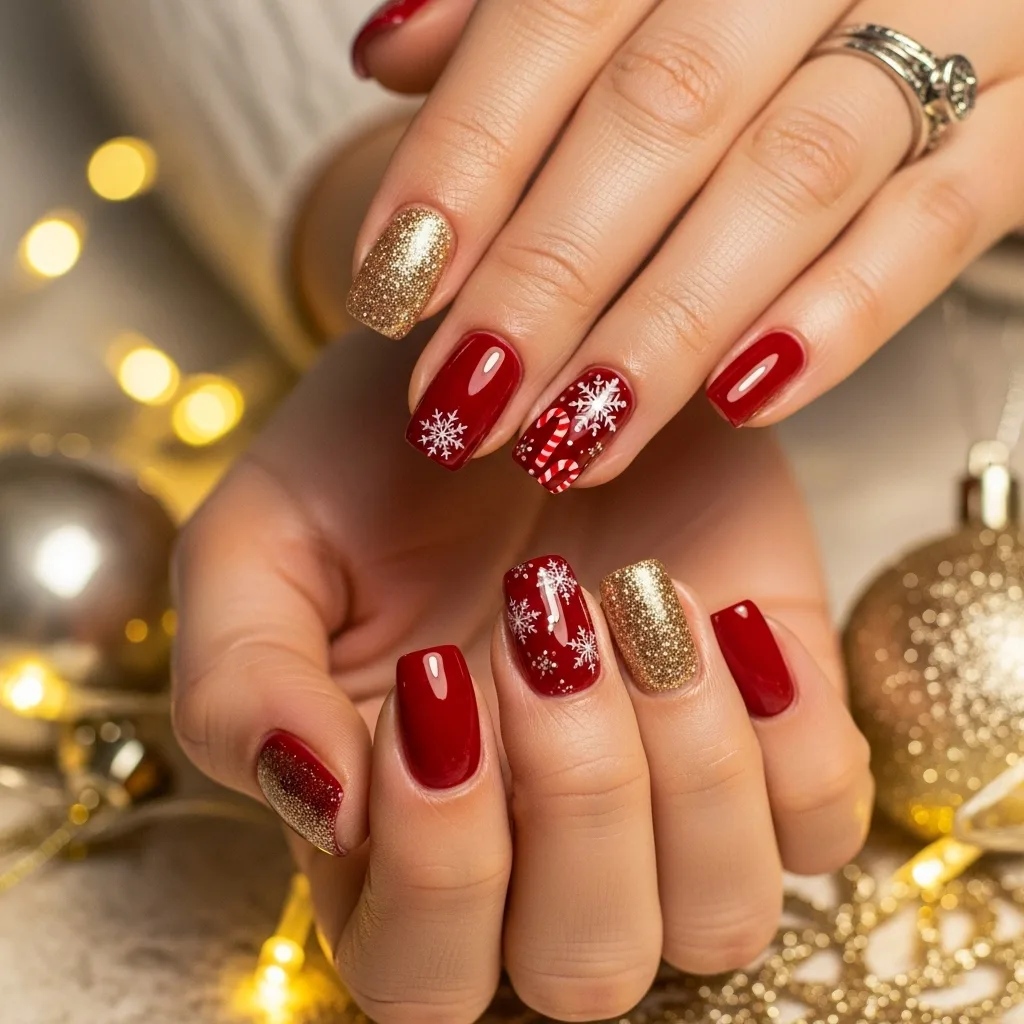
2. Delicate Snowflake Accent Nails

Snowflakes provide a touch of winter sophistication without being too dramatic. Coat your nails with a light blue, silver, or nude base color. Choose one or two accent nails per hand to feature elaborate white snowflakes. Snowflakes can be achieved with a dotting tool by beginning with a dot and continuing with six short radiating lines, finishing with minuscule dots at the tip of each line. Snowflake nail stickers or a stamping plate can yield definitive results for anyone not good at doing freehand designs. The secret to making snowflakes pop is layering—apply a shimmer top coat to the base first, followed by snowflakes, and finish it off with a clear, glossy finish.
3. Holiday Plaid Patterns
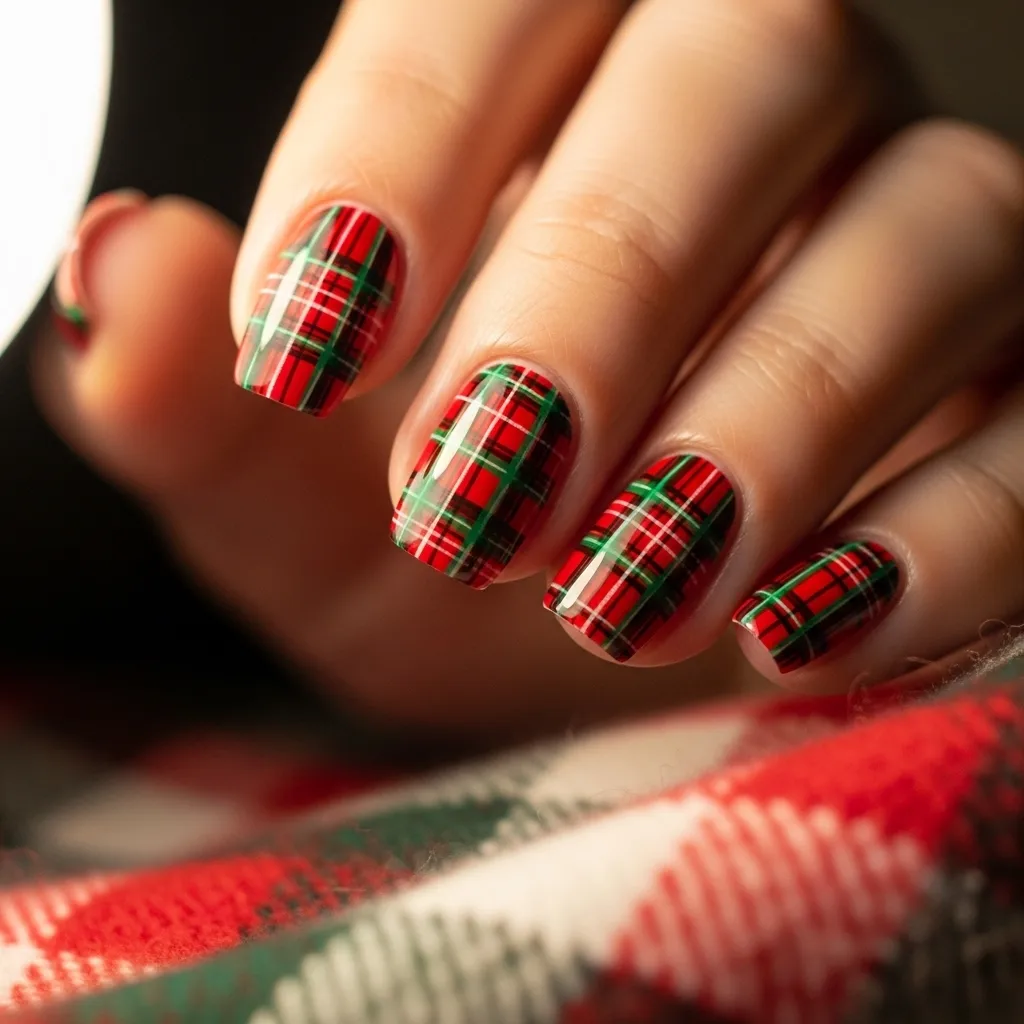
Plaid nails capture the holiday cheer of Christmas sweaters and winter flannel. Begin with a red or green base coat to serve as your canvas. Once dry, use a thin brush to paint horizontal and vertical lines in contrasting colors like white, black, or gold. The trick to authentic-looking plaid is varying your line thickness—make some lines bold and others delicate. Let each color dry completely before adding the next to prevent muddying. For beginners, stick to two or three colors maximum. This look is particularly elegant if done in traditional Christmas colors of red, green, and white, or choose a modern appearance with navy, silver, and white tones.
4. Glittery Christmas Tree Nails
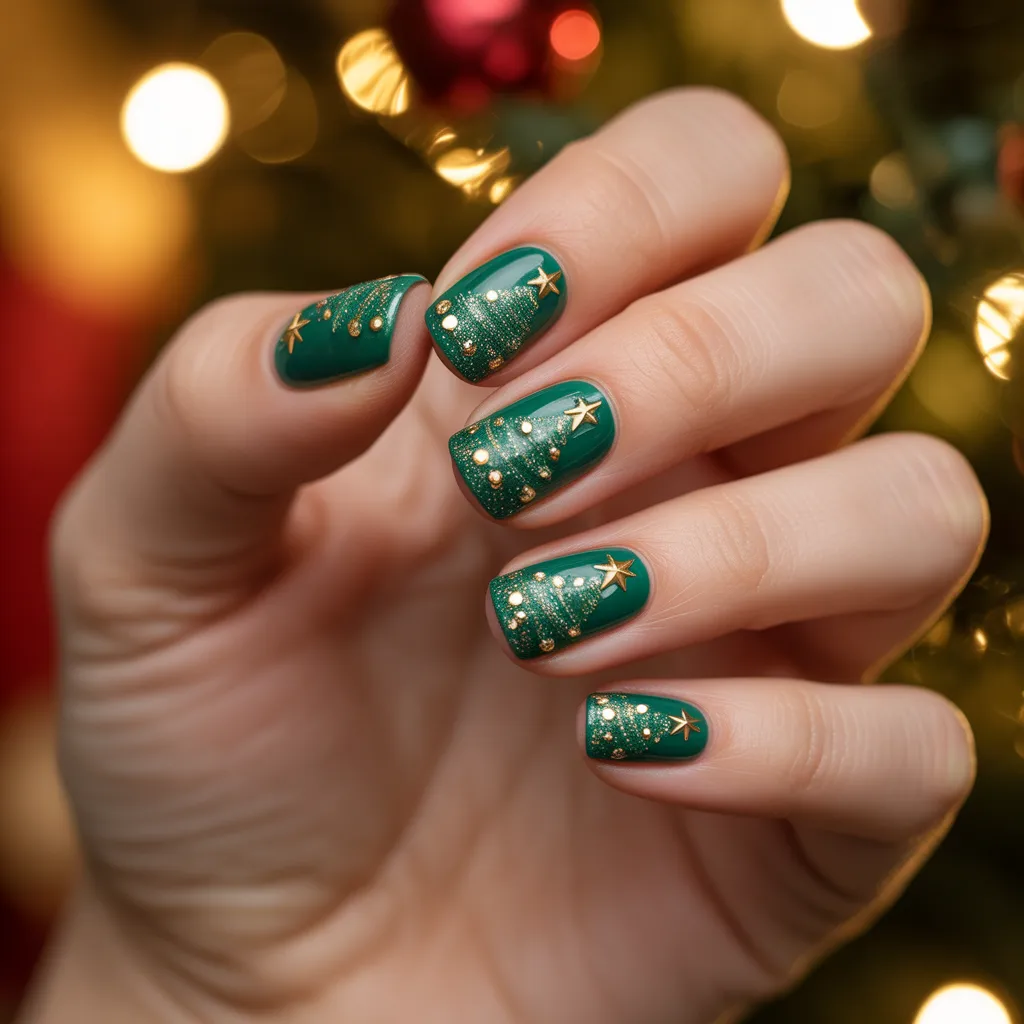
Turn your nails into miniature Christmas trees with this holiday design. Color your nails green and allow them to dry fully. Make a simple triangle shape with a toothpick or a fine brush using the darker brown or green for the tree trunk. The magic now: dust with glitter dust when the tree is still sticky, or place small, carefully positioned rhinestones as ornaments. Apply a dotting tool for a small gold star at the tip. The key secret to this design is moving fast when adding embellishments—nail glue can be used to attach bigger embellishments. This design looks best as an accent nail with full red or gold nails on the rest of the fingers.
5. Sparkling Red and Gold Ombre
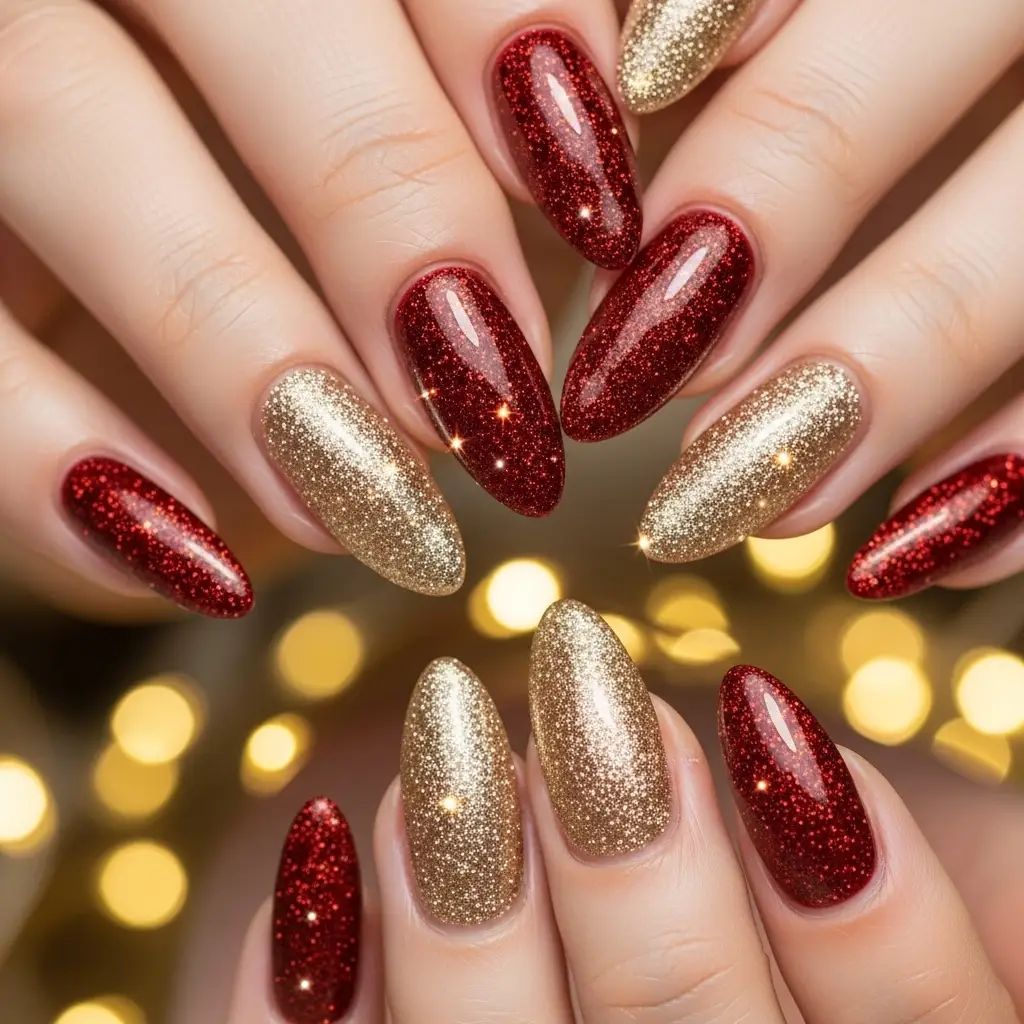
Ombre nails create a sophisticated gradient look ideal for holiday gatherings. Begin by painting all of the nails with a red base coat. When dry, apply the tip of every nail with gold glitter polish employing a makeup sponge for a seamless transition. Dab the sponge delicately, smearing the gold shade downwards for an ombre that blends seamlessly. To have a smooth ombre, accumulate the color gradually in thin layers rather than try to do it all at once in one thick application. Secure the edges over your cuticles by employing a small brush that has been soaked in nail polish remover. Seal with a gel-like top coat to flatten the glitter texture and get tremendous shine. if you’re looking for…
6. Winter Wonderland White Nails with Silver Accents
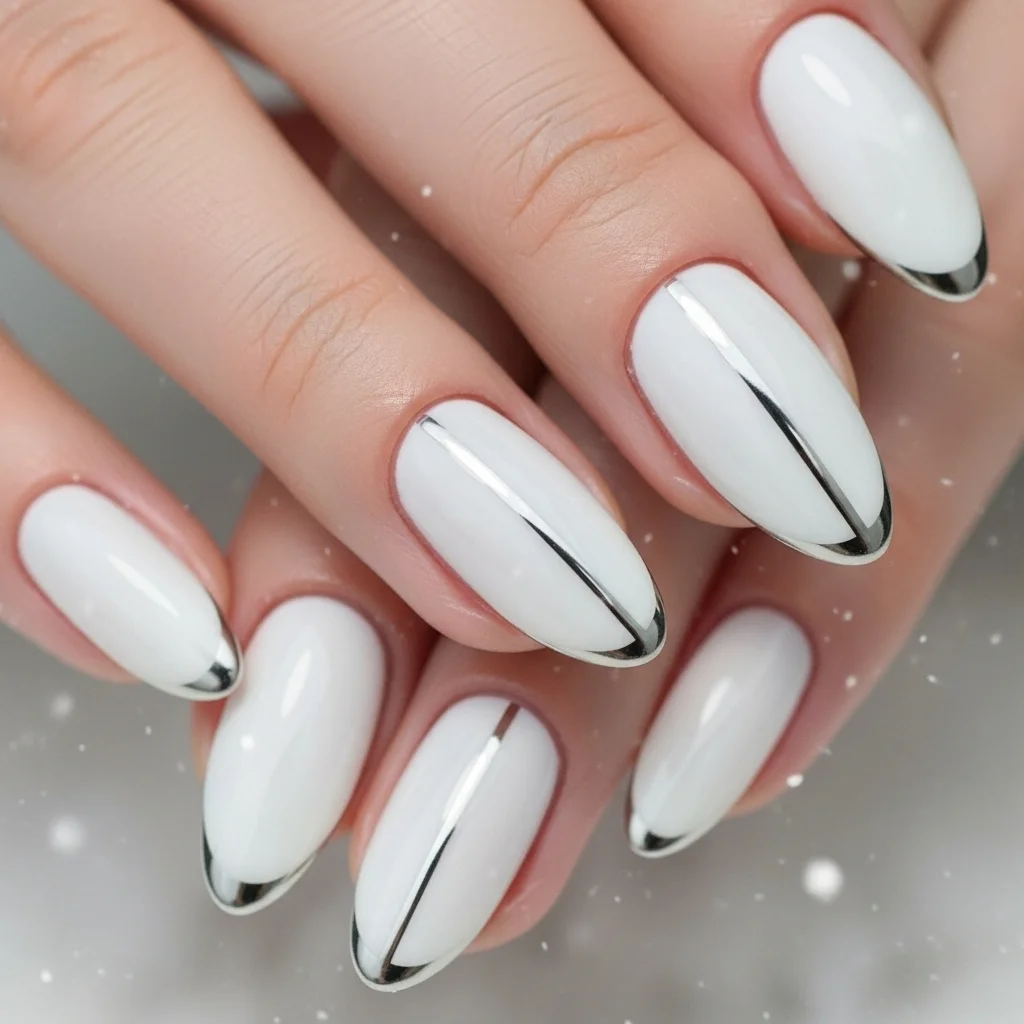
White nails make a clean, classy base that is as crisp as newly fallen snow. Paint two coats of pure white polish for ultimate coverage. Once they are completely dry, apply silver chrome accents on one or two nails per hand using chrome powder for a mirror-like finish, or create thin silver details in the shape of swirls, dots, or fine lines with metallic silver polish. For extra depth, place a single silver rhinestone near the cuticle area of every accent nail. The best part about this design is that it suits any holiday wear while still being subtle enough for work.
7. Gingerbread Man Cuteness
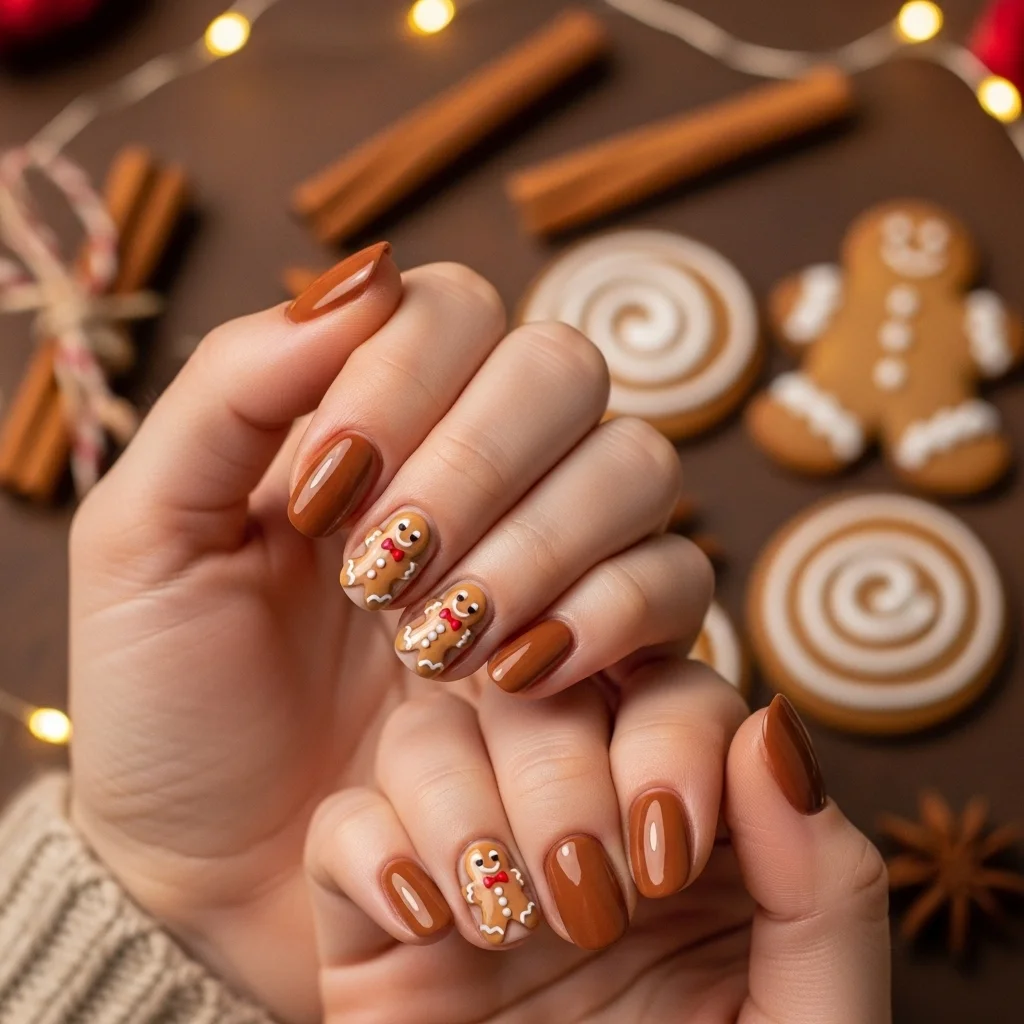
Get holiday baking in the palm of your hand with cute gingerbread man nails. Begin with a brown or tan base coat. On your accent fingers, paint simple gingerbread men using a thin brush—just an oval body, round head, and tiny arms and legs. Add white icing details using a dotting tool or a fine brush: zigzag lines, buttons, and a smiley face. The trick to having these characters cute rather than sloppy is to make them small and basic. Gingerbread men that are slightly imperfectly proportioned are more lovely and homemade in nature. This whimsical design never fails to create a conversation piece and a smile.
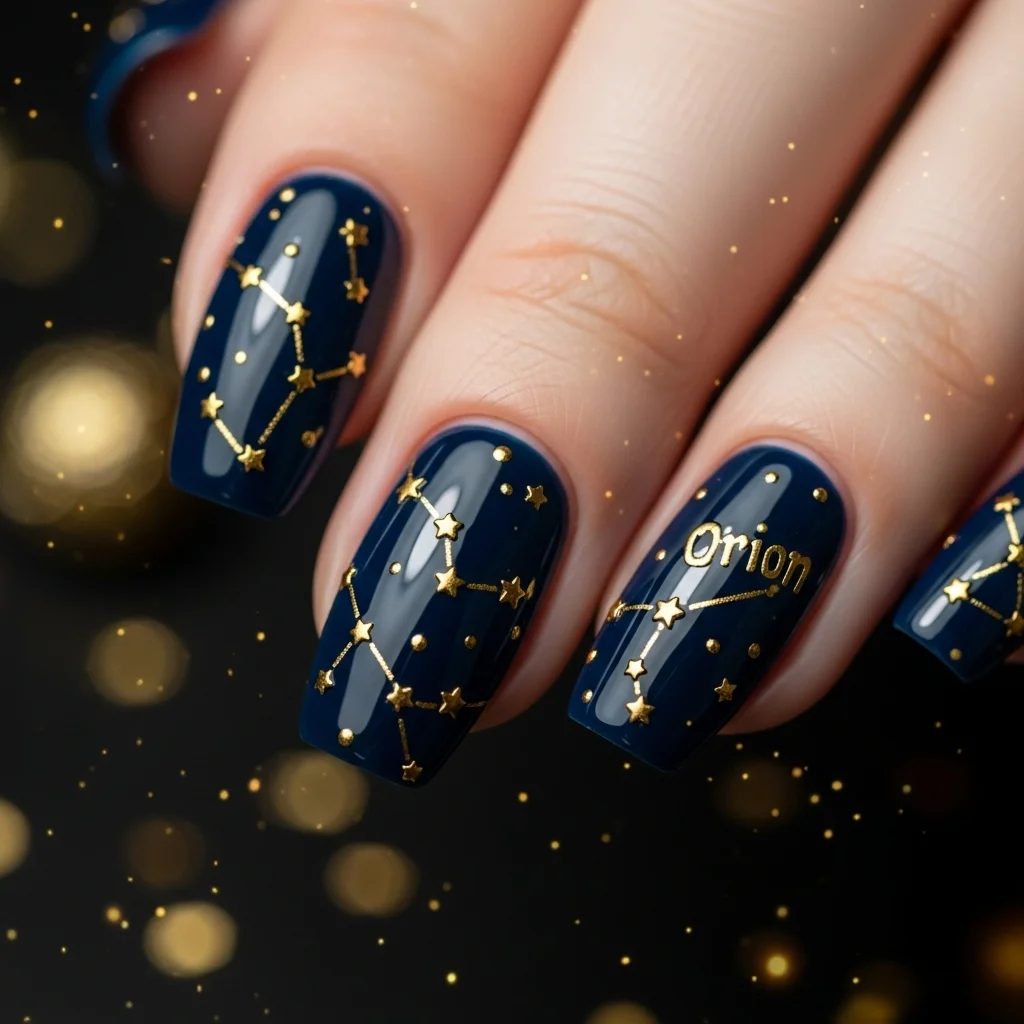
8. Midnight Blue with Gold Star Constellation
For those who prefer subtle glamour, this nighttime constellation design creates Christmas magic without using red and green. Paint nails with a deep midnight blue or navy creme color. With a dotting tool or fine brush and gold polish, paint small stars scattered over one or two accent nails. Connect a few stars with thin gold lines to create constellation patterns. The secret to this design’s elegance is restraint—less is more. Make the stars small and do not overfill the nail. This design is particularly lovely on short nails and is perfect for regular and formal holiday gatherings.
9. Holly Berry French Tips
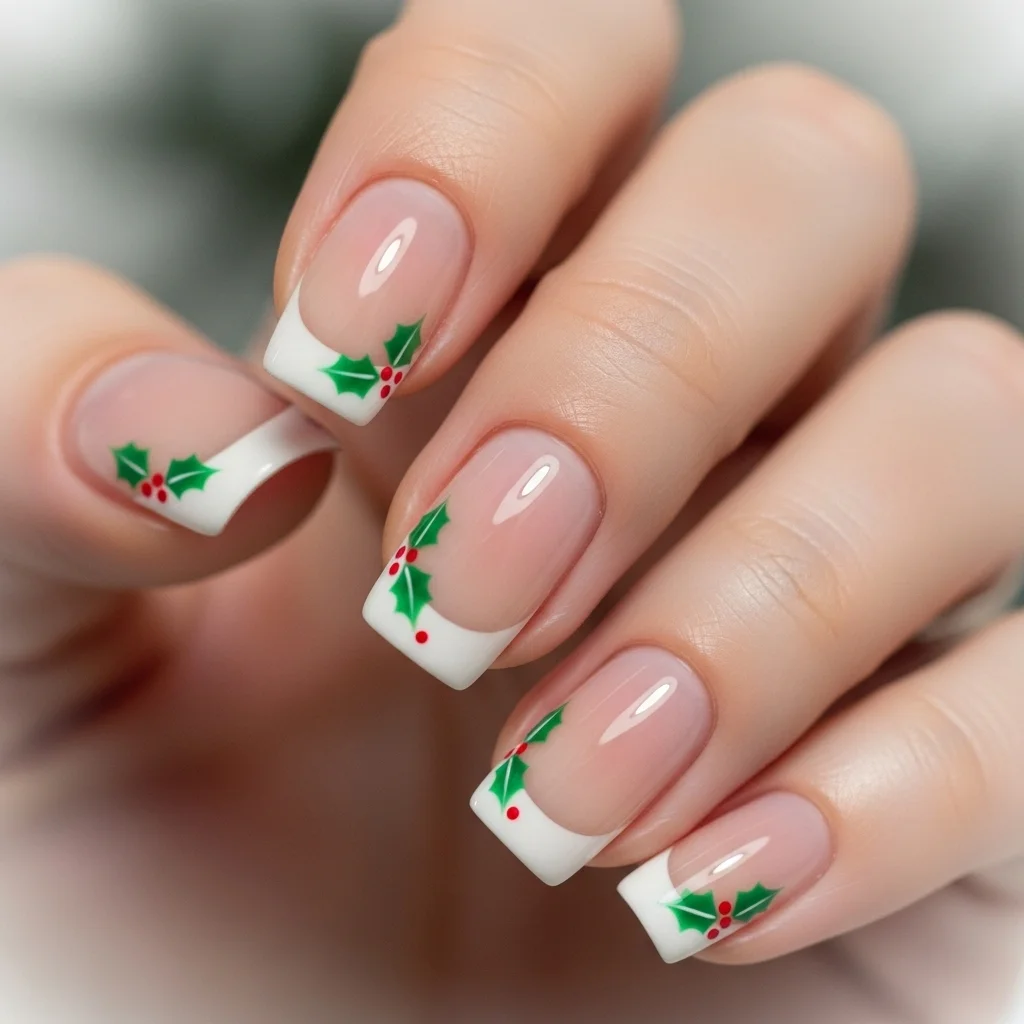
Give a holiday spin to the classic French manicure with holly berries. Start with a pale pink or nude base coat and finish with white tips just as you would with regular French nails. Dry and then use small green leaves painted along the tip line on every nail—a pair of small, rounded ovals should work well. Add sets of three red dots with a dotting tool to represent berries. The trick to French tip nails styled like a professional is to use nail guides or tape for perfectly curved white lines. This is perfectly the right amount of holiday without intimidating bluster and is perfect for those who require Christmas spirit without radical boldness.
10. Wrapped Gift Nails
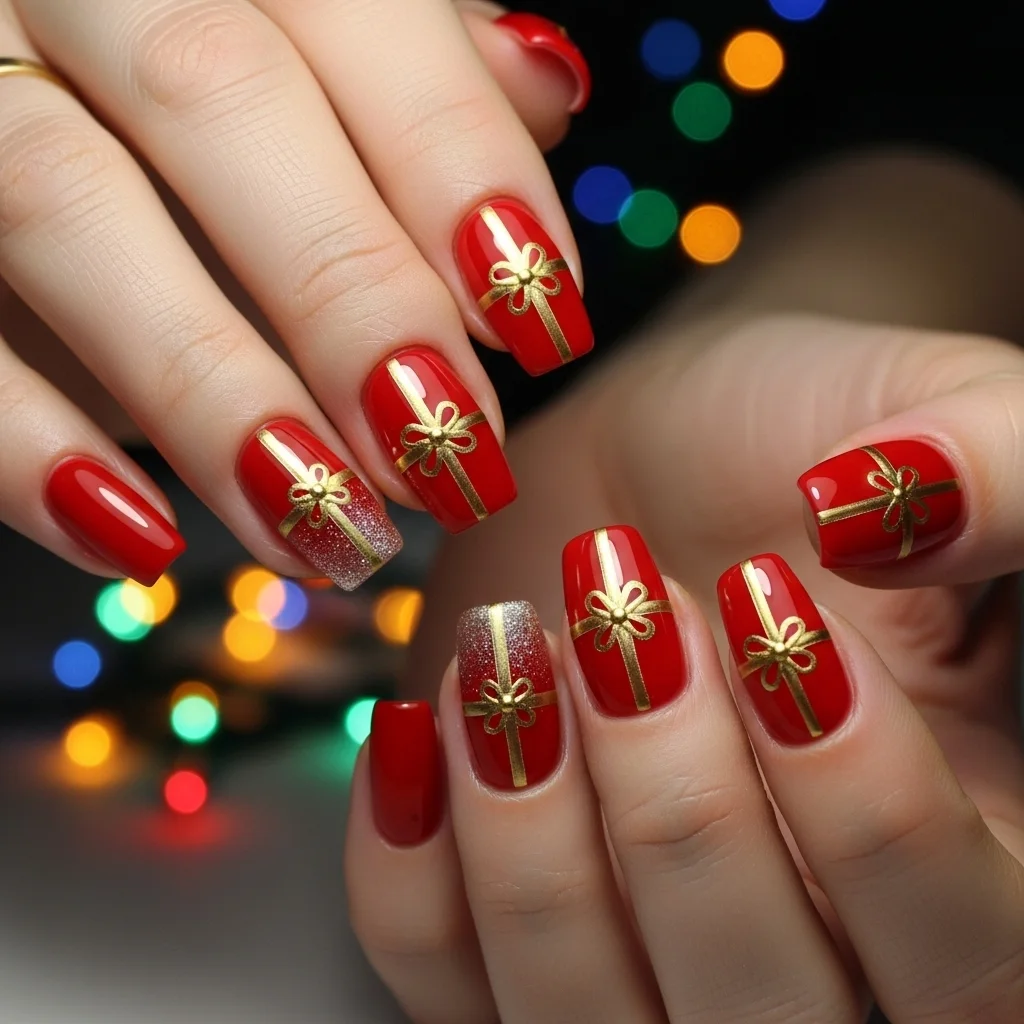
Turn your nails into little wrapped gifts with ribbons and bows. Choose your favorite Christmas color as the base—red, green, gold, or blue. Once it dries, paint crosshatched lines that look like ribbon wrapped around a gift with thin striping tape or a fine brush. On the intersection, create a basic bow using tiny curved strokes. For added depth, employ the ribbon of a contrasting metallic color like gold or silver. Here’s how to …The key to achieving this look to shimmer is ensuring your base coat sets before applying ribbon accents. Experiment with this design on your ring fingers only as accent nails, and have the rest solid-colored.
Final Tips for Long-Lasting Christmas Nails
Regardless of design, careful planning preserves your holiday manicure throughout all your celebratory pursuits. Start with clean, shaped nails and carefully push back cuticles. Seal your natural nails and prevent staining with a good base coat. Allow each layer to dry thoroughly before you add the next—be patient for dazzling, professional-looking results. Top each completed design with a good top coat, applying every two to three days to ensure they remain shiny and don’t chip. Have a small brush and polish remover handy to clean up boo-boos as soon as they occur. With these steps and designs, your Christmas nails will absolutely make Santa—and everyone else—double-take this holiday season!ded ovals should work well. Add sets of three red dots with a dotting tool to represent berries. The trick to French tip nails styled like a professional is to use nail guides or tape for perfectly curved white lines. This is perfectly the right amount of holiday without intimidating bluster and is perfect for those who require Christmas spirit without radical boldness.